Bolt IoT Chrome Extension
Overview
Bolt IoT extension lets you use all the latest available APIs to control and monitor your Bolt Device form your browser without having to visit cloud.boltiot.com
There are 2 modes in this extension -
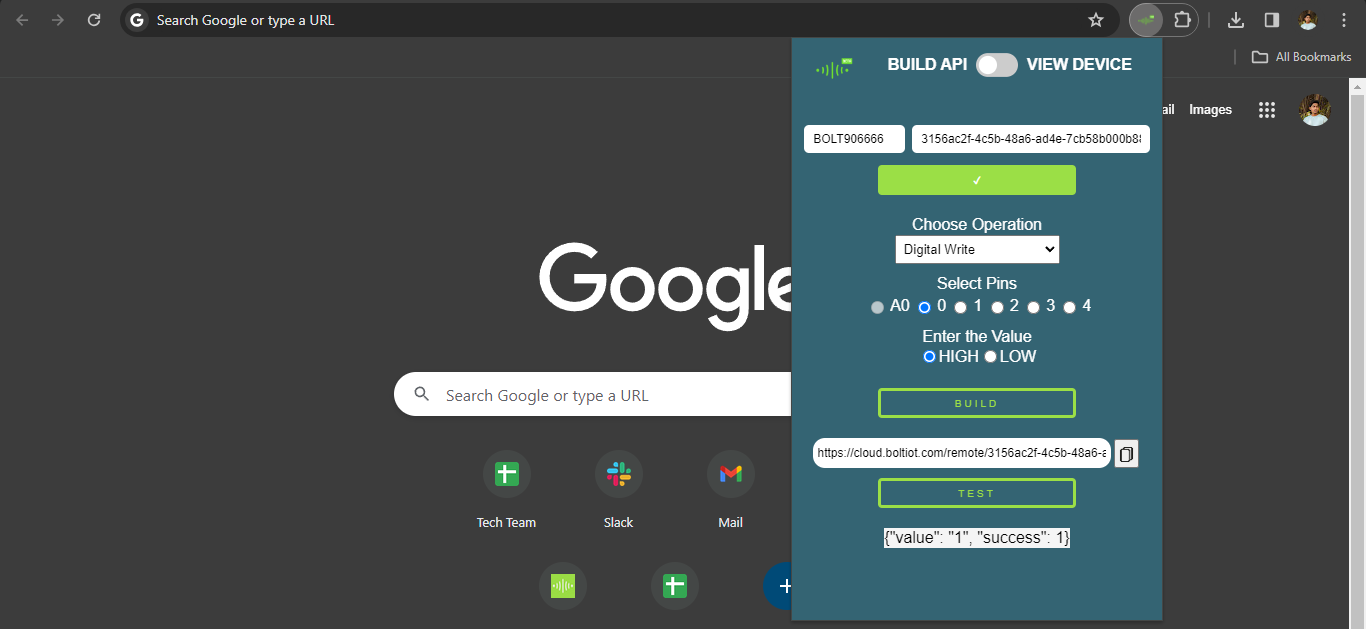
- BUILD API - This mode lets you use the latest APIs that can be used to control the Bolt Device manually. Select the Operation you want to perform with your Bolt Device and you'll be able to control your Bolt Module in only a few clicks.
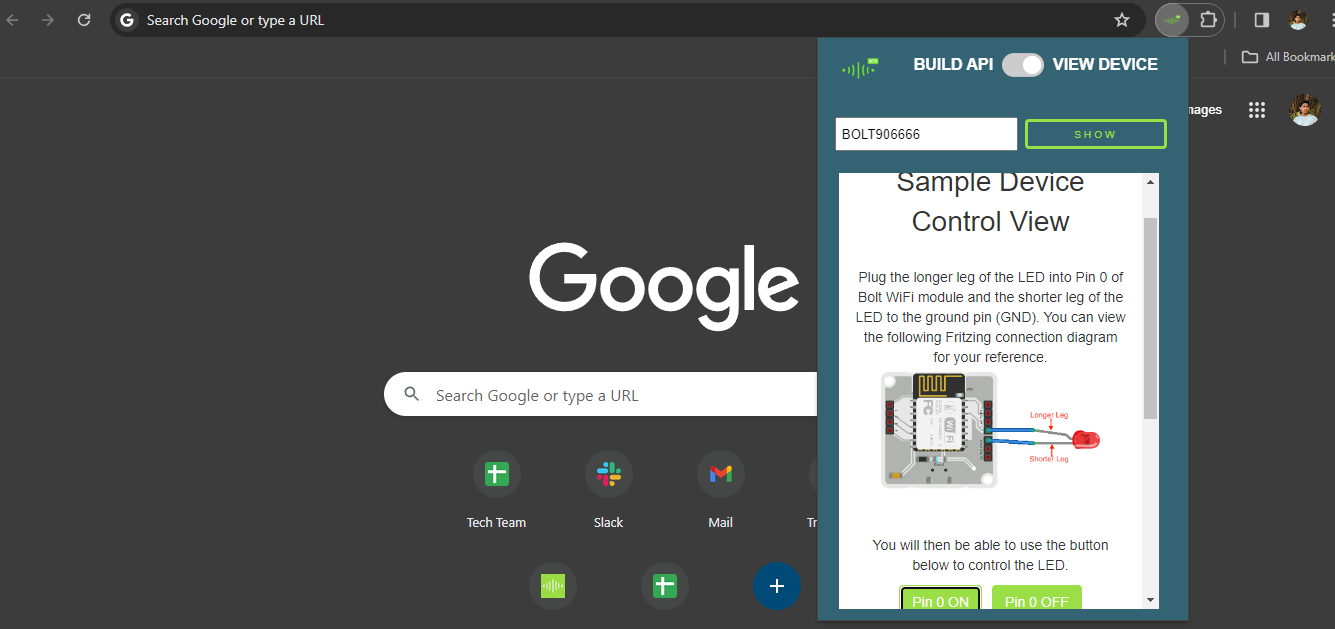
- VIEW DEVICE - This mode lets you view the Bolt Device (Public) directly from this section. You can view a graph of your Bolt Module's readings. Or it could be designed buttons made for controlling particular functions. All of which can be coded on the Cloud Dashboard's Product Section.
Installation
- Go to any search engine eg. Google and search for Bolt IoT chrome extension. Visit the first link that appears at he top of your results page.
- Or you can Download and install the Bolt IoT Chrome Extension from Bolt IoT extension
- Done, now go to your extensions tab and open Bolt IoT extension.
Configuring Bolt IoT extension with BolT IoT device
- Build API mode:
- You can toggle between Build API mode and View device mode using Button given.
- In Build API Mode, Enter your Bolt device ID and API key which you can get from cloud.boltiot.com
- Click on verify and choose your preferred operation, eg. Digital write.
- Select pin eg.0 and enter the value eg. High and click on 'BUILD'
- An API key will be generated, you can either copy the API Key or test it it by clicking the 'TEST' button. Results will be displayed below.
- View Device mode:
- Switch to View device mode by using the button given.
- Enter your Bolt Device ID and click on 'SHOW'.
- Make the circuit connections as given in the diagram and follow the instructions.
- Click the buttons below ( Pin 0 ON and Pin 0 OFF) to control your LED
Updated 4 months ago