Creating app from basics
In this section, we shall create an app from the basics. Here you will have the control over of creating UI and deciding actions and workflows.
Creating an app on bubble.is
If you have not created the app using the readily available template, below is the screen that you shall see. Skip the interactive lessons and directly head to creating the app.
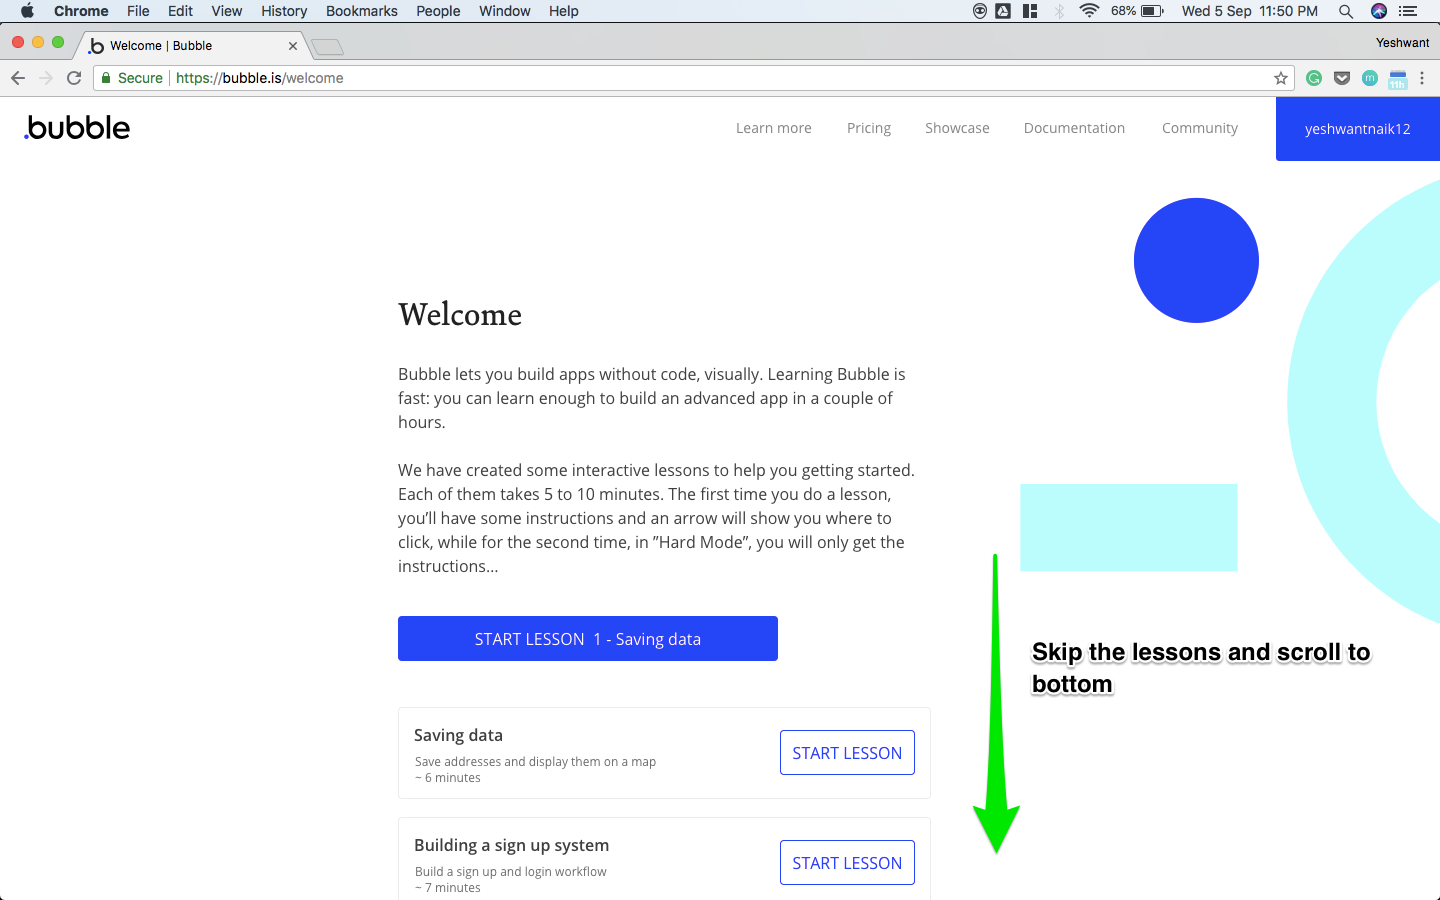
Skip to bottom
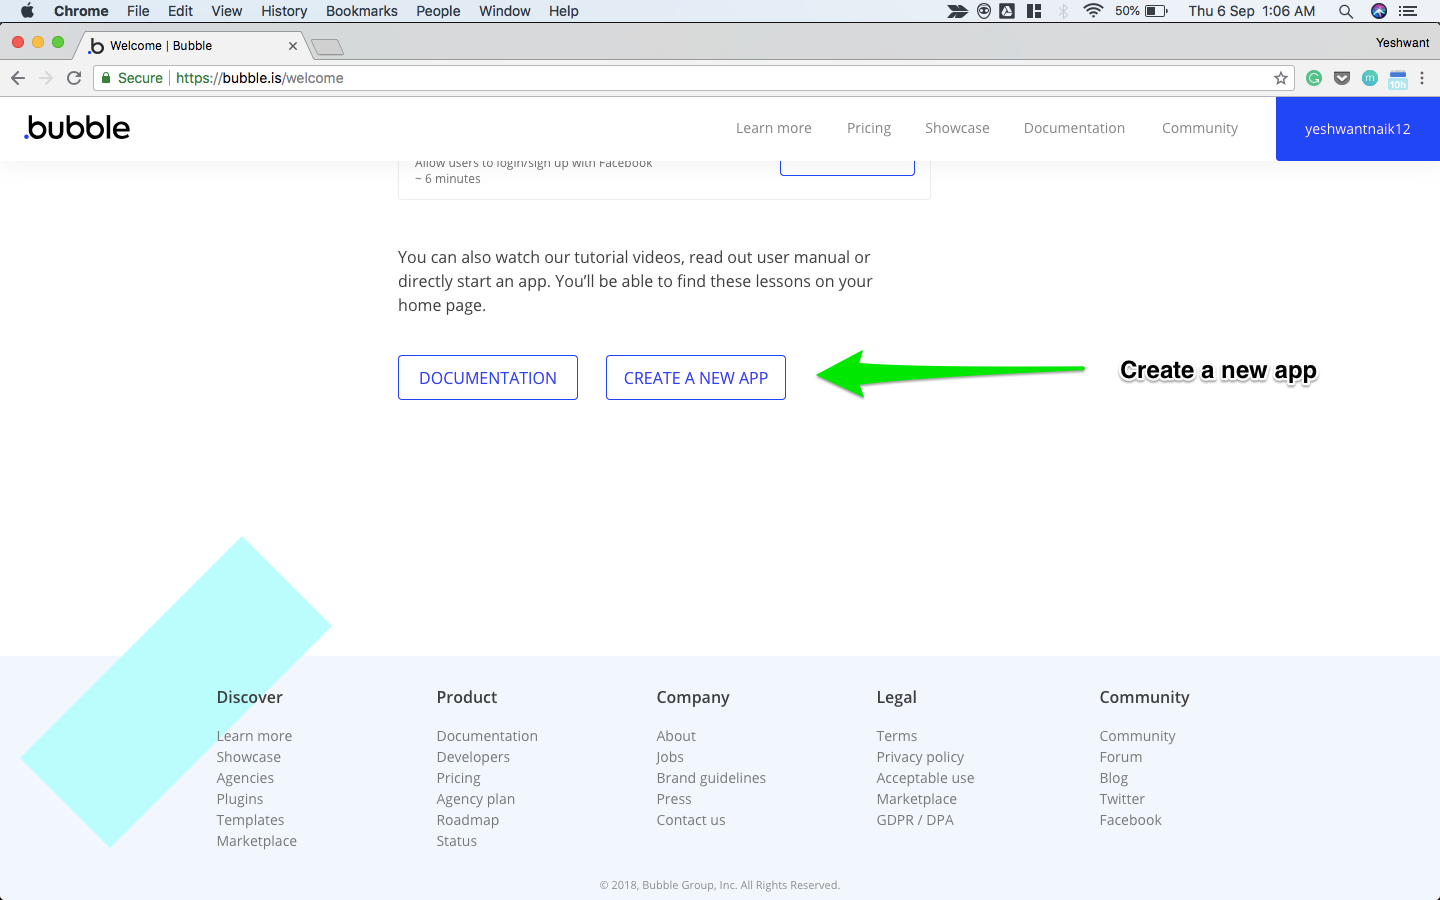
Create a new app
If you have already created an app using the template, and want to create your own app from scratch,
-
Go to your profile which is on the top right corner.
-
Select "My applications"
-
Click on "NEW APP"
-
Give an appropriate name to your app.
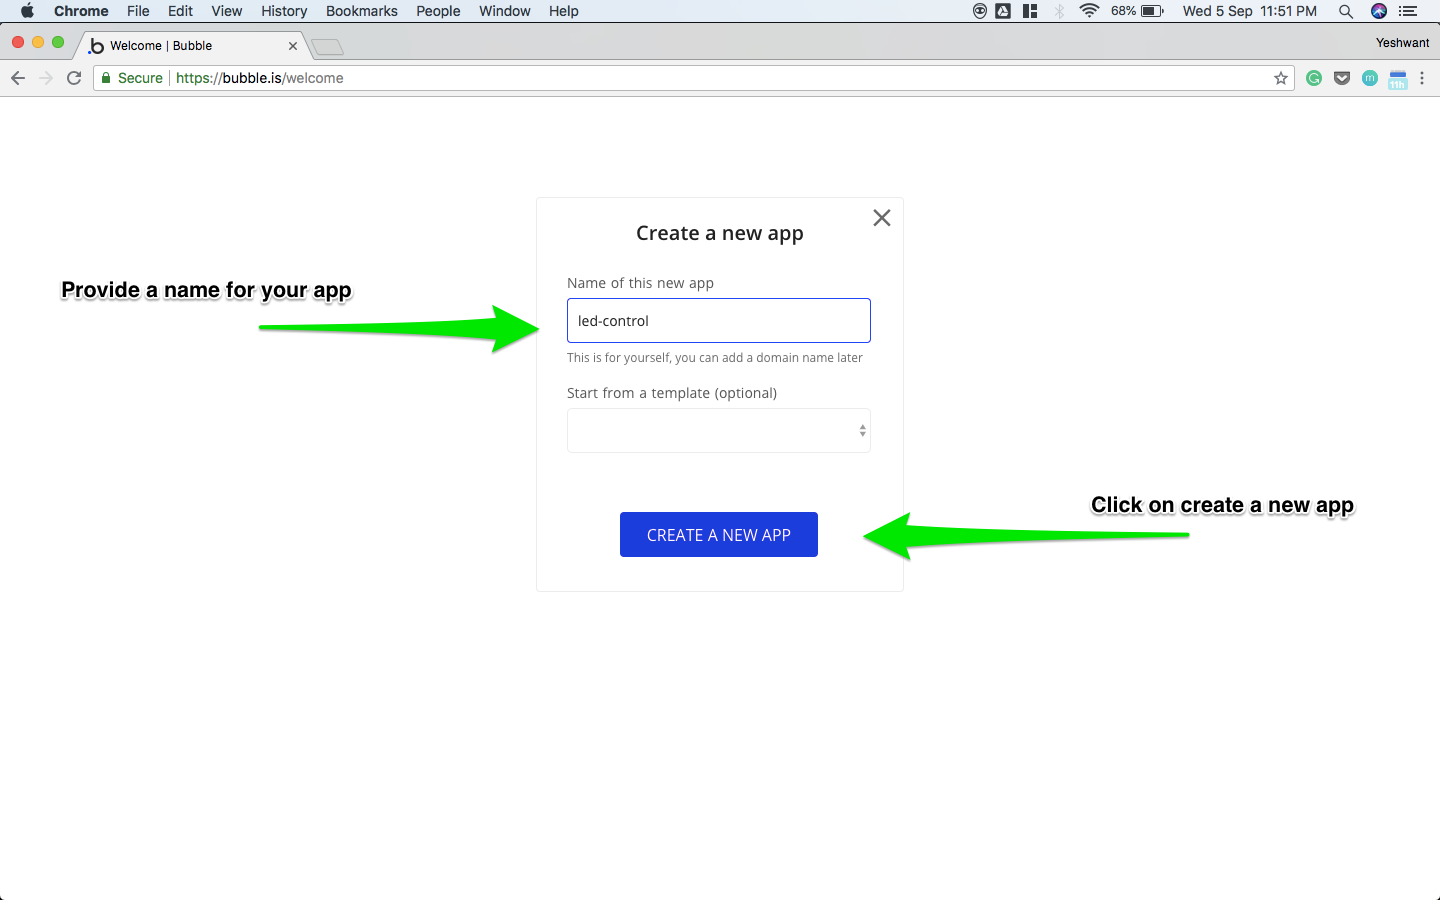
Naming the app
- Click on "Start with a blank page" and "Close the assistant"
Clearing the default page
The editor using which we shall create clickable elements and control their actions via the Bolt plugin is shown below
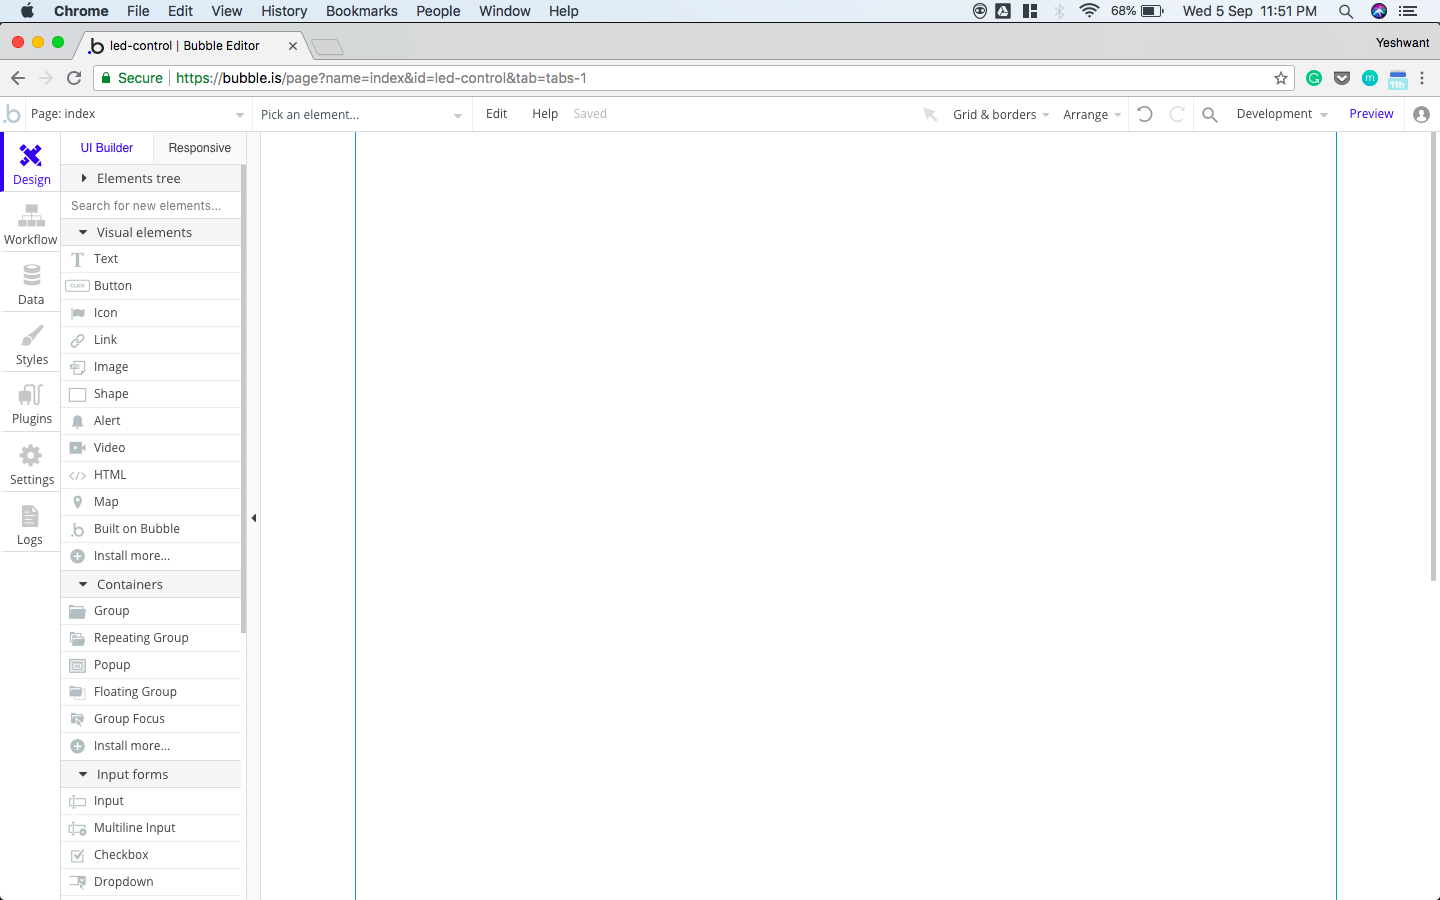
App editor
Installing the Bolt IoT plugin
- Go to the Plugin section of the app
- Click on "Add plugin"
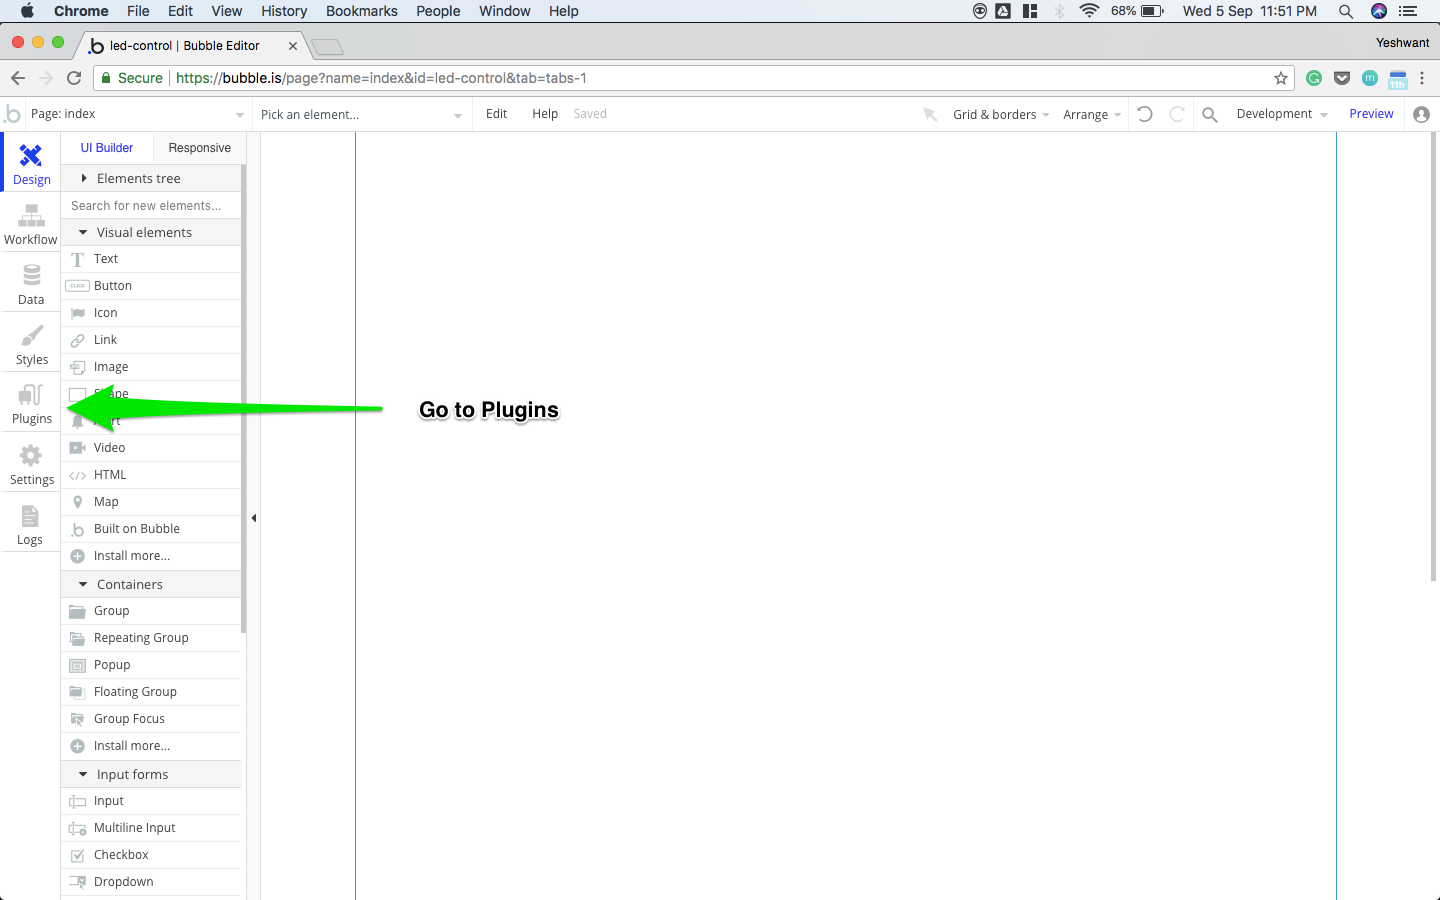
Go to Plugin
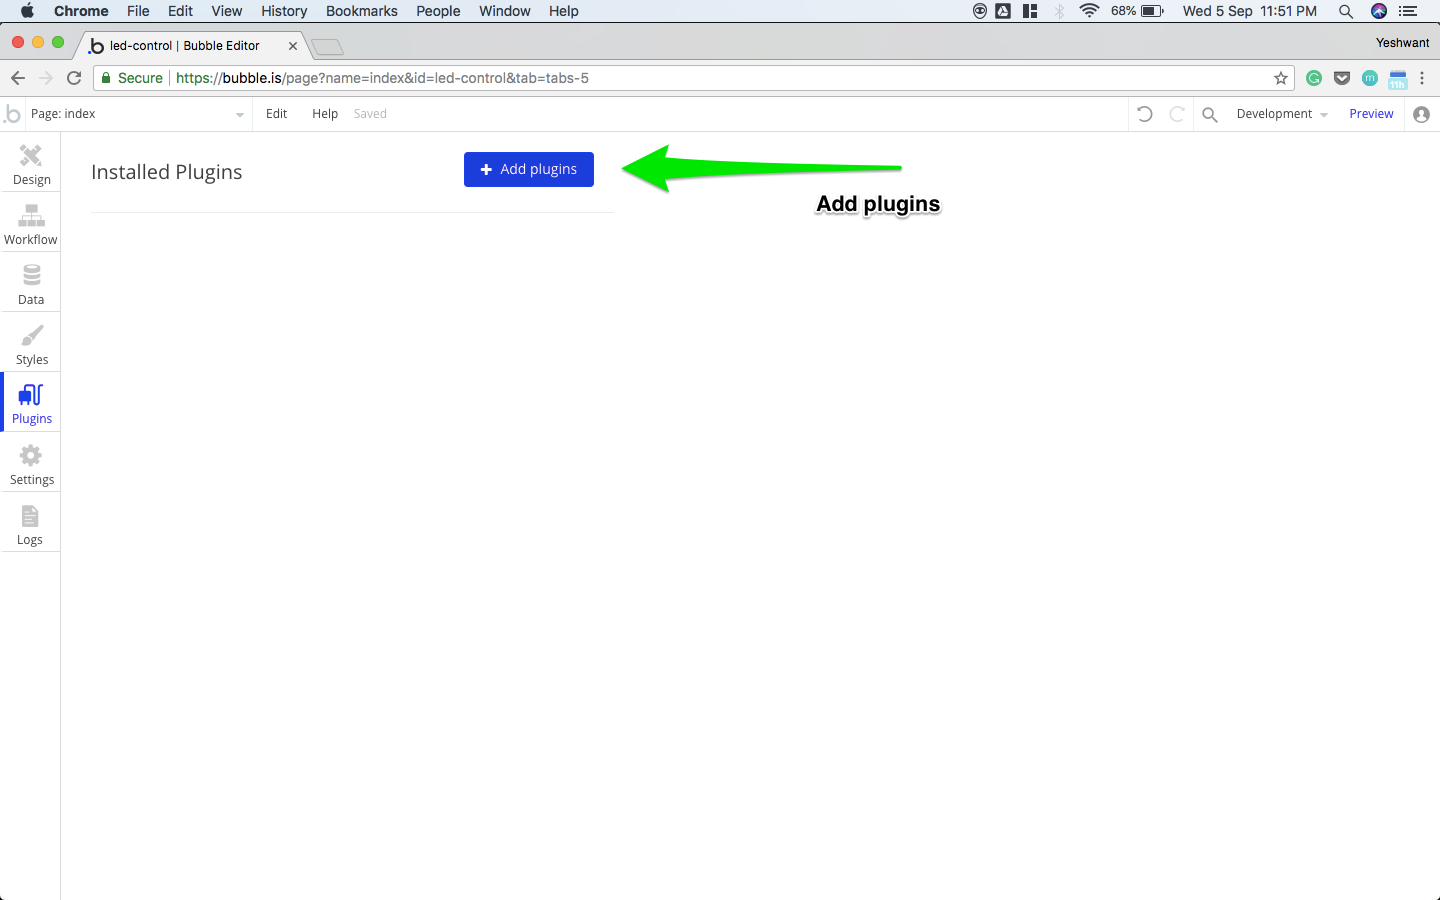
Add plugin
- Search for Bolt IoT, wait for it to get listed and then install it.
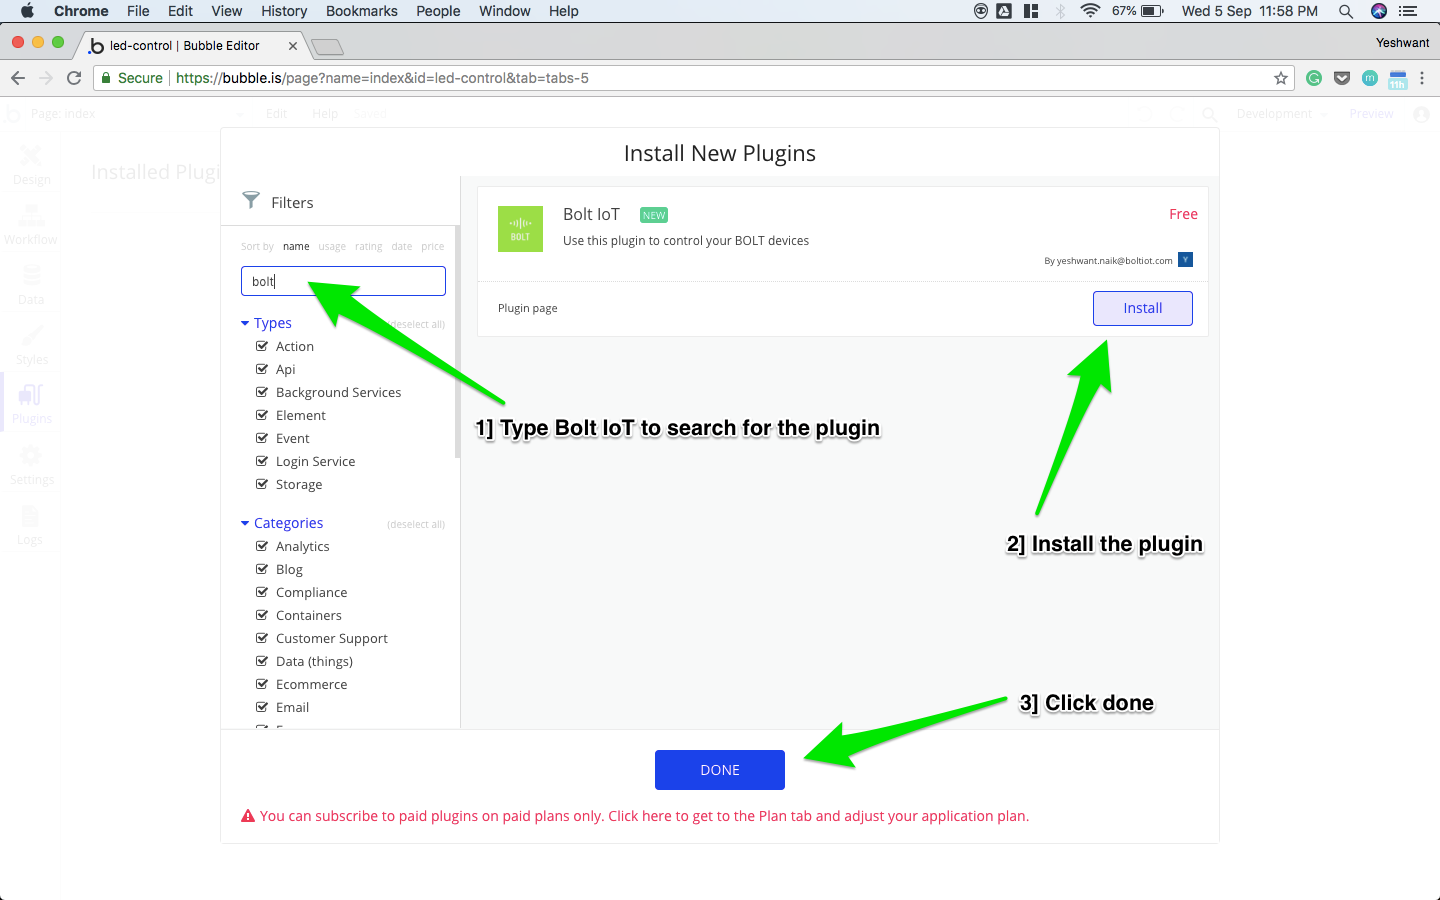
Installing the plugin
- Provide your API_KEY and DEVICE_ID from your Bolt cloud account.
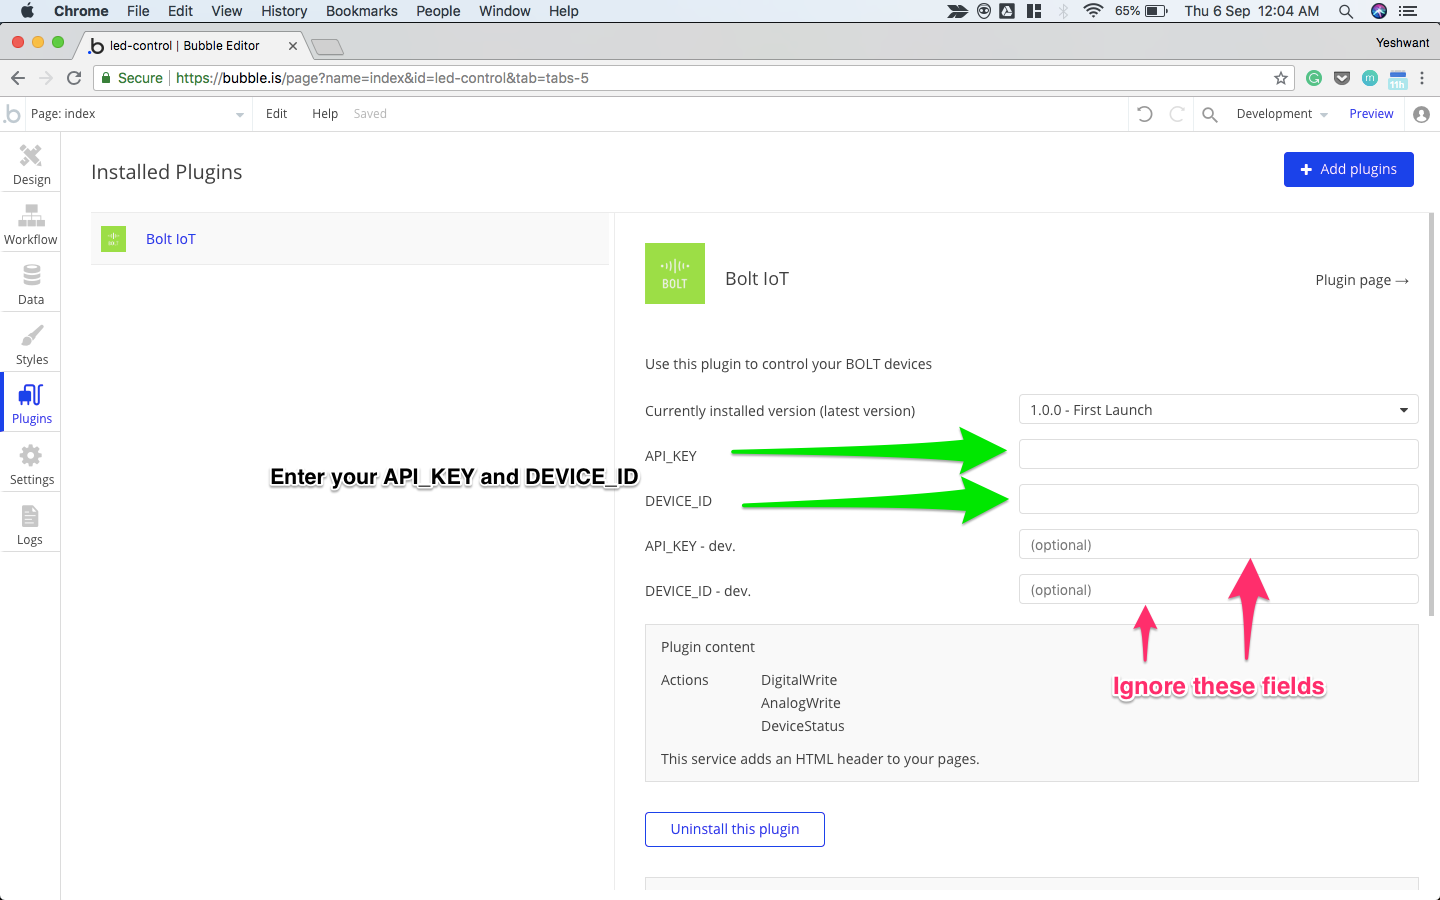
Enter your API_KEY and DEVICE_ID
📘
Please ignore the optional variables
Since we don't have any development specific API_KEY and DEVICE_ID for testing purpose, we can ignore them.
Here is the step by step video of this section.
After successfully adding Bolt plugin to the app. We can control our device using the actions provided by the plugin, which we shall learn in the next session.
