Creating app using template
In this section, we shall use the template integrated on Bubble.is by the Bolt team to control your device.
We have created multiple templates based on use case. We have listed them below.
1] Bolt IoT Template
A basic template for experimentation purpose to control all the PINs. You can turn them ON/OFF as well control the intensity of LED connected to the pins.
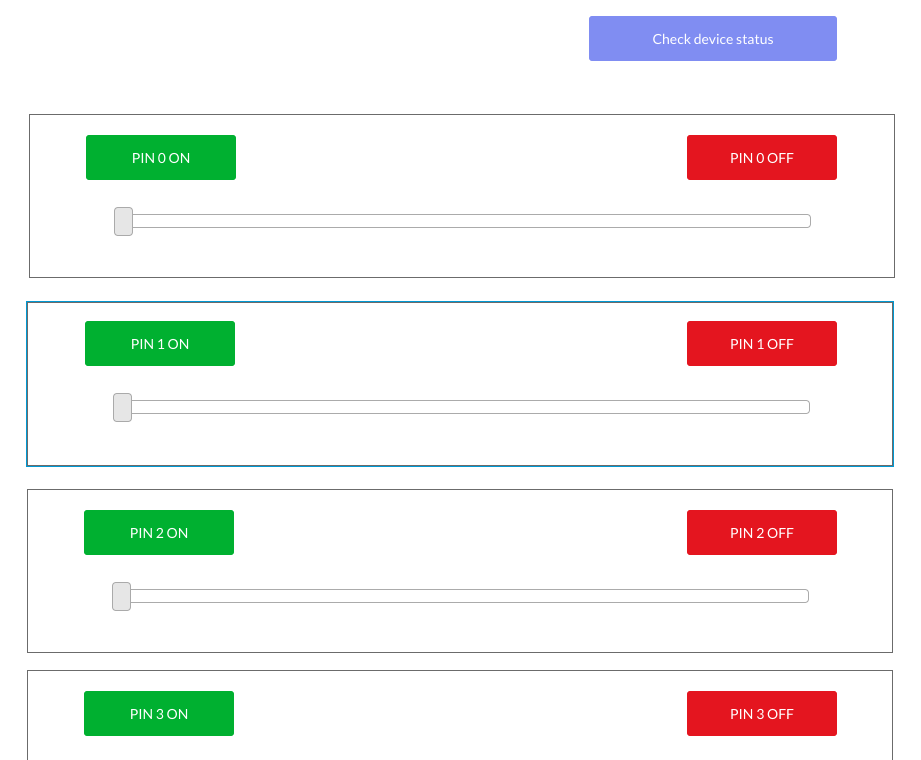
Name: Bolt Iot Template
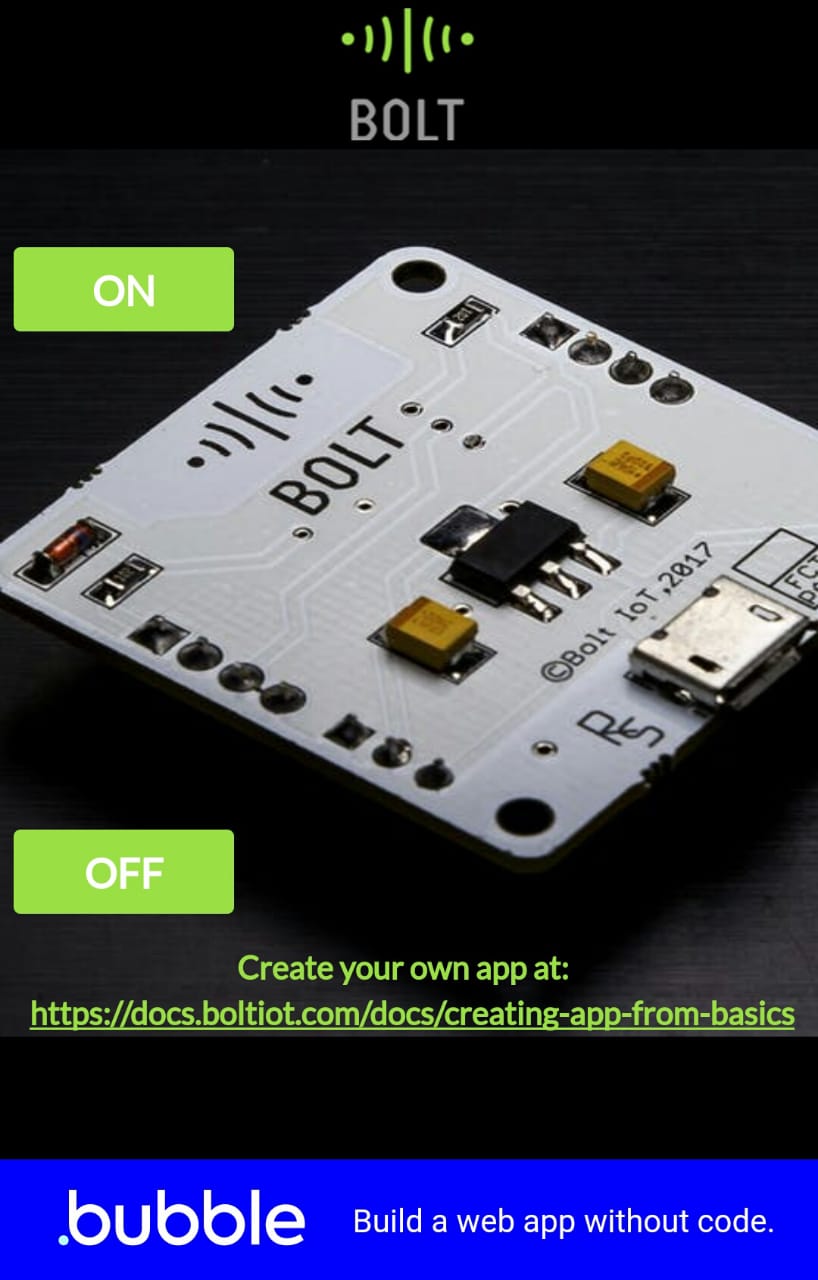
2] Bolt IoT Control a PIN
Best suitable if you want to control a single device using Bolt. Less cluttered and simple UI. This template lets you control PIN 0 of your device. You can change the pin that you want to monitor while in the edit mode.
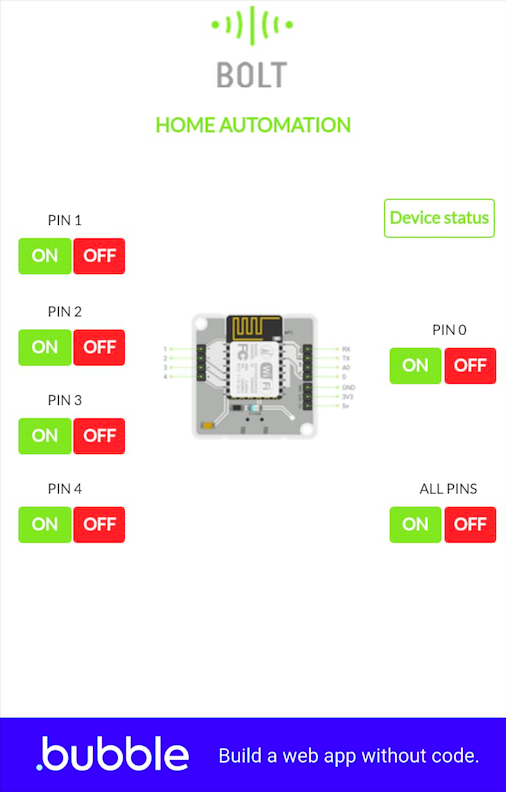
3] Bolt IoT -Home Automation
Perfect match for full-fledged home automation projects. You can turn ON/OFF all the pins.
You can search the template name while creating the bubble app to use it.
Creating an app on bubble.is
Once you are logged in into Bubble.is, skip the interactive lessons and directly head to creating the app.
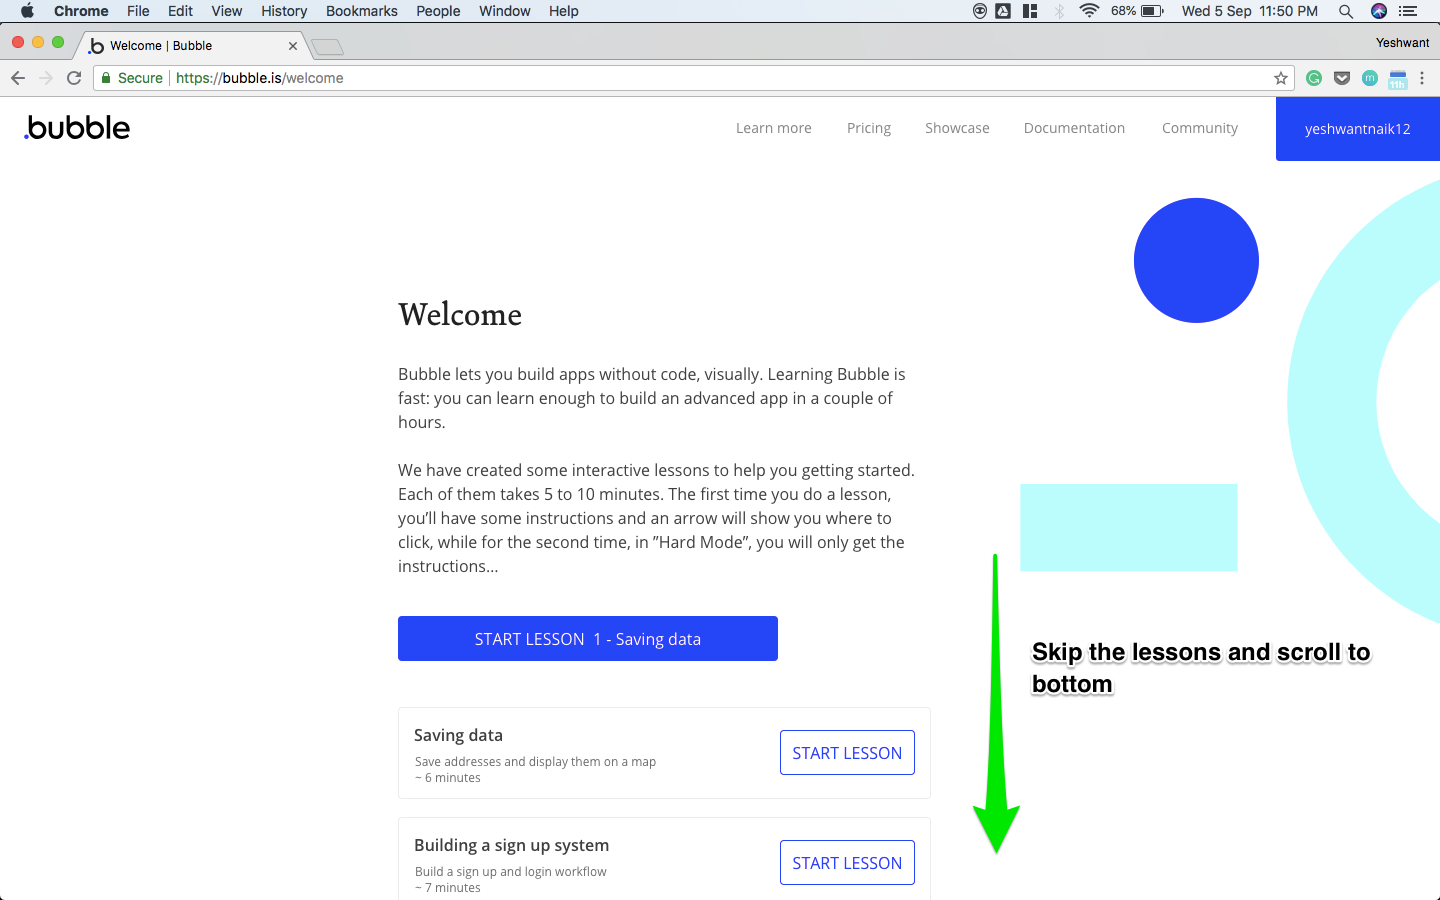
Skip to bottom
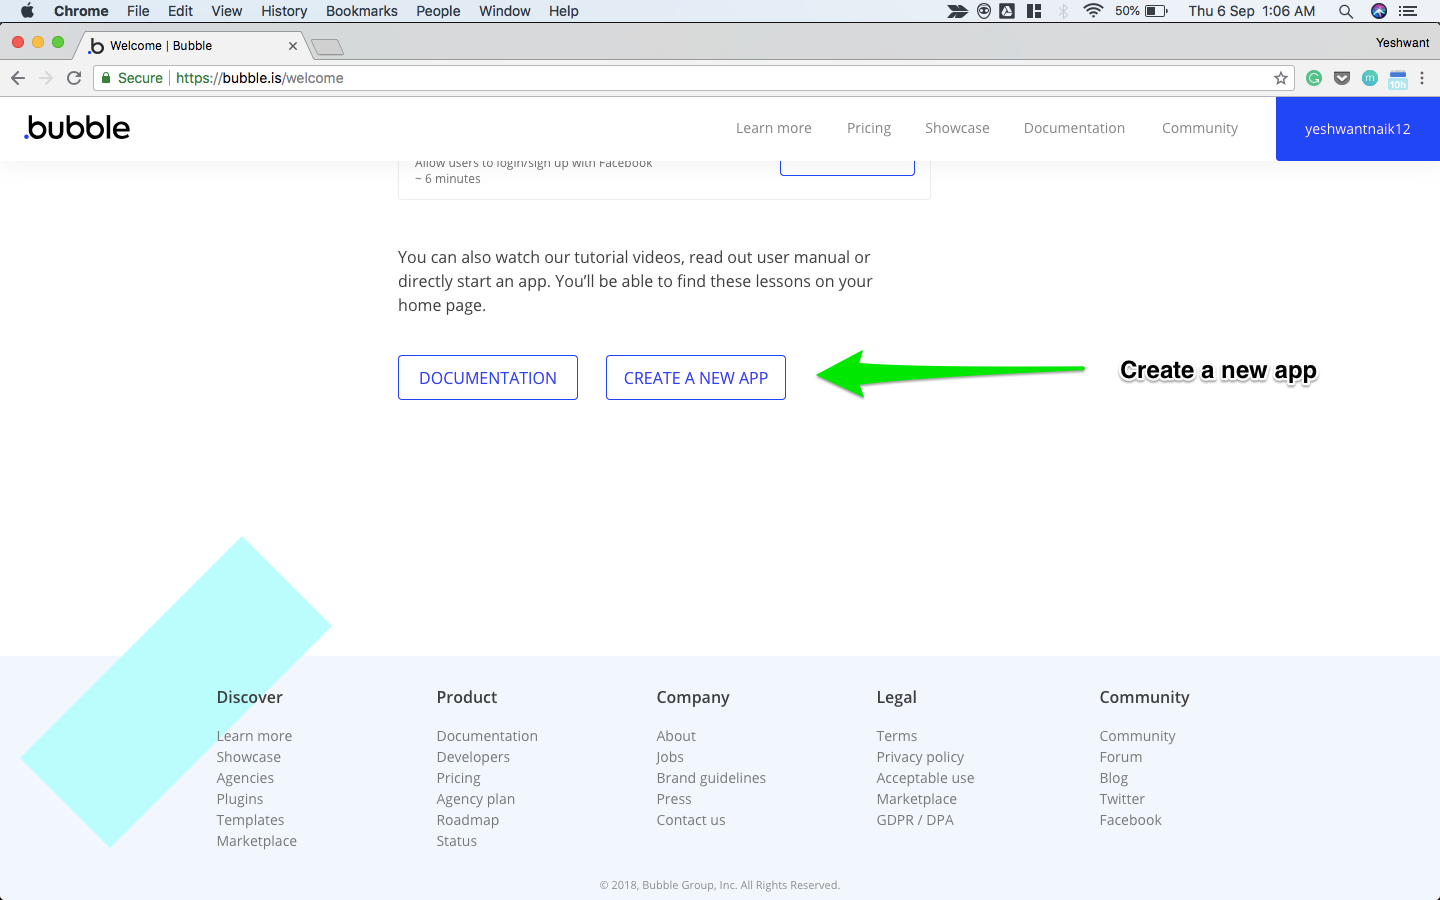
Create a new app
- Select "templates on the marketplace"
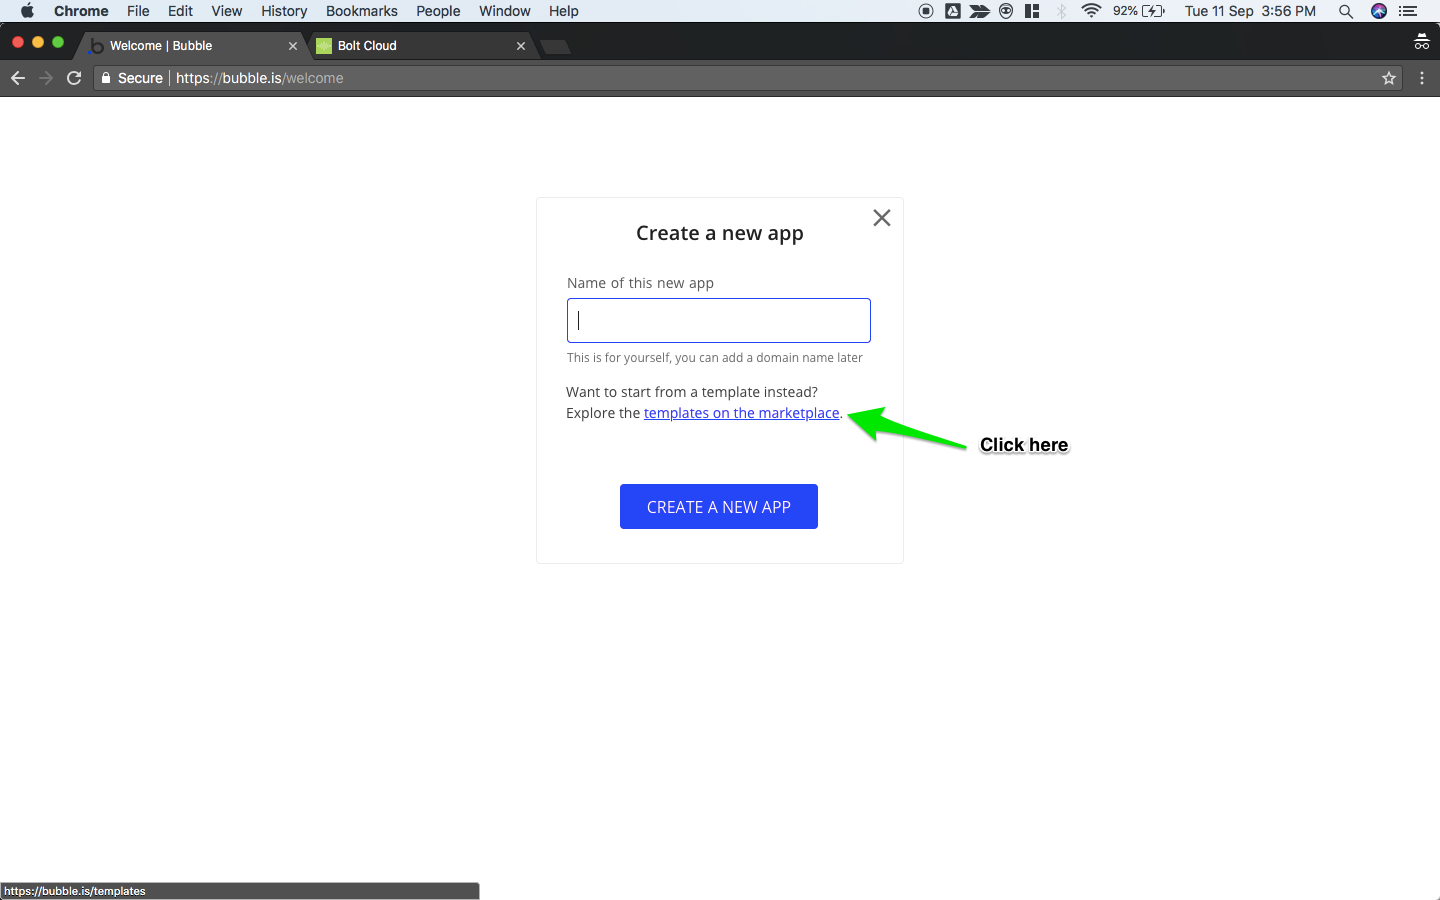
Go to template marketplace
- Type in the name of the template you want, from the list mentioned at the start.
We are using "Bolt IoT Template" here for demo purpose. - Once listed, click on the template.
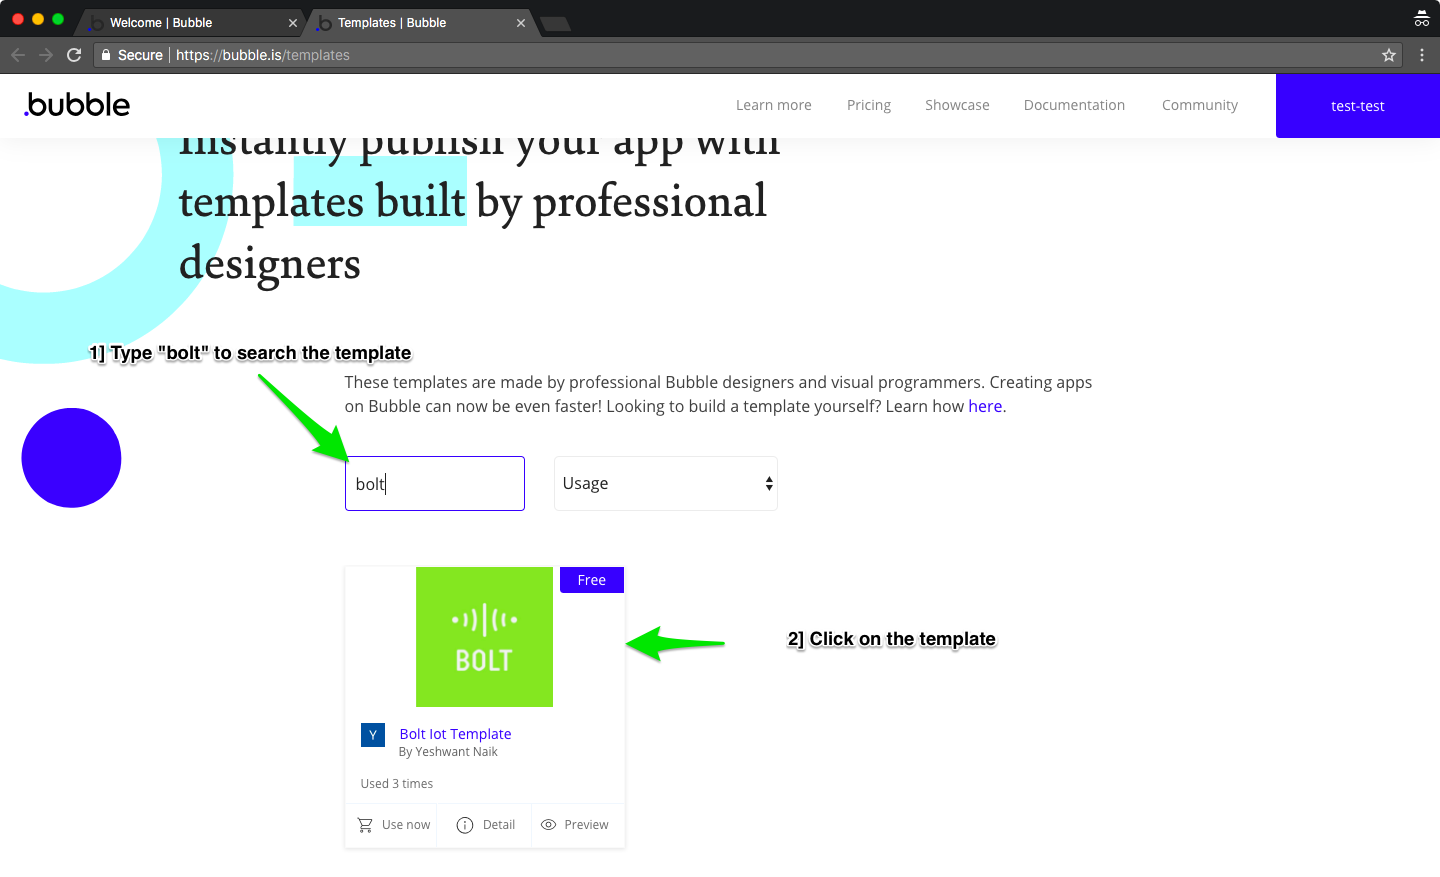
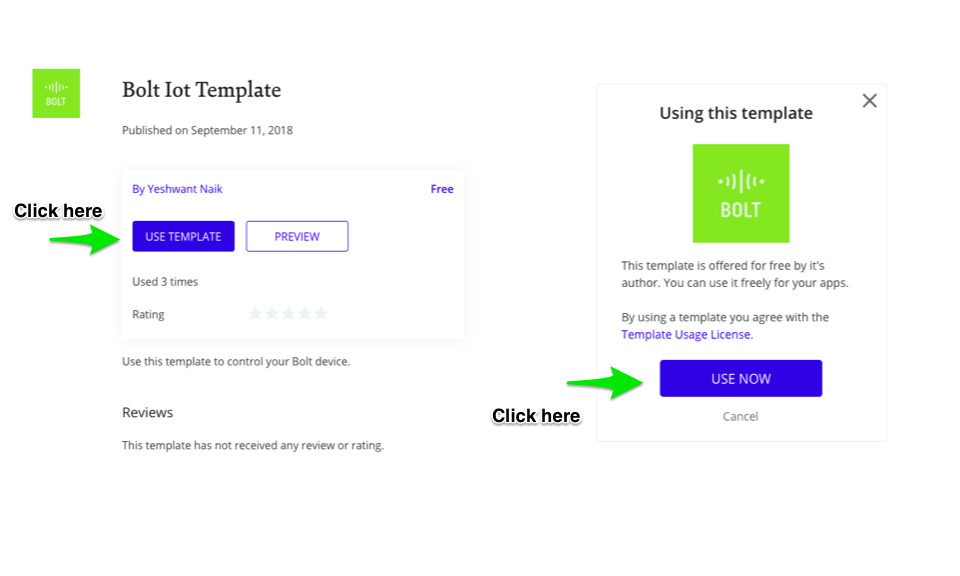
Selecting the template
- Click on "USE TEMPLATE"
- Click on "USE NOW" which will appear on a new page.
- Click on "GO TO MY APPS"
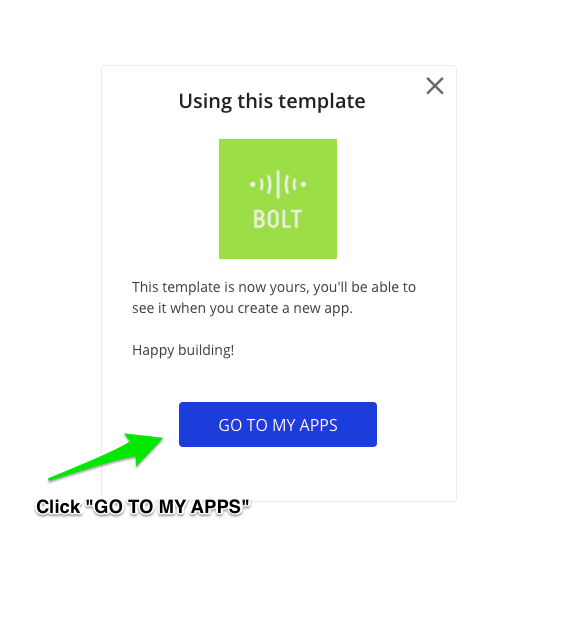
Go to my apps
This will take you to your applications section. Since this is your first app you will be prompted to create a new app. Skip the interactive lessons and directly head to creating the app.
- Provide a unique name for your app.
- Select the template from the drop-down.
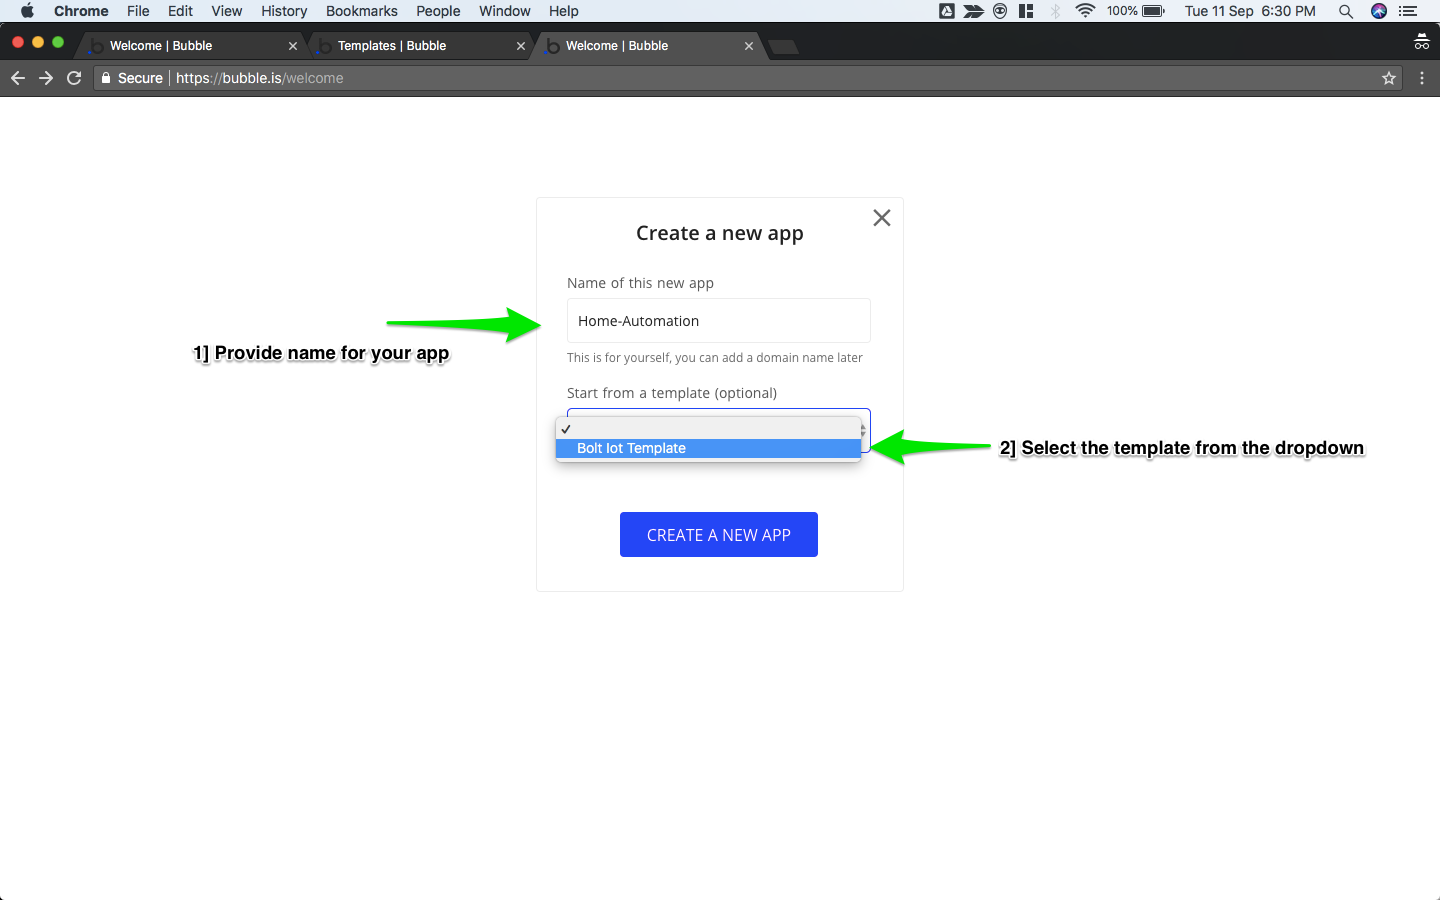
Selecting the template from the dropdown
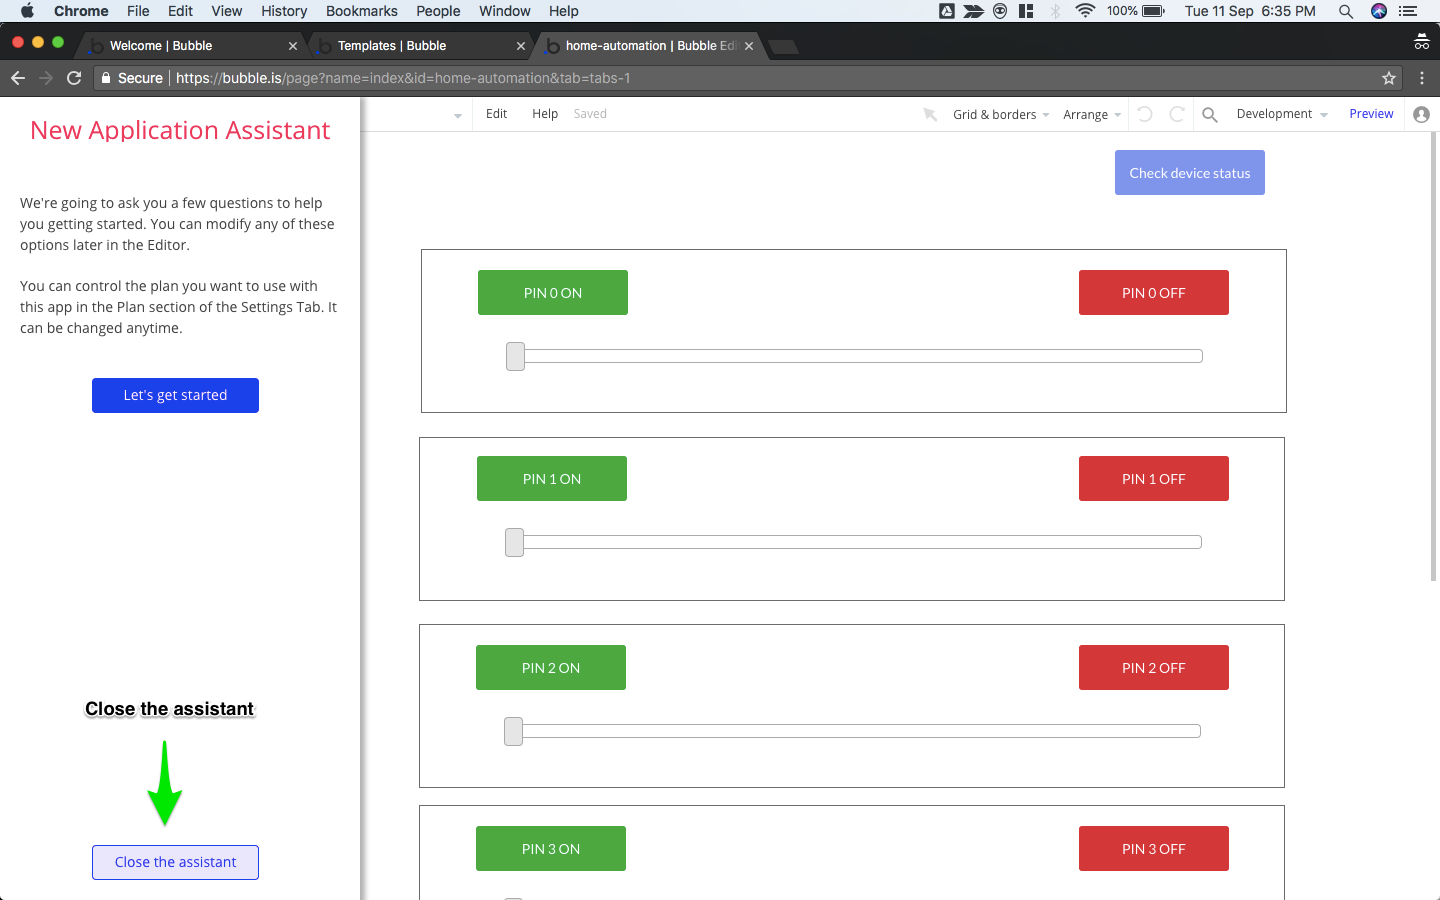
- Close the assistant
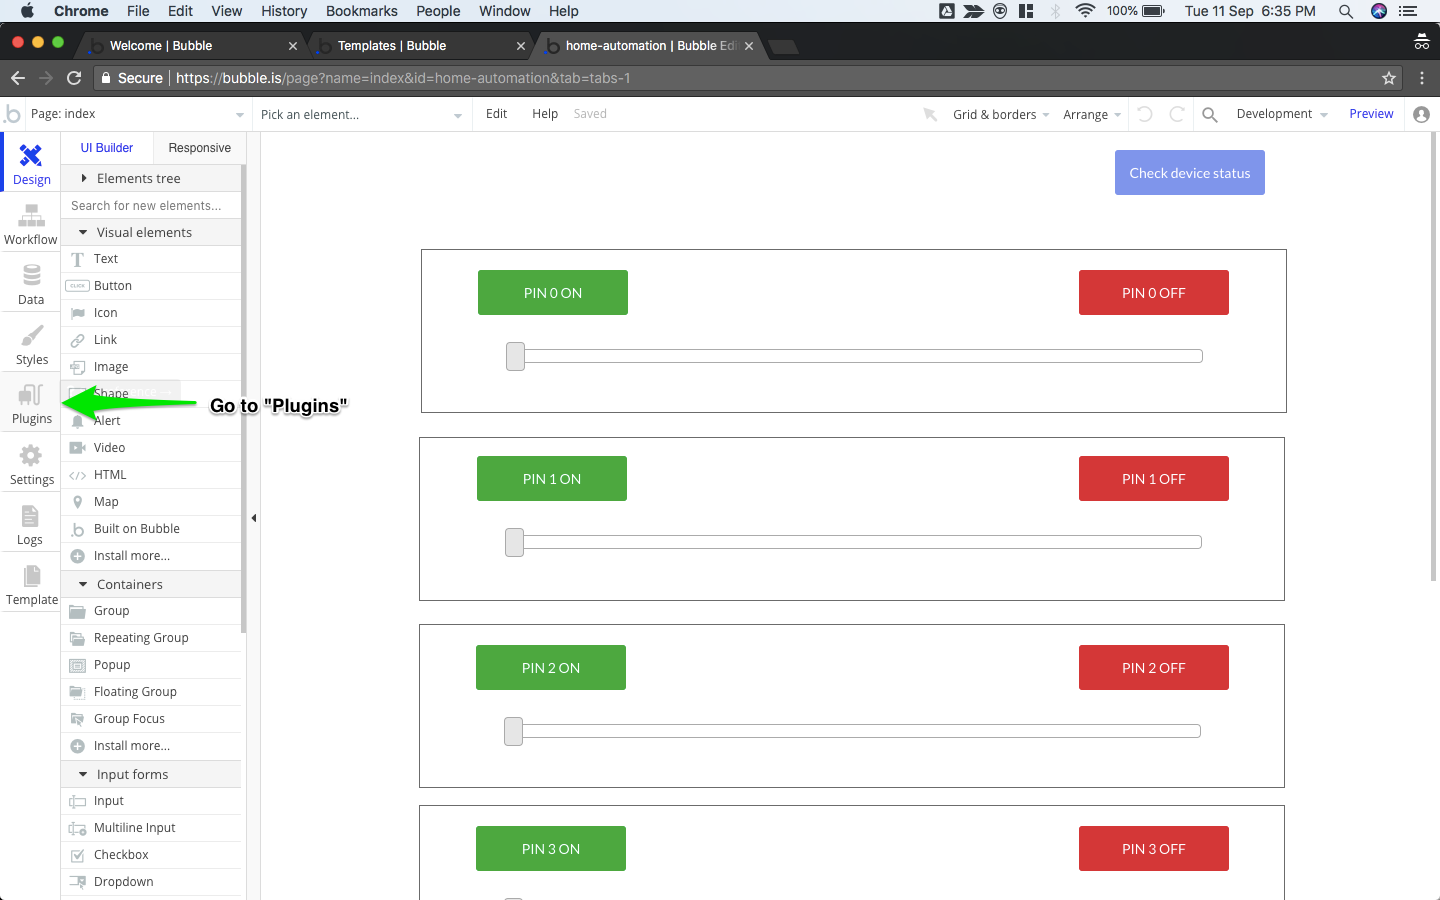
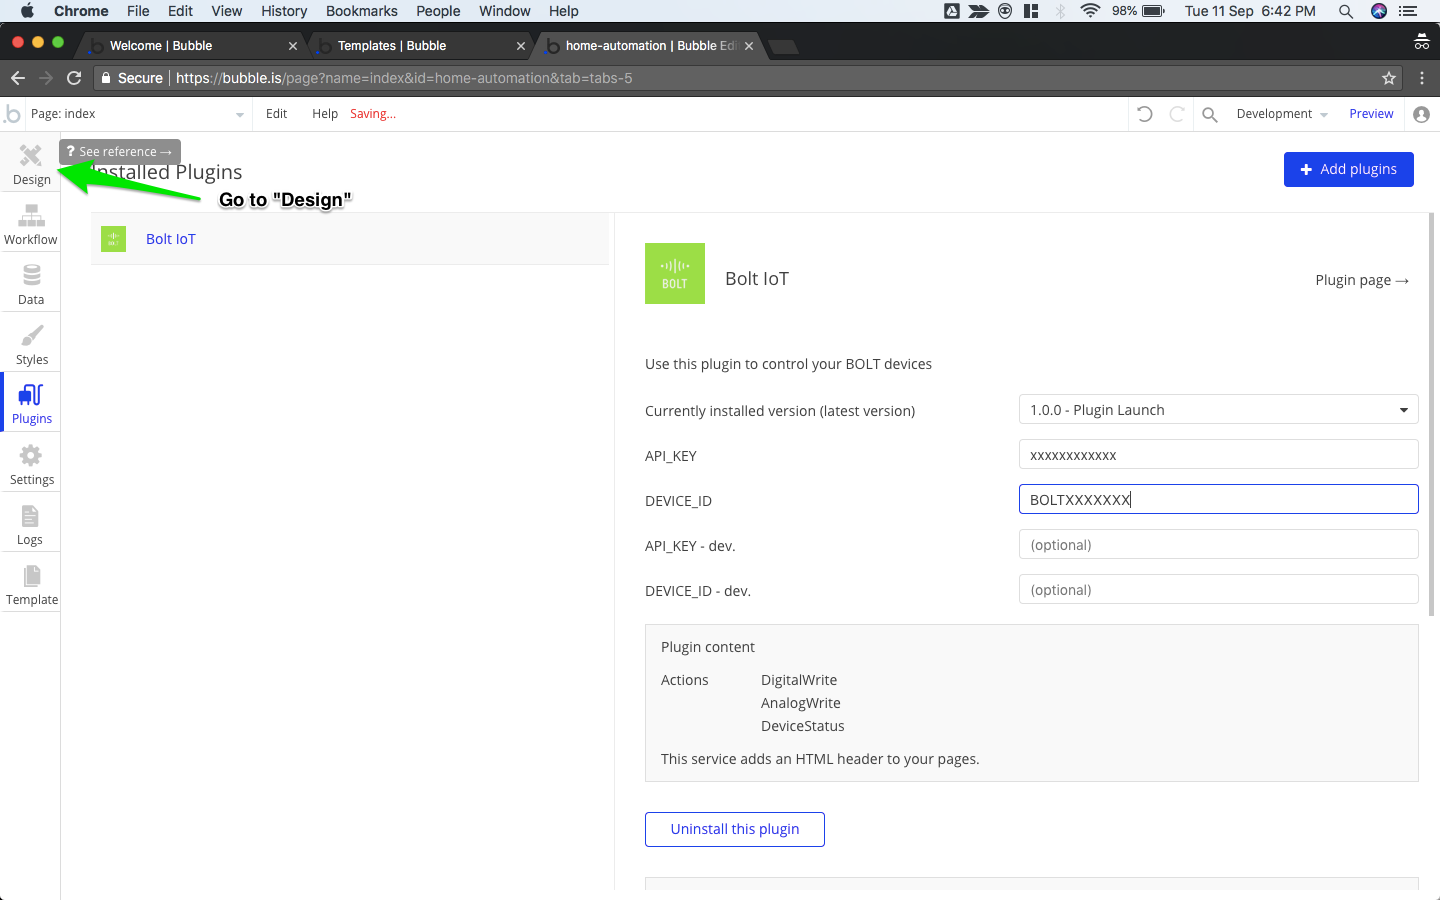
- Go to "Plugins"
- Provide your API_KEY and DEVICE_ID from your Bolt cloud account.
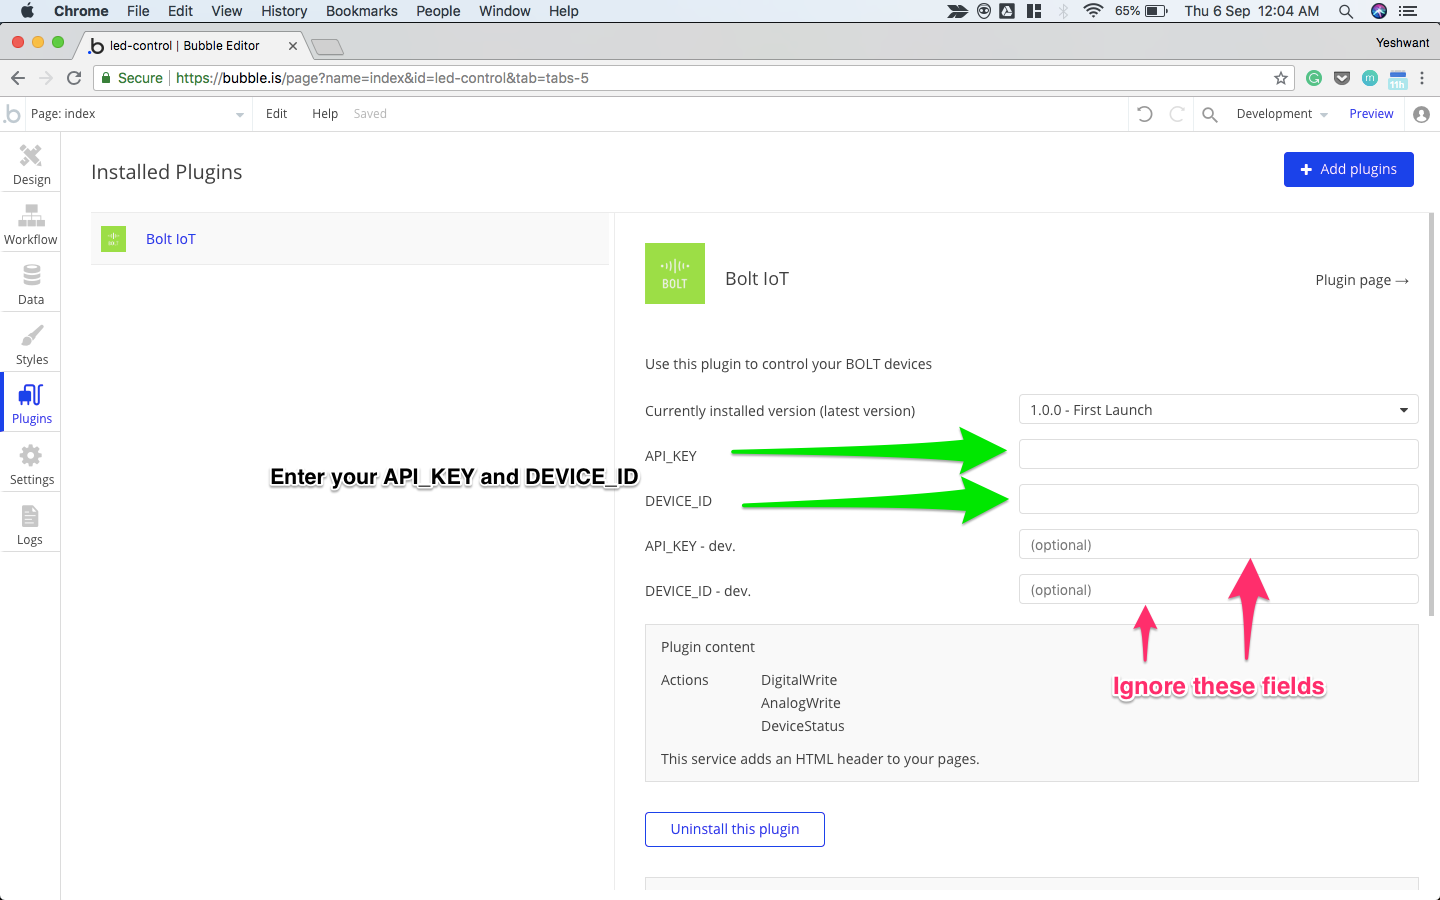
Enter your API_KEY and DEVICE_ID
📘
Please ignore the optional variables
Since we don't have any development specific API_KEY and DEVICE_ID for testing purpose, we can ignore them.
- Go to "Design"
- Click on "Preview"
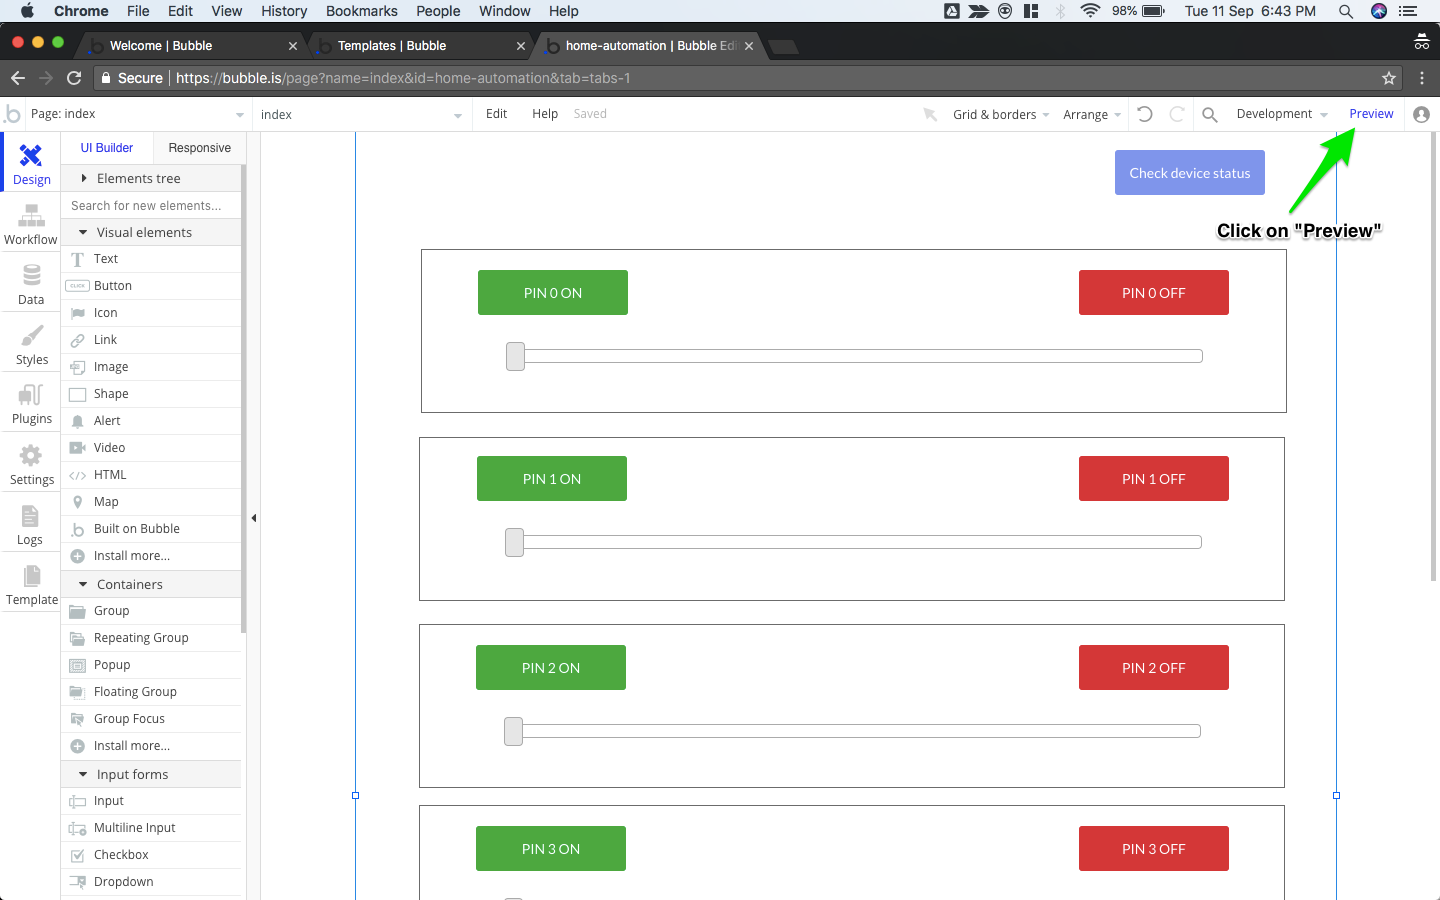
Here you can see your app in action. Test all the buttons and sliders. Once you have made sure that everything works fine, its time for the app to go Live.
Deploying the app
As you must have noticed, we are working on the Development version of the app.
To deploy the app and make it live,
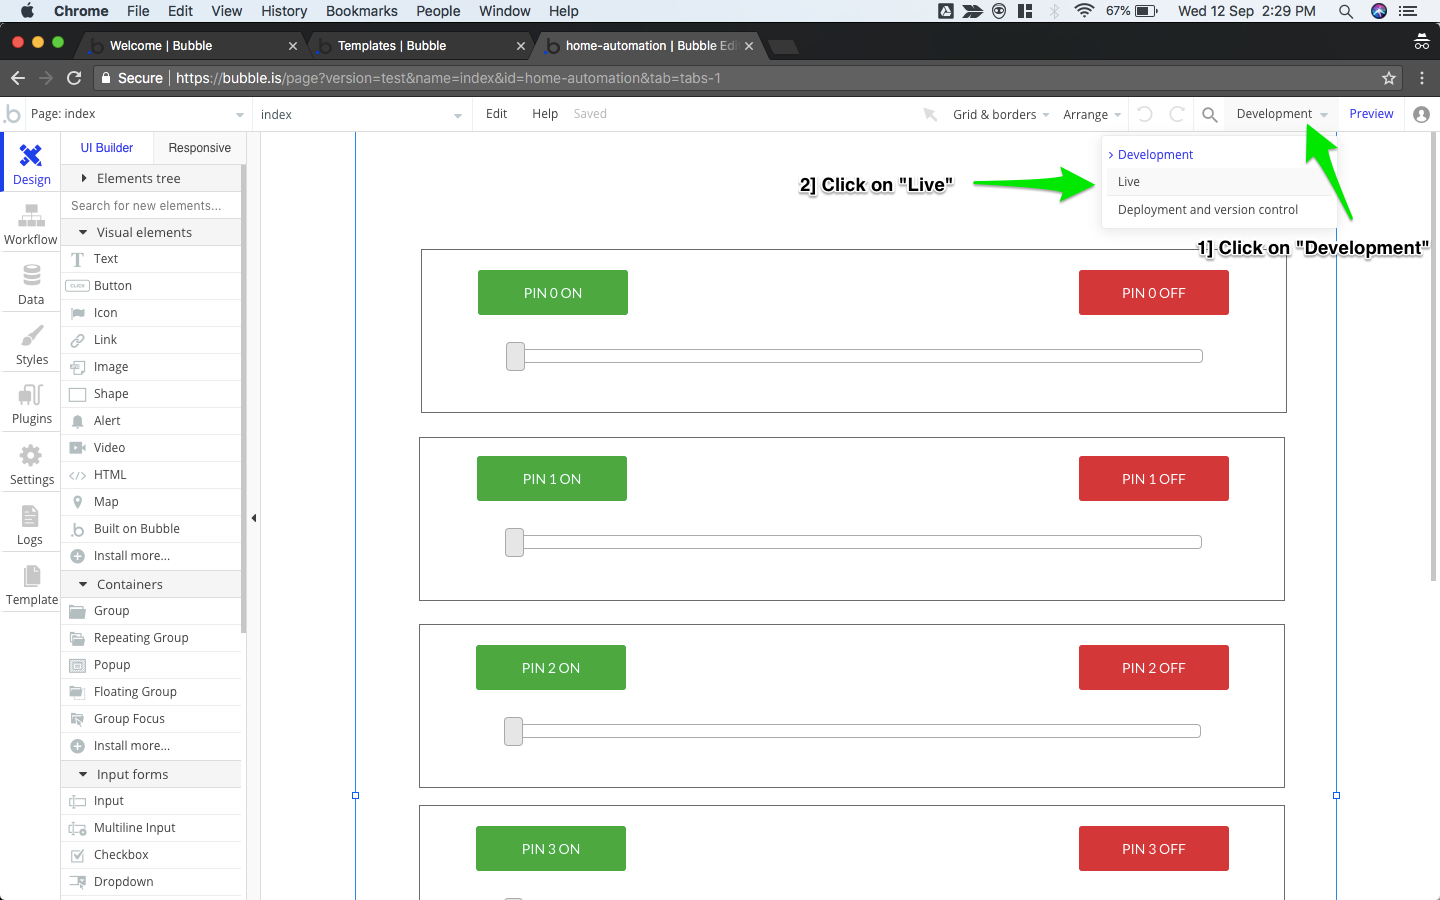
- Go to the Design section.
- Click on "Development" next to preview.
- Click on "Deployment and version control".

- Click on "Deploy Development to Live"
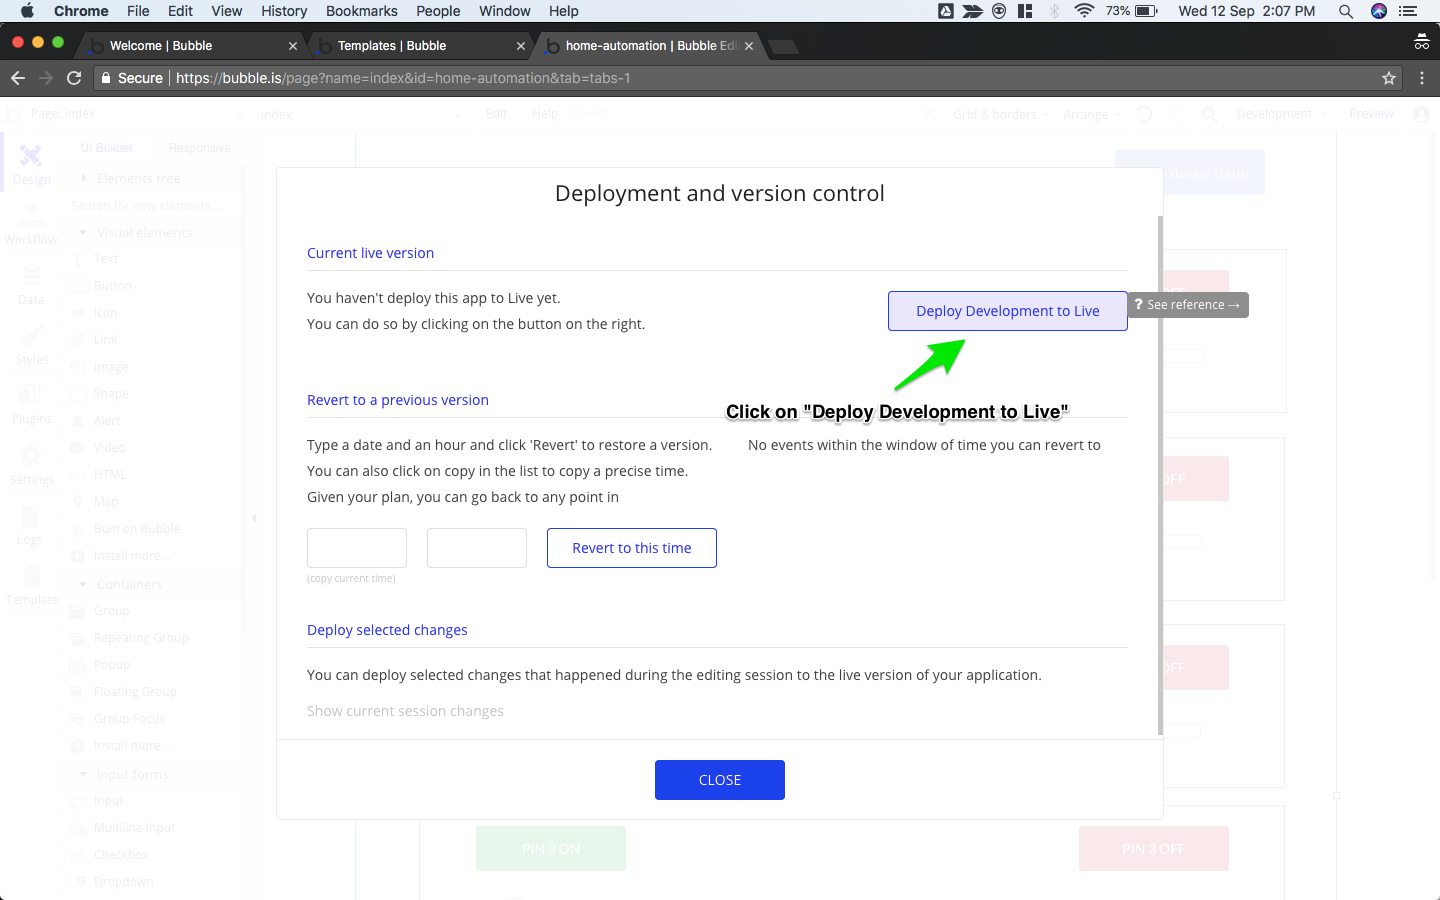
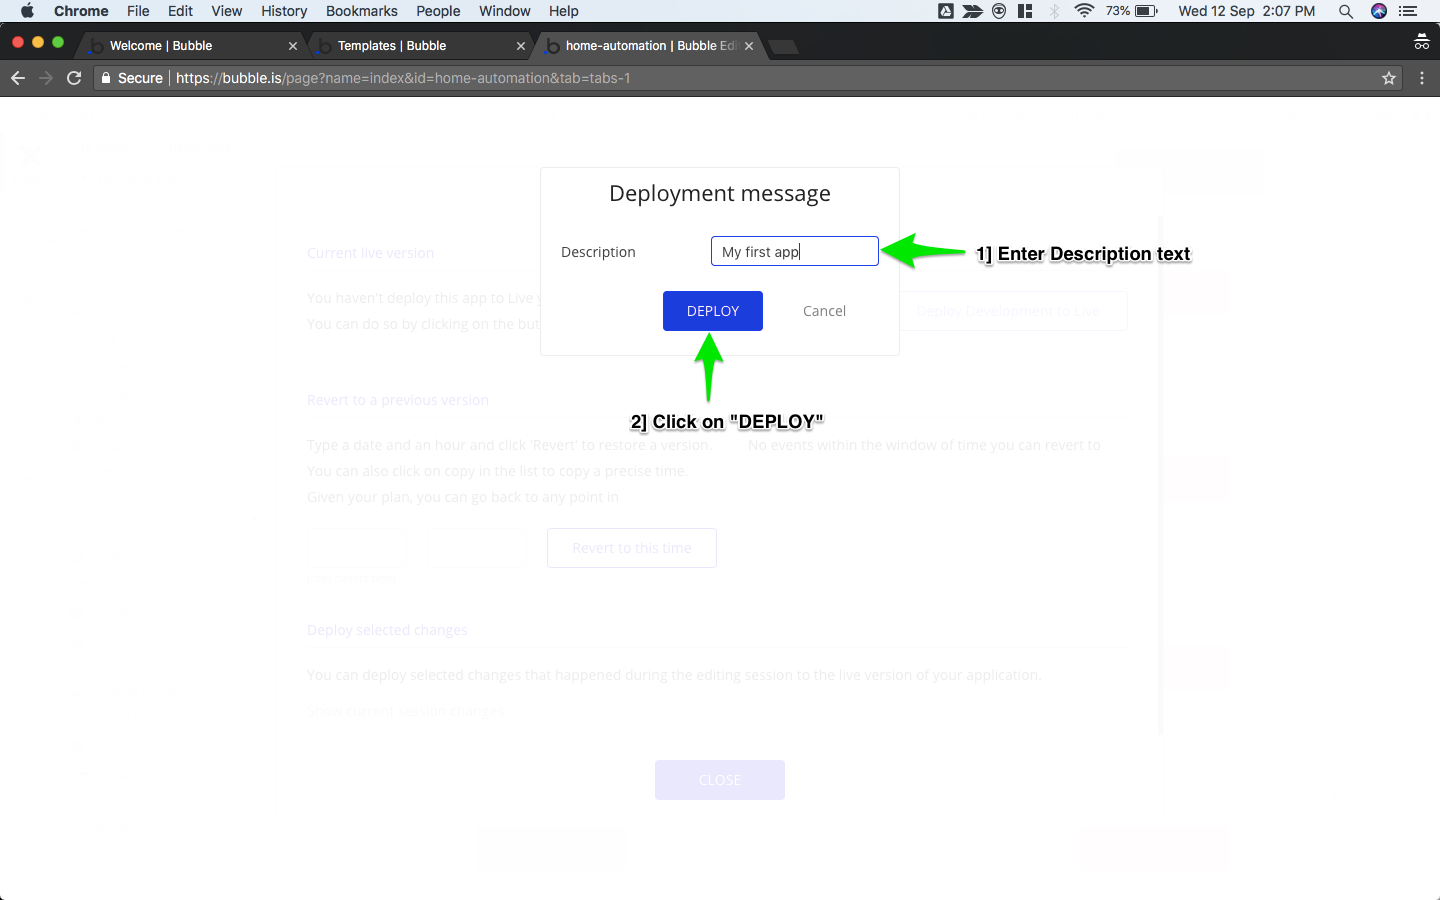
- Enter Descriptive text for this deployment.
- Click on "DEPLOY"
To view the final deployed app, follow below instructions.
- Click on "Development".
- Click on "Live".
- Go to Preview.
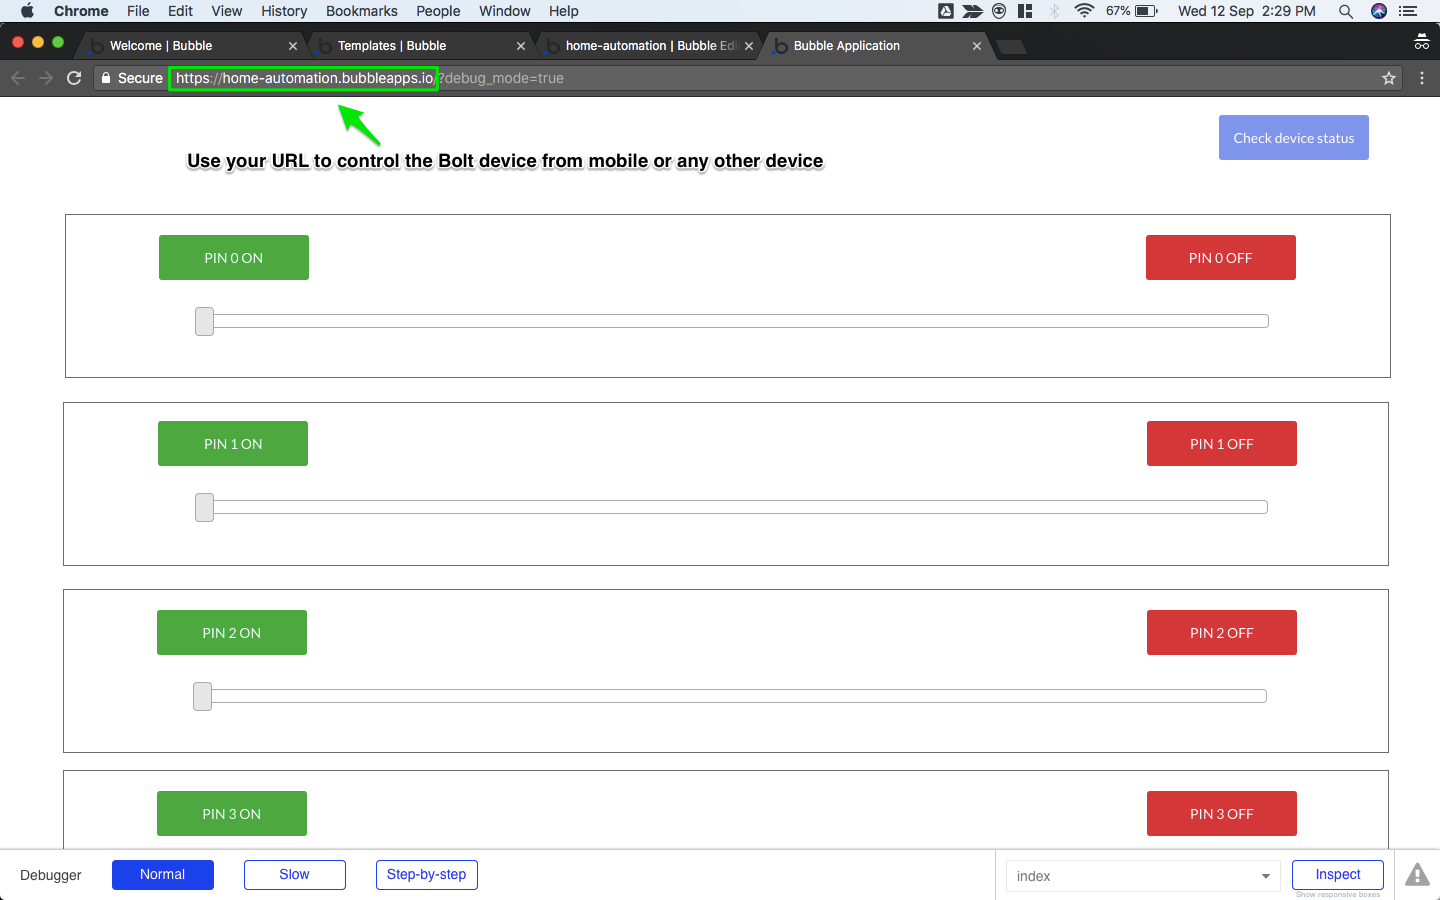
Once you are in the "preview section" of the LIVE app, use the URL to open your app in any device that supports a browser.
Watch the walkthrough video for the above-explained process.
Visit below links to know how to extend this tutorial to the home automation project and control bulb using.
Project: You can skip step 3 and 4 of the project use bubble app instead. [Updated project coming soon]
https://www.hackster.io/boltmakers/home-automation-8cc388
Video: Watch below video to learn how to connect an AC bulb to Bolt.
https://youtu.be/RDnTYlOkhWY
🚧
The Home Automation Project
We highly recommend using either "Bolt IoT Control a PIN" or "Bolt IoT -Home Automation" template mentioned at the start, for home automation projects since they only have ON/OFF buttons.
The template used in this tutorial has a slider, if used by mistake, the relay used in the project might misbehave and damage your appliances.
If you want to learn how to create the UI elements and set actions for the same, head on to our next section which will take you through the entire process.
👍
Your feedback is important to us!
Do provide your valuable feedback in the Plugin section for the Bolt's plugin. This will help us in improving the user experience.
