Arduino Library
The BoltIoT-Arduino-Helper library helps you to quickly interface Bolt with Arduino. The library supports both hardware serial and software serial UART which is provided by Arduino. We recommend you to choose hardware serial over software serial since it's more robust than software serial. The library makes it possible to push data to Bolt Cloud by abstracting the setup and interface layer between Bolt and Arduino. You can always checkout the underlying code here.
How to include the library in Arduino IDE?
Please follow the steps given below to include the Bolt library into the Arduino IDE.
- Go to the Github link https://github.com/Inventrom/boltiot-arduino-helper.
- Click on clone or download button and download the zip.
- Open Arduino IDE ( In case you don't have Arduino installed, click here to find out how to install it.)
- Click on Sketch -> Include Library -> Add .Zip library.
- Navigate to the folder containing boltiot-arduino-helper.zip and select boltiot-arduino-helper.zip.
- Press ok and the library is loaded.
- Write the Arduino code. Examples are given below for reference.
Note: We recommend you to choose hardware serial over software serial.
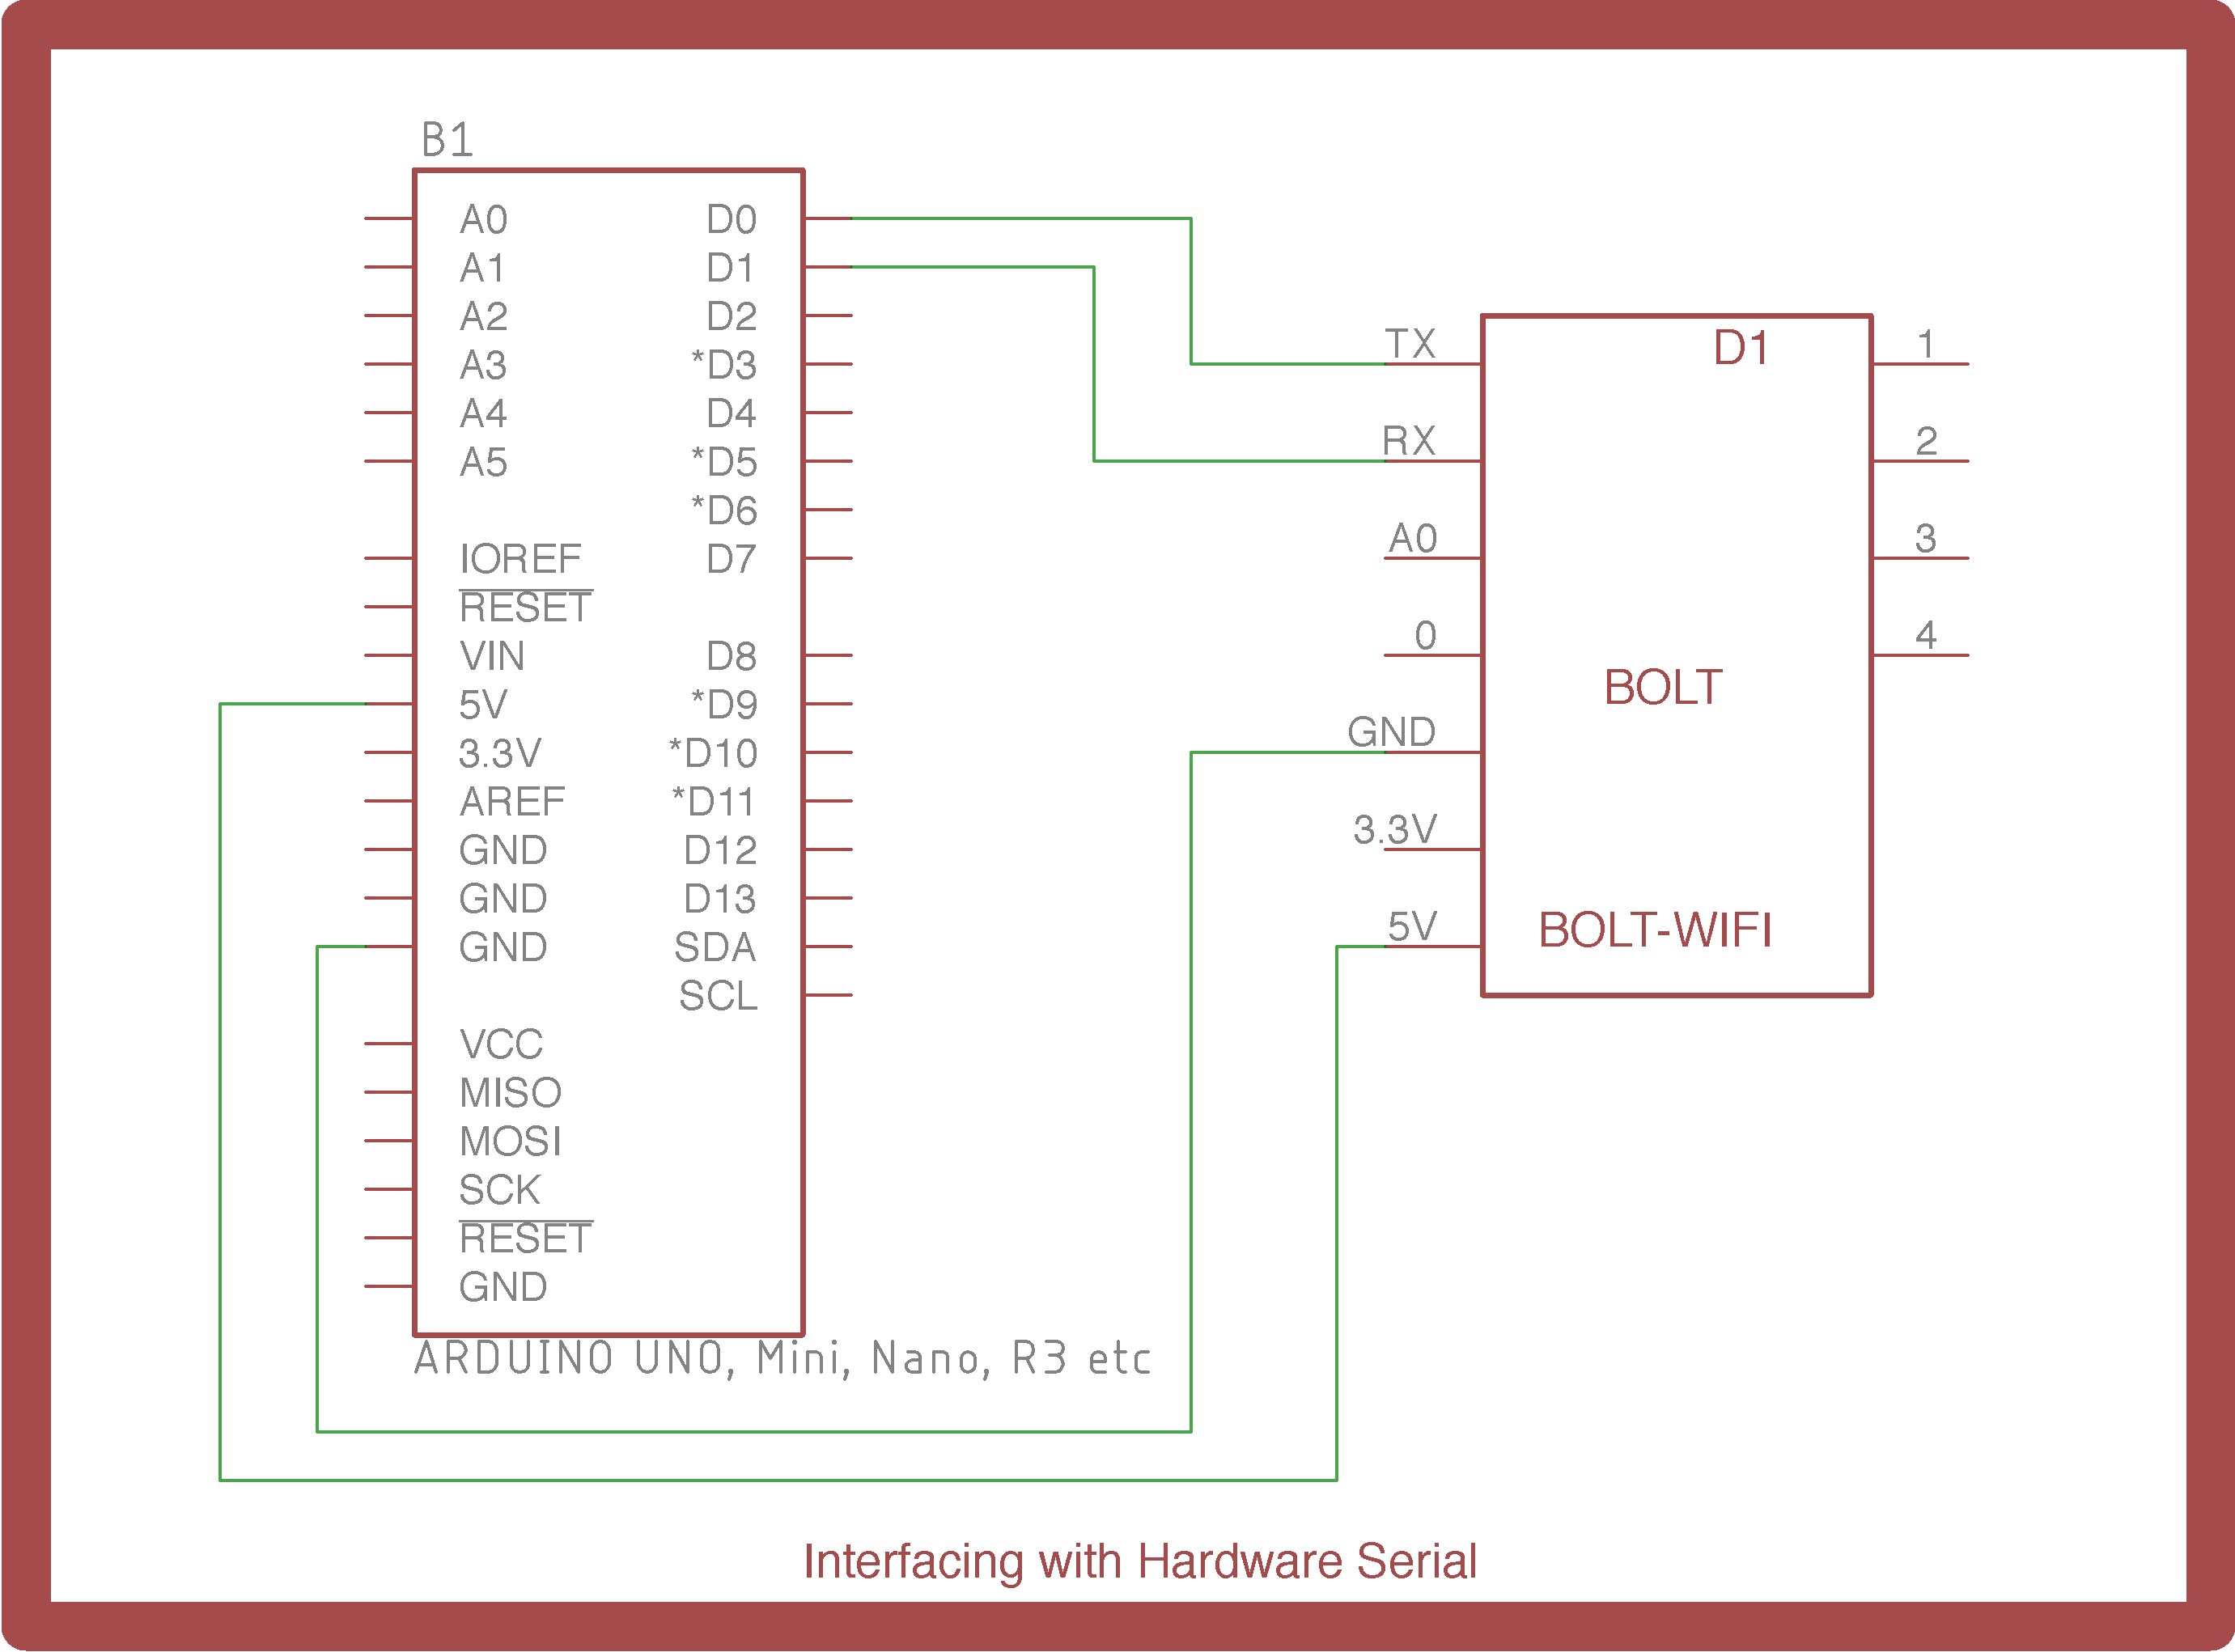
Interfacing via Hardware Serial Port

Sample Code
#include <boltiot.h>
  void setup() {
    boltiot.Begin(Serial); //Initialize the Bolt interface over serial uart. Serial could be replaced with Serial0 or Serial1 on Arduino mega boards.
         //In this example Tx pin of Bolt is connected to Rx pin of Arduino Serial Port
         //and Rx pin of Bolt is connected to tx pin of arduino Serial Port
    pinMode(2,INPUT); //Set pin 2 as input. We will send this pin's state as the data to the Bolt Cloud
  }
  void loop() {
    boltiot.CheckPoll(digitalRead(2)); //Send data to the Bolt Cloud, when the Bolt polls the Arduino for data.
  //This function needs to be called regularly. Calling the CheckPoll function once every seconds is required
  }
Note: While uploading the code, the Bolt needs to be disconnected from the Arduino.
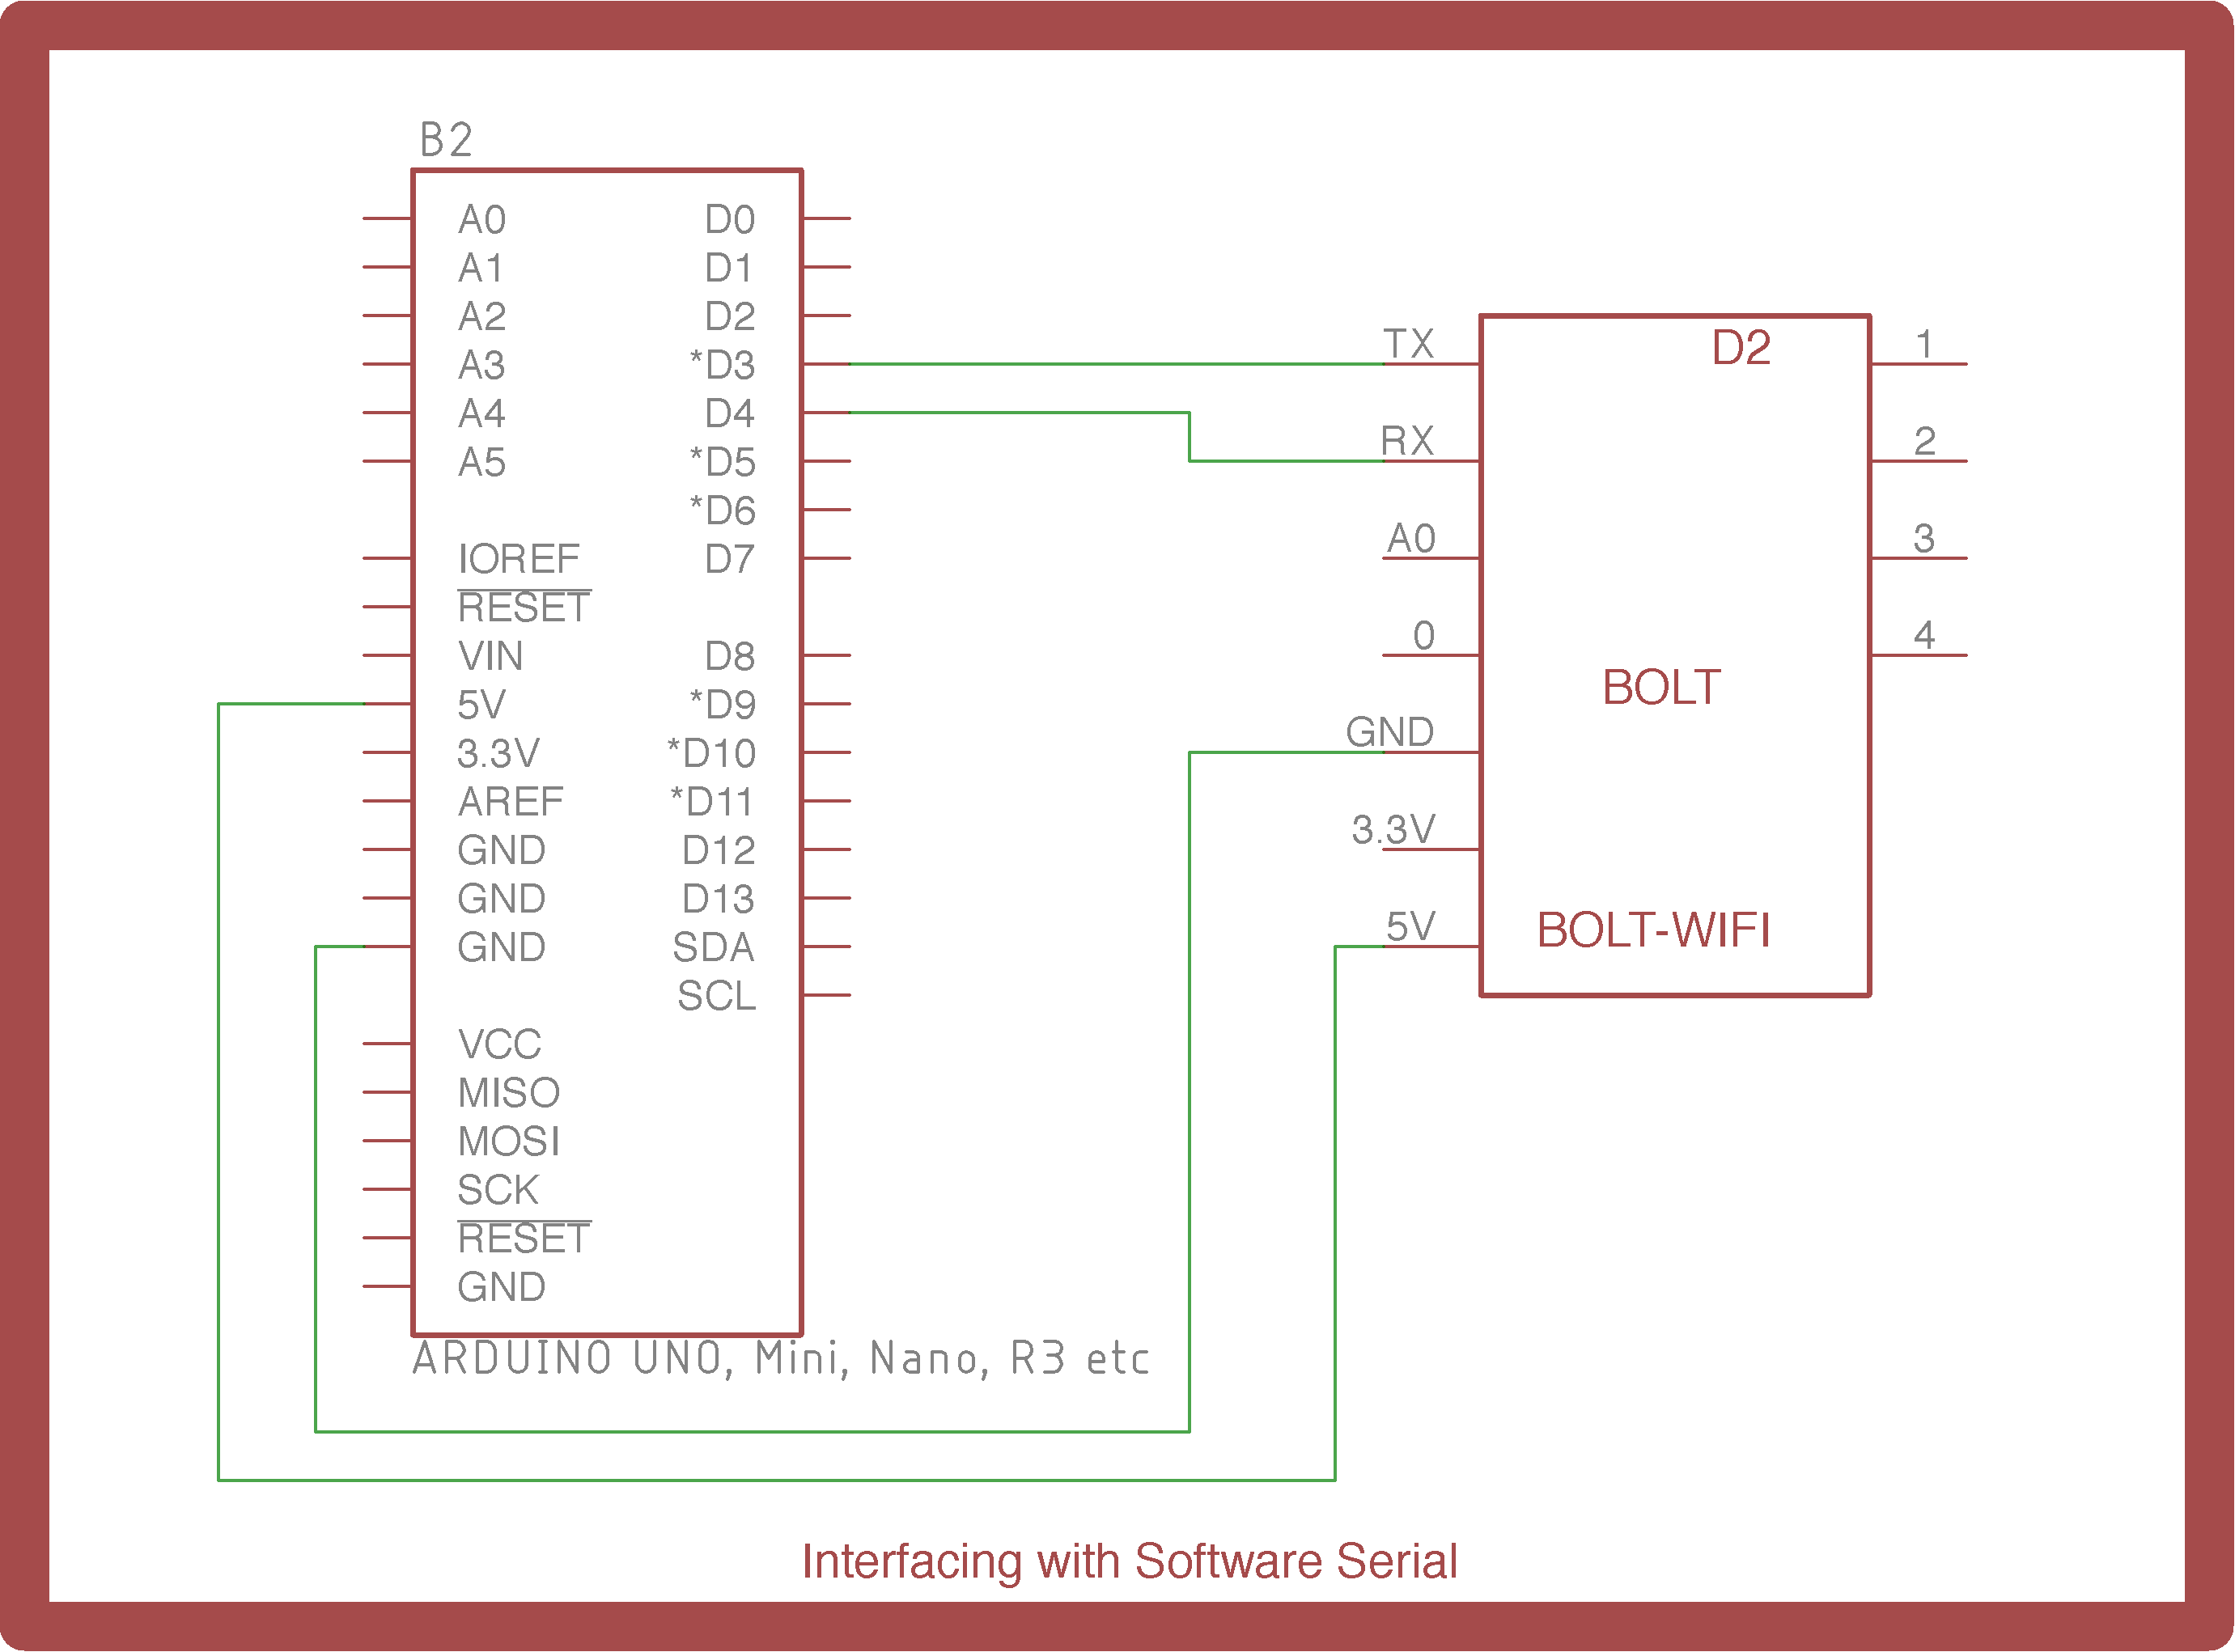
Interfacing via Software Serial Port

Sample Code
#include <boltiot.h>
void setup() {
  boltiot.Begin(3,4); //Initialize the Bolt interface over software serial uart.
       //In this example Tx pin of Bolt is connected to pin 3 of Arduino
       //and Rx pin of Bolt is connected to pin 4 of Arduino
  pinMode(2,INPUT); //Set pin 2 as input. We will send this pin's state as the data to the Bolt Cloud
}
void loop() {
  boltiot.CheckPoll(digitalRead(2)); //Send data to the Bolt Cloud, when the Bolt polls the Arduino for data.
//This function needs to be called regularly. Calling the CheckPoll function once every seconds is required
}
- Upload the code to Arduino.
- Create a product and link it to the device. Refer the below gif for this step.

- Connect your Bolt to the Arduino as shown in the interfacing diagram given above. Now you should be able to view the data collected by Bolt by clicking on view device icon in the Devices tab on the dashboard.
Updated over 2 years ago
