Intensity Control
In the previous sections, we were using buttons to as our action elements. The digitalWrite action had only two states, we used one button to set the STATE to HIGH and other to LOW.
The analogWrite's values range from 0 to 255 hence we shall use a different approach. We will be using a slider bar element to control the range that we want to set. So, as you slide the pointer of the slider, the intensity will vary accordingly.
Creating a Slider
Let's create a Slider bar to control the intensity of the LED.
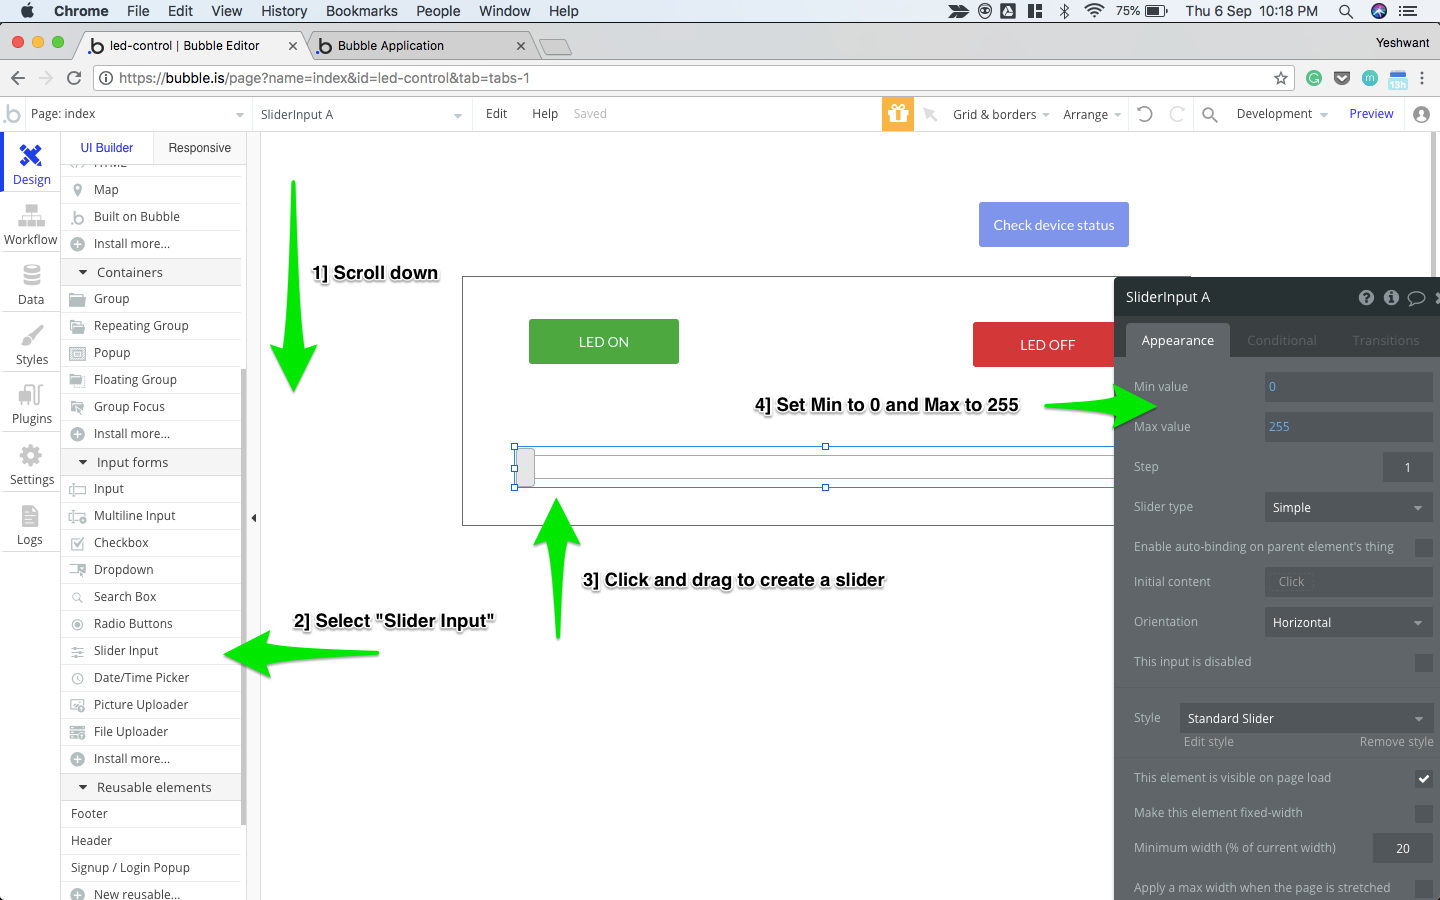
- Go to the Design section.
- Scroll down until you reach Input forms section.
- Select "Slider Input"
- Click and drag inside the rectangle below the two buttons to create a slider.
- Set Min value to 0 and Max value to 255.

Creating a Slider
Value range of analogWrite
Please make sure that you enter the values in the specified range only ie: 0 - 255.
Setting action of the slider
In the Digital Write section, the actions got triggered whenever the element ie. the button was clicked.
But in this section, the action will be triggered whenever the value of the slider is changed.
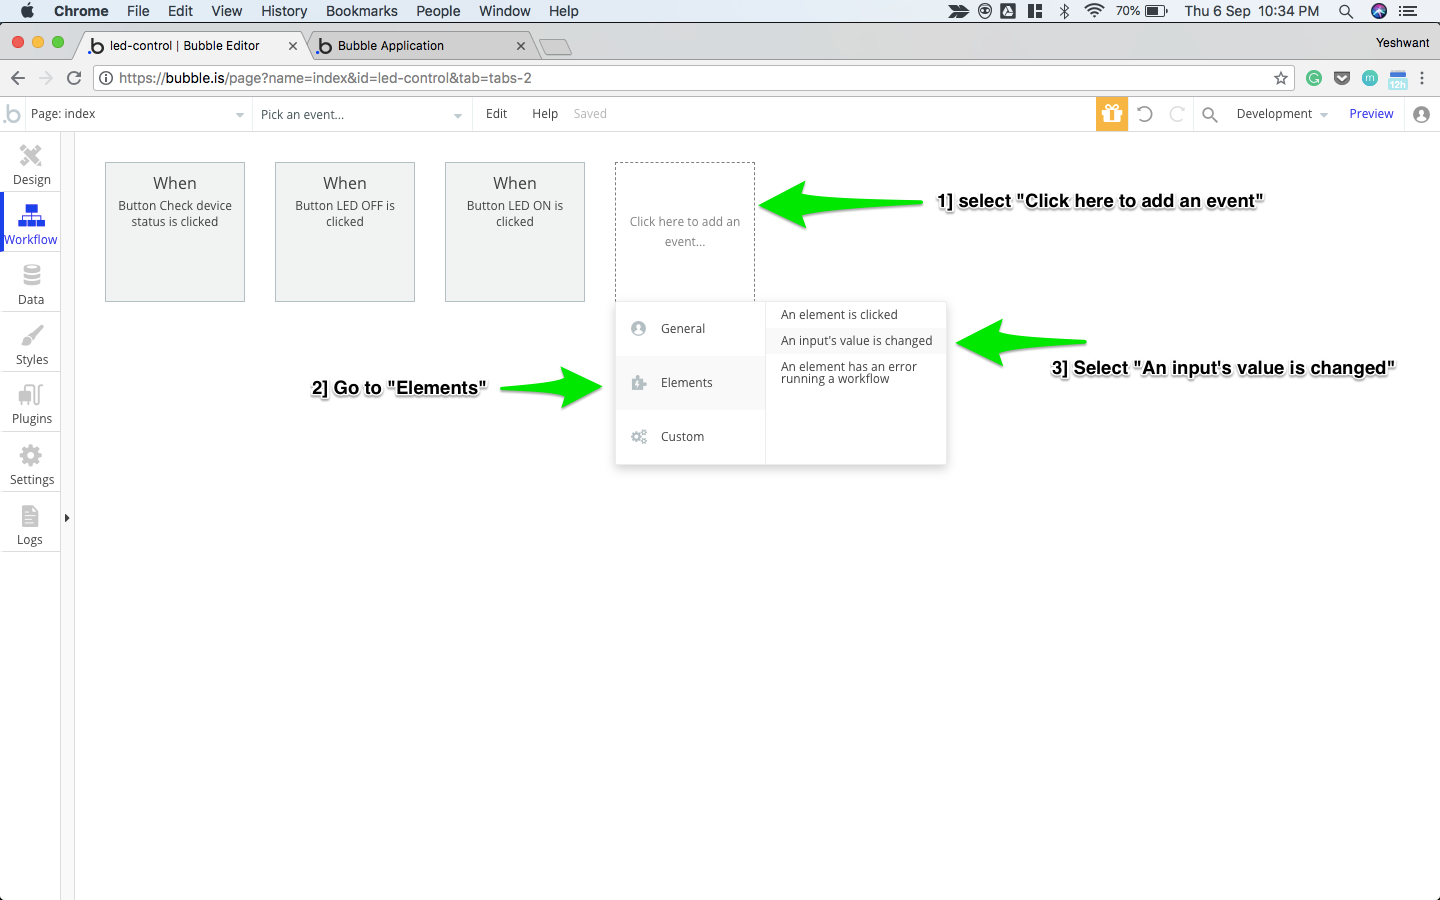
- Go to the Workflow section.
- Select "Click here to add an event.."
- Go to Elements
- Choose "An Input's value is changed"

Setting action for the slider
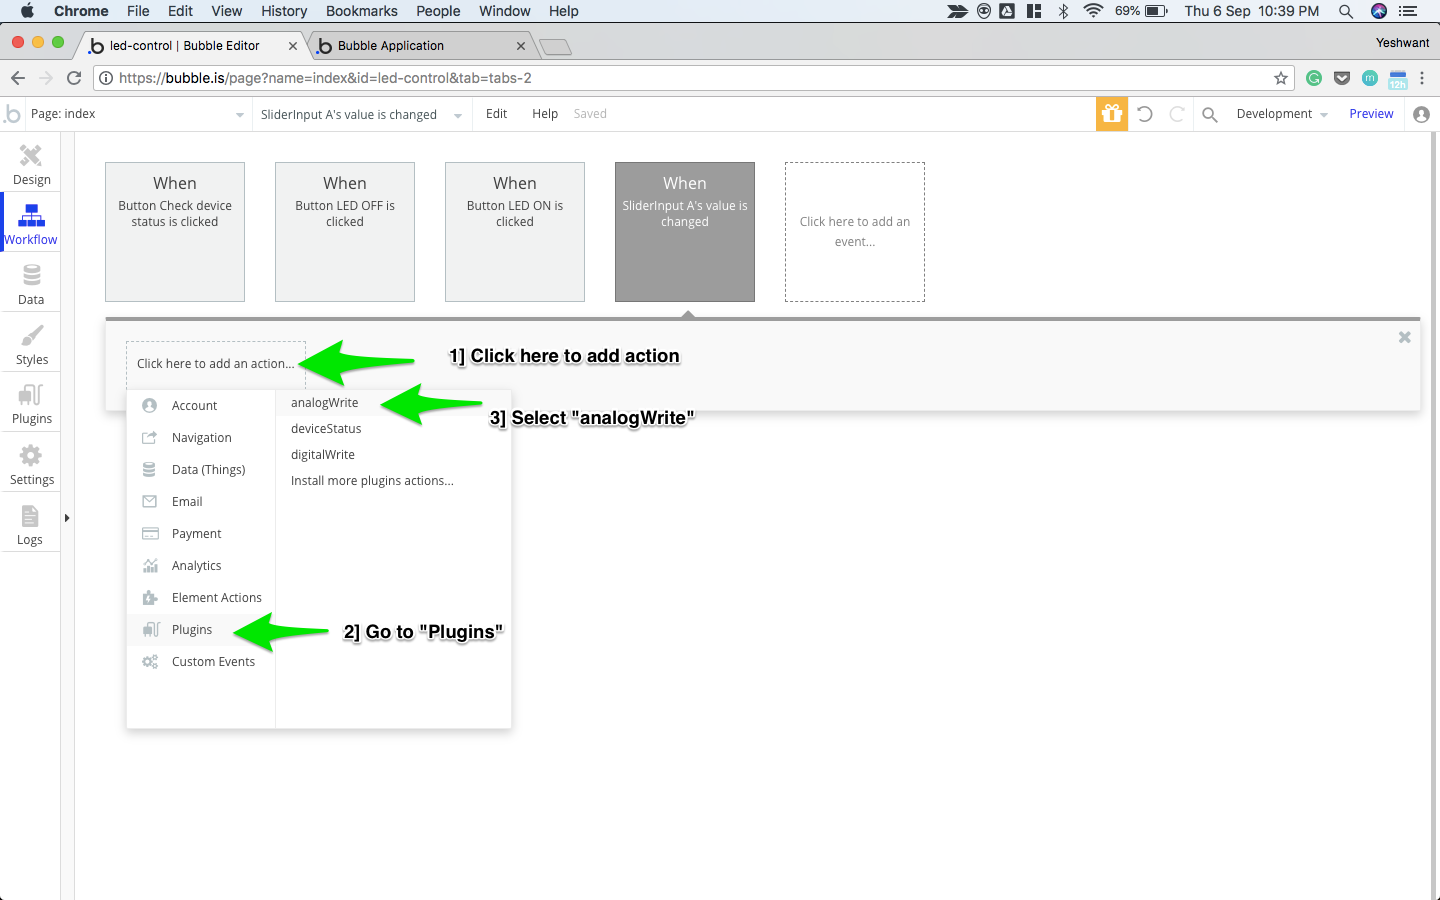
- Go to "Click here to add an action"
- Go to "Plugins"
- Select "analogWrite"

Creating action for the slider
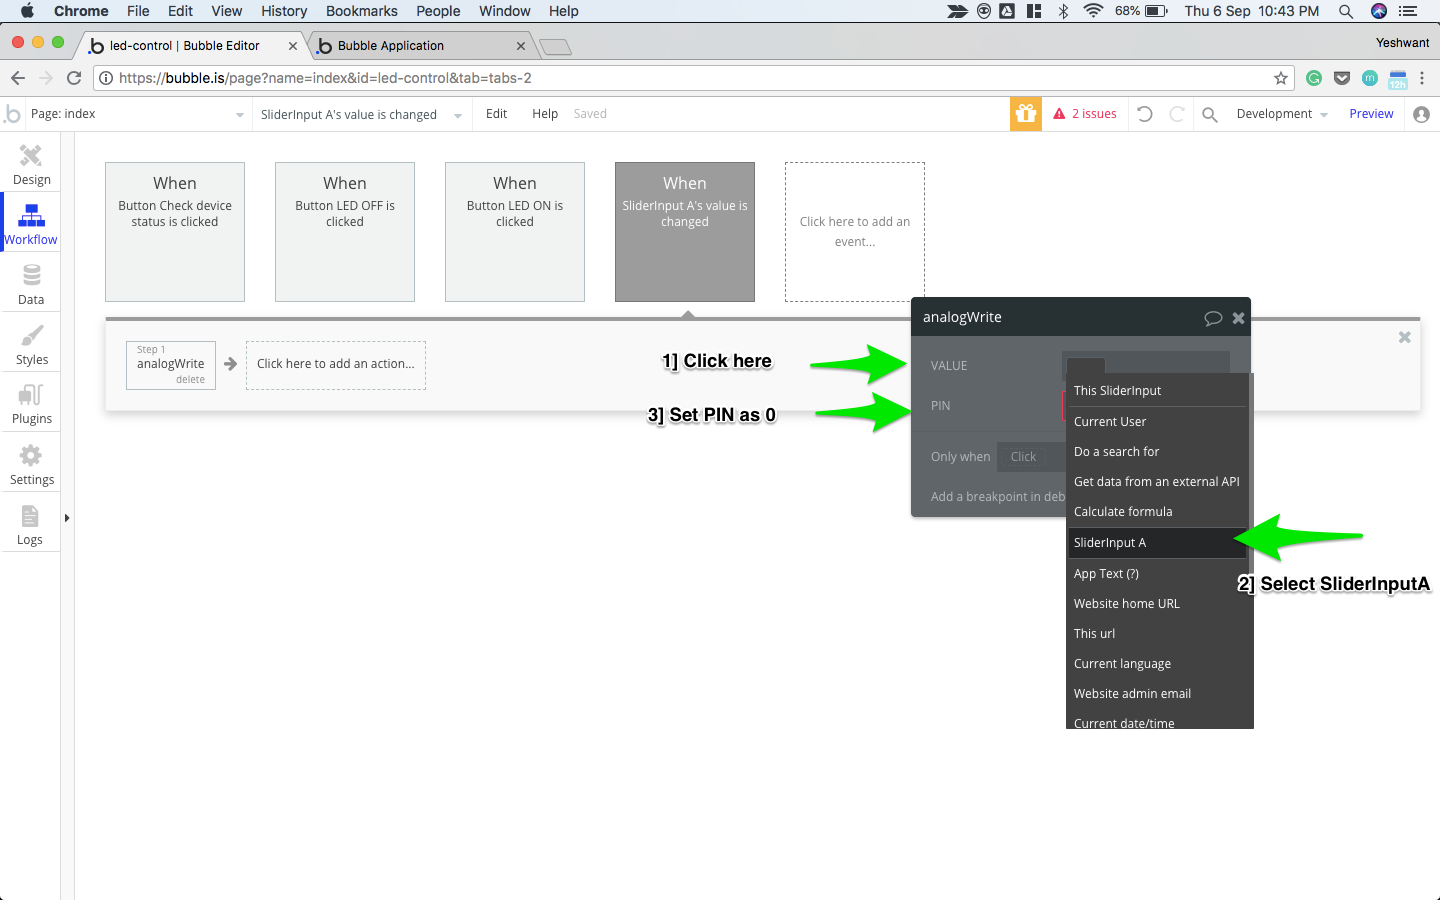
Next, we shall set the value for analogWrite as the dynamic value of slider's position.
- Click on VALUE's field.
- Select "SliderInput A".
- Set PIN as 0.

Setting dynamic value of the slider
Go to preview and test the slider. The intensity of LED will vary proportionally to the slider's position.
Here is the step by step video for this section.
Our App is now ready to be deployed. You can repeat the same steps if want to control any other o/p devices connected to rest of the pins.
Updated over 6 years ago
