Creating & Managing Products
Product in Bolt Cloud is a settings template that can be applied to multiple devices. It is possible to have many devices linked to a single product but a single device cannot have multiple products associated with it.
The product can be configured for two things.
- For controlling the output Bolt devices
- For monitoring the input Bolt devices
Products for output devices.
Creating product
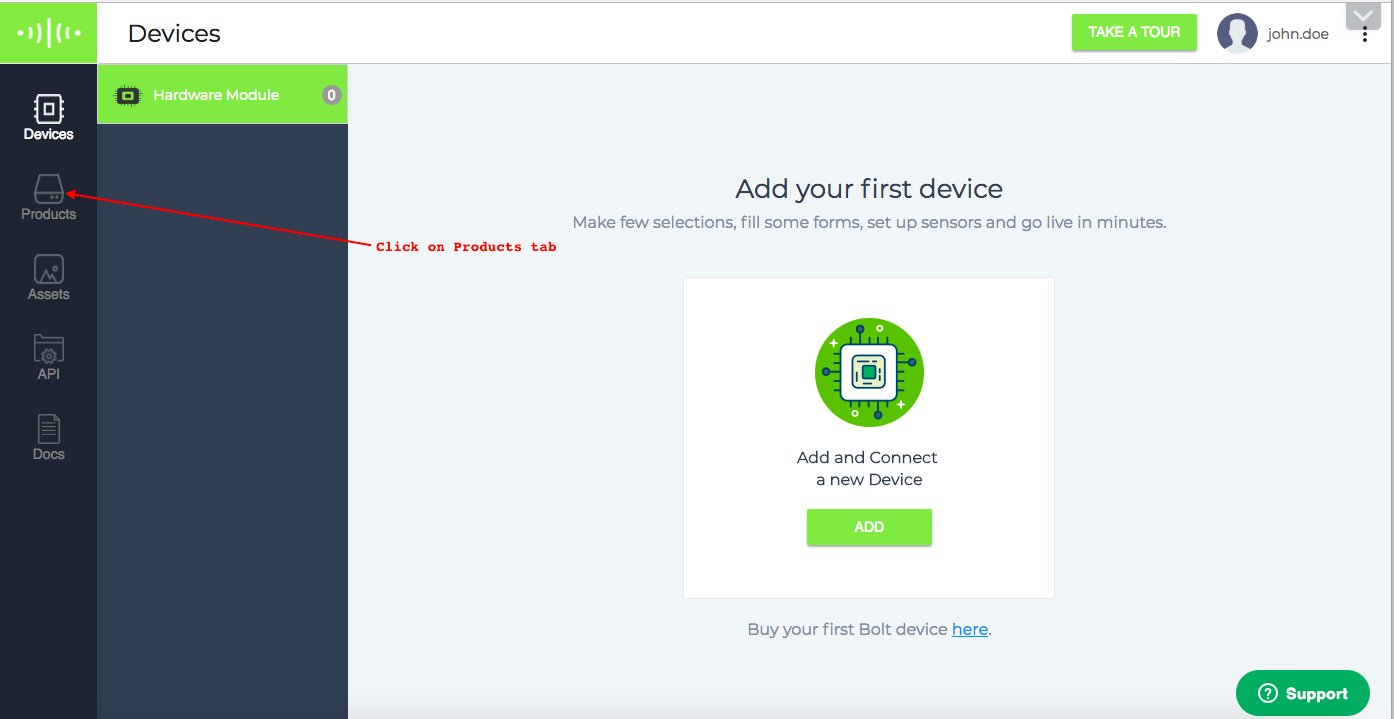
- Go to Products tab.
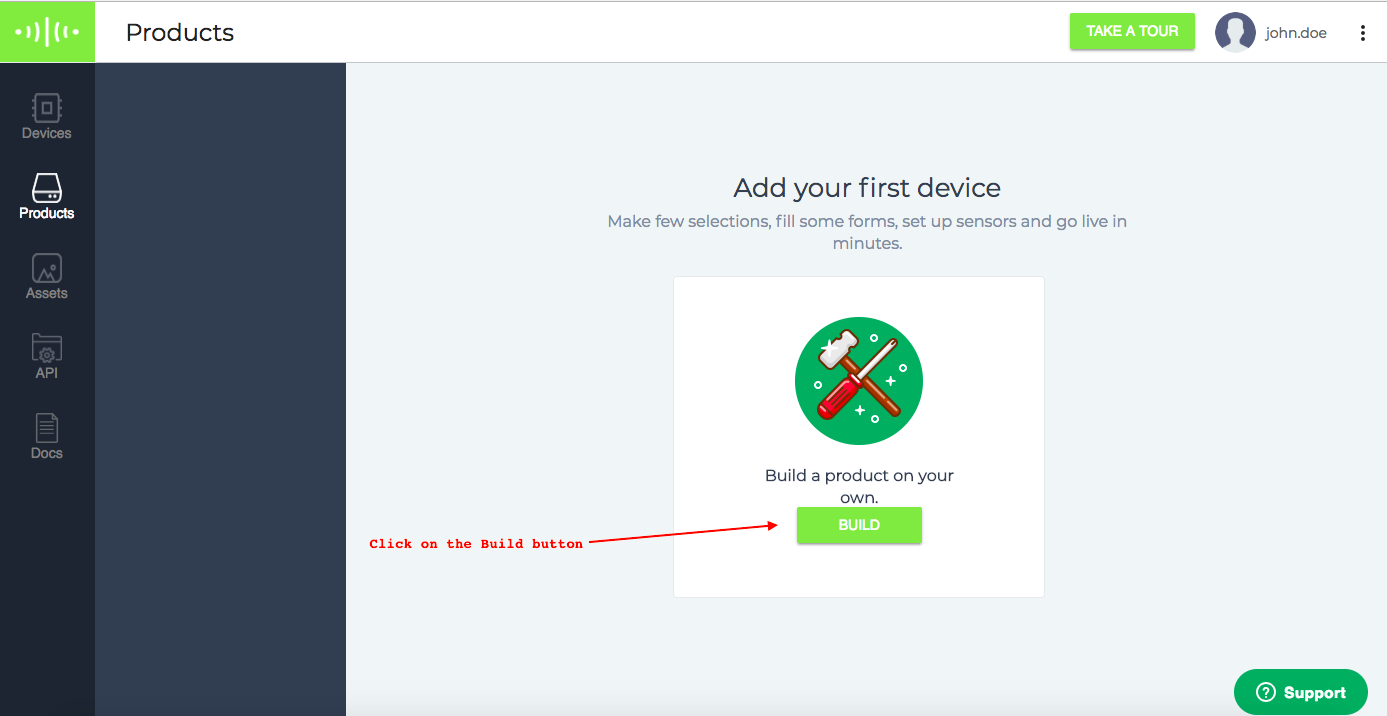
- Click on the Build button
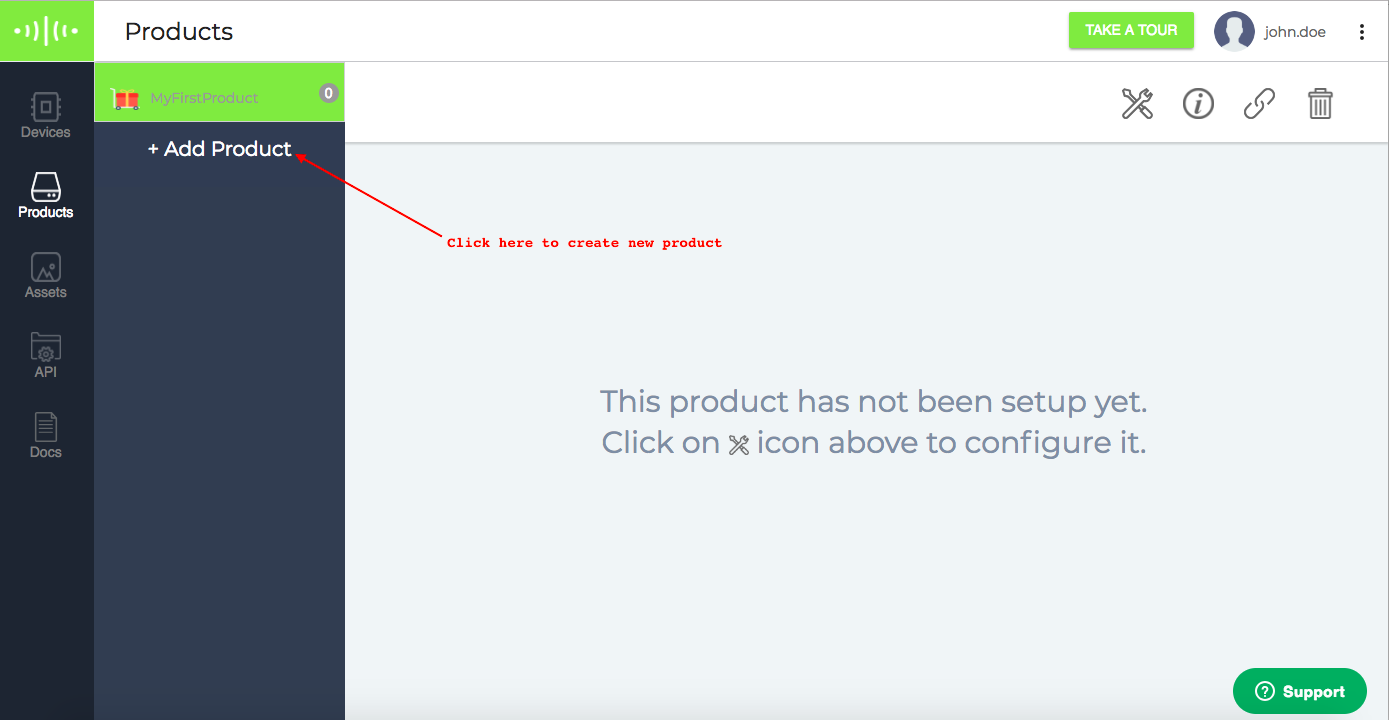
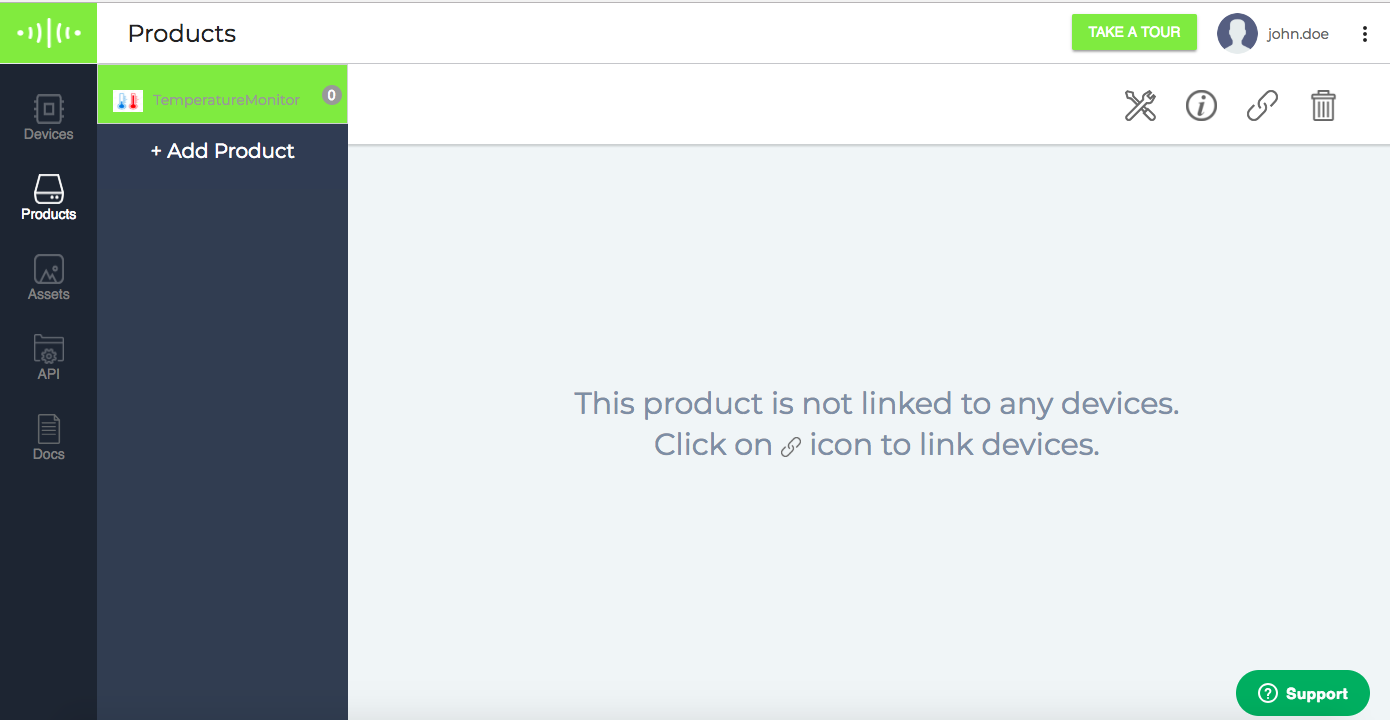
Note: If you have already created the product then click on + Add Product as shown in the image below.
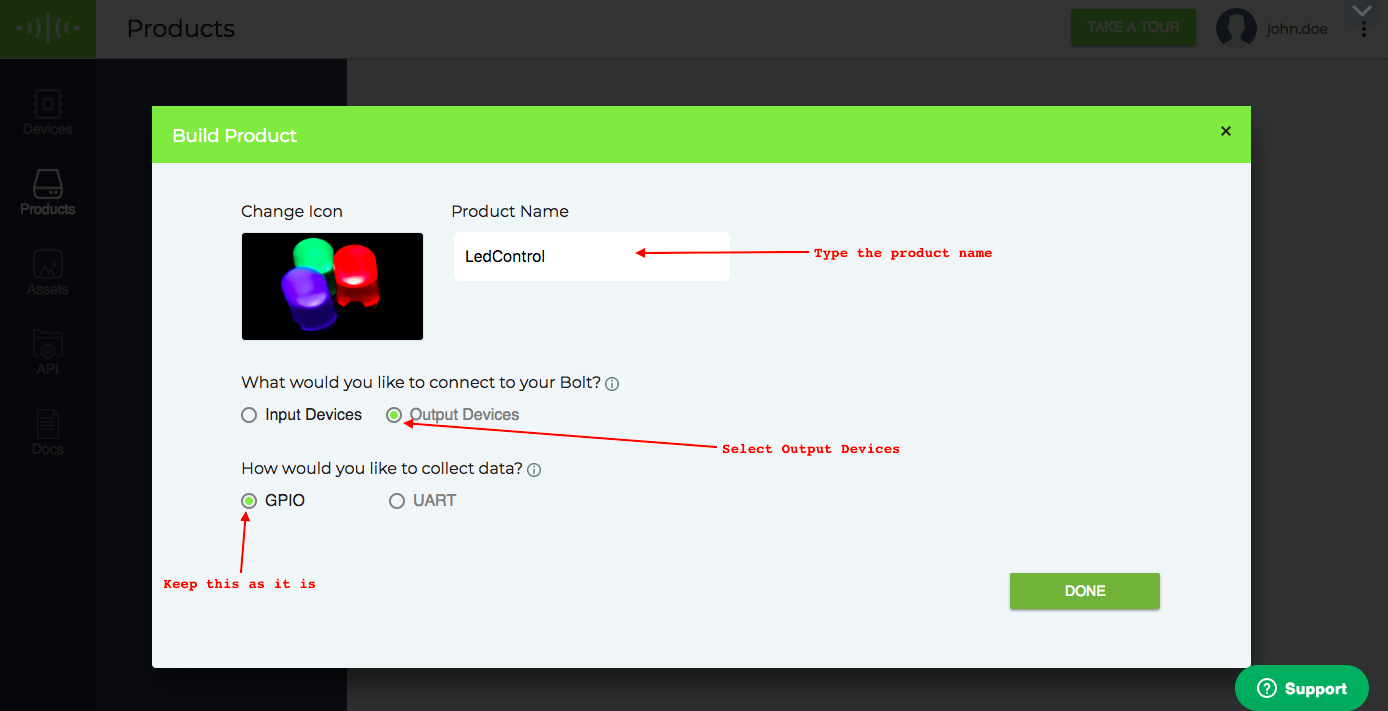
- Enter the product name and choose the output device in the radio button.
Note: Product names can only have alphabets, numbers, and underscore ( _ ) as a special character. Spaces are not allowed.
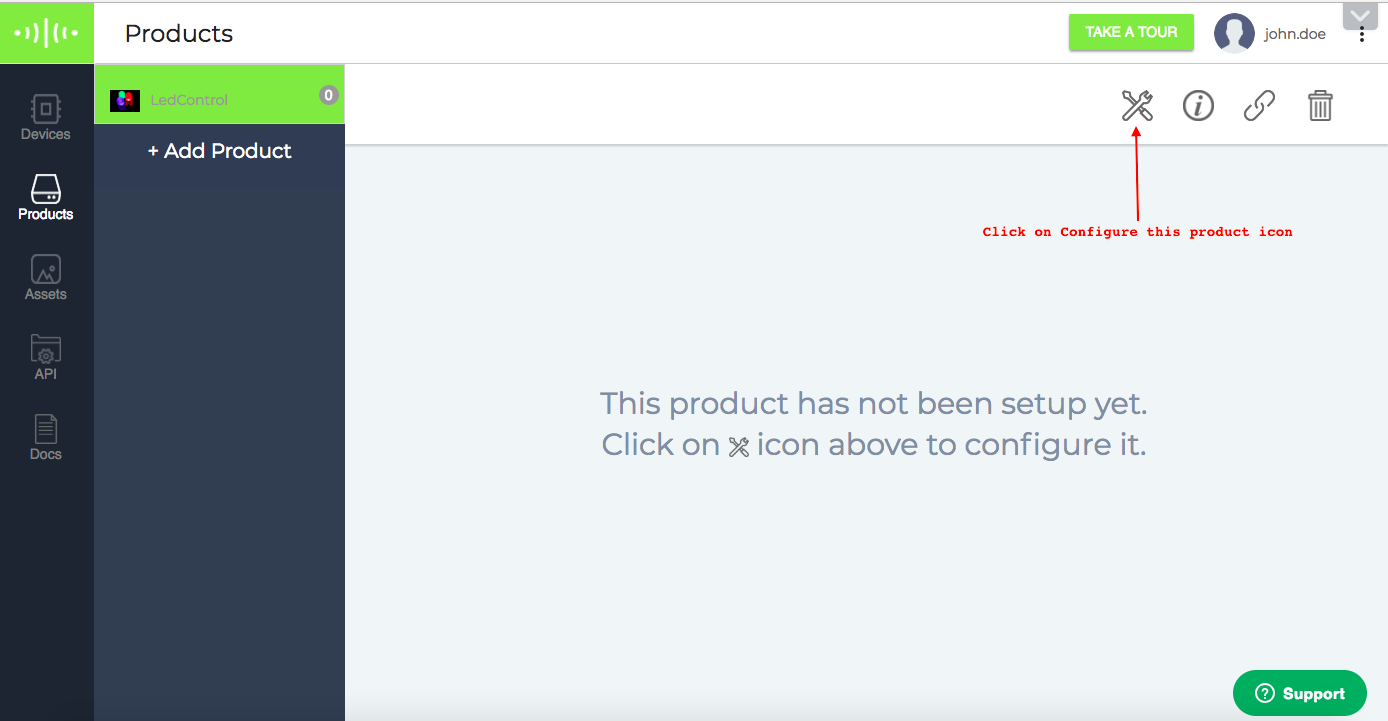
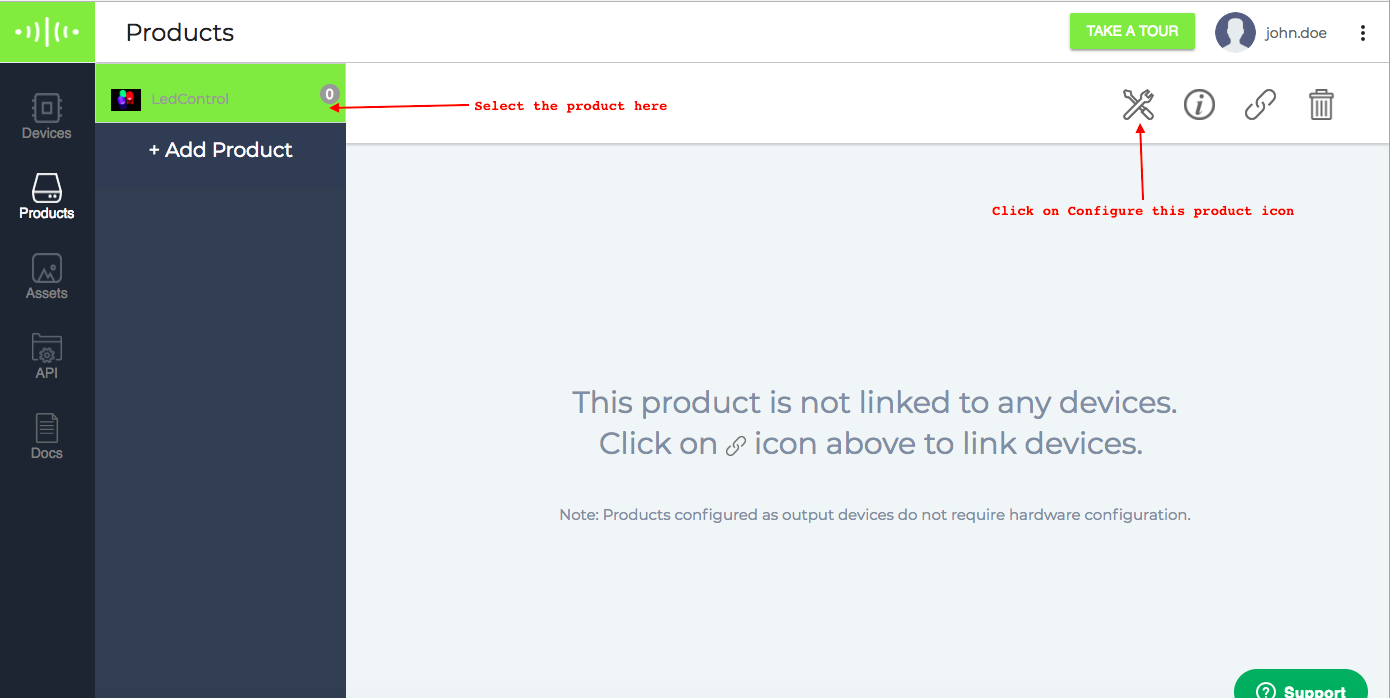
- Your product is created, now we will configure it. Click on the Configure this product icon.
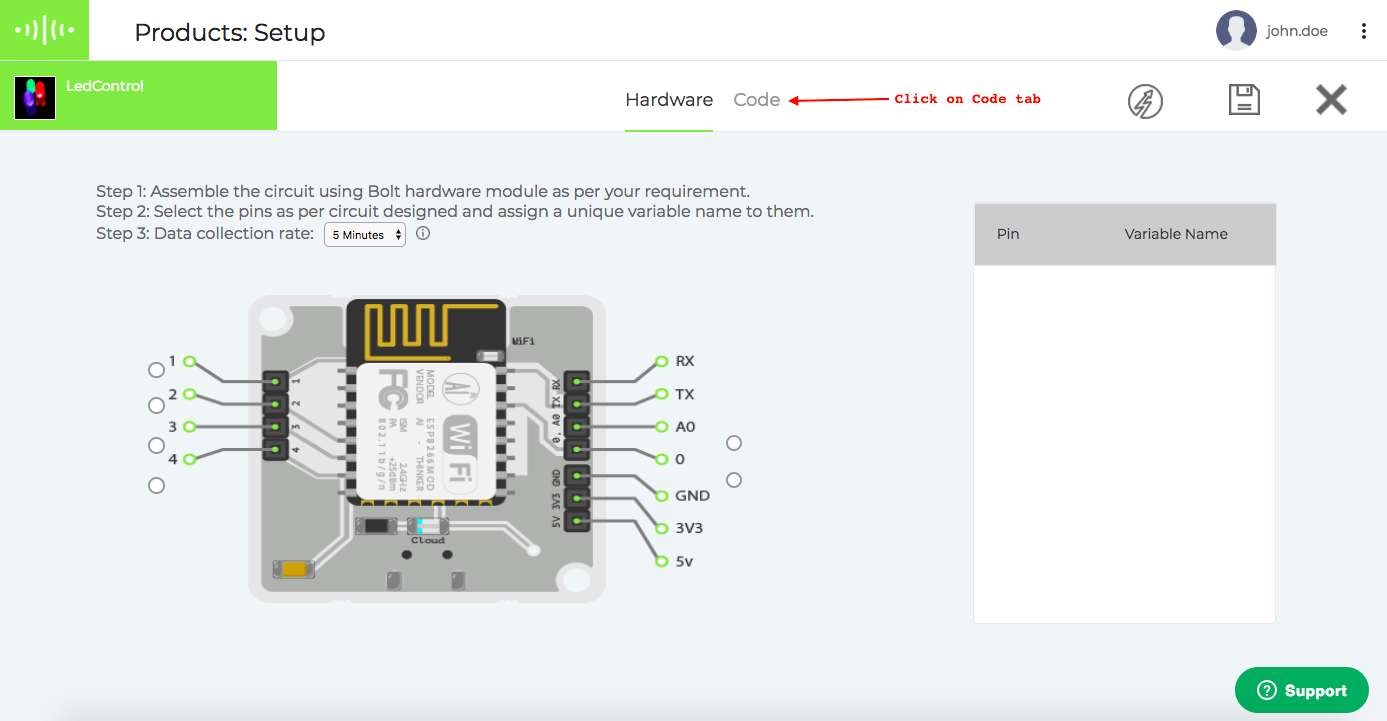
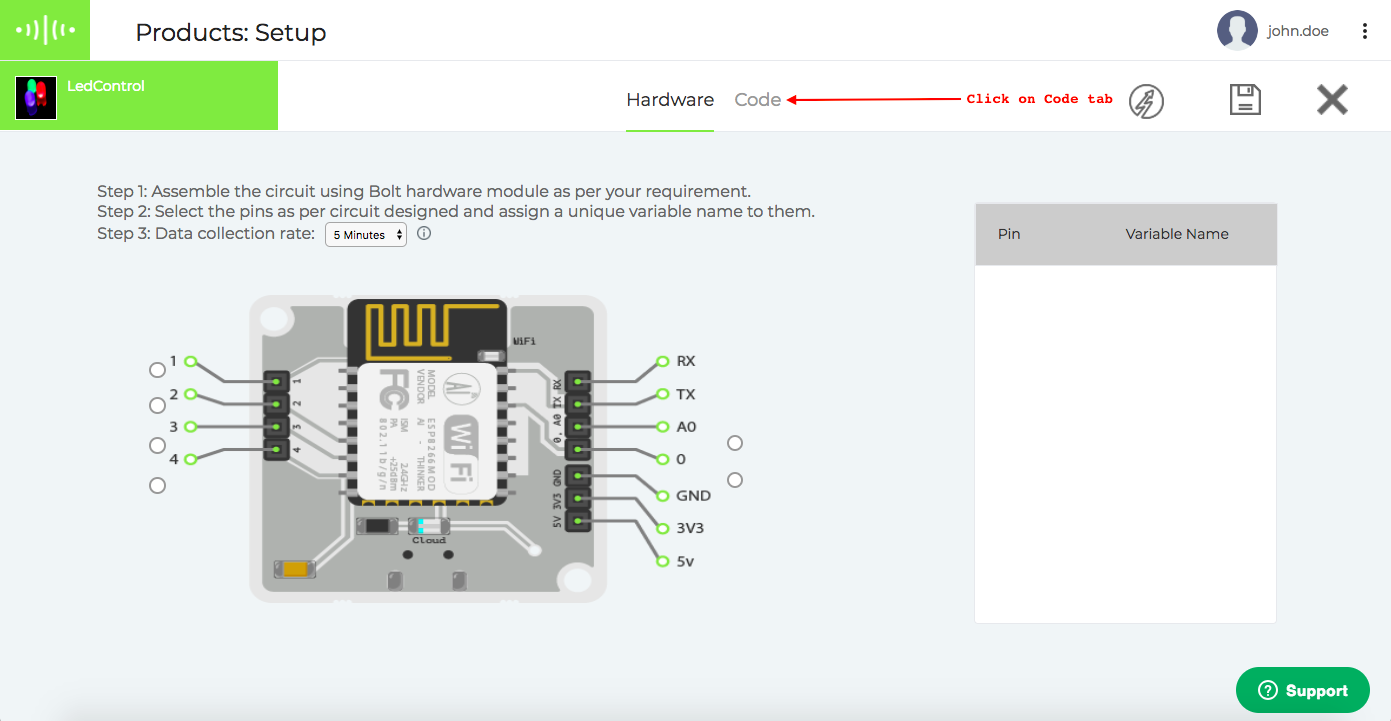
- Product configuration page will be opened. Click on the Code tab.
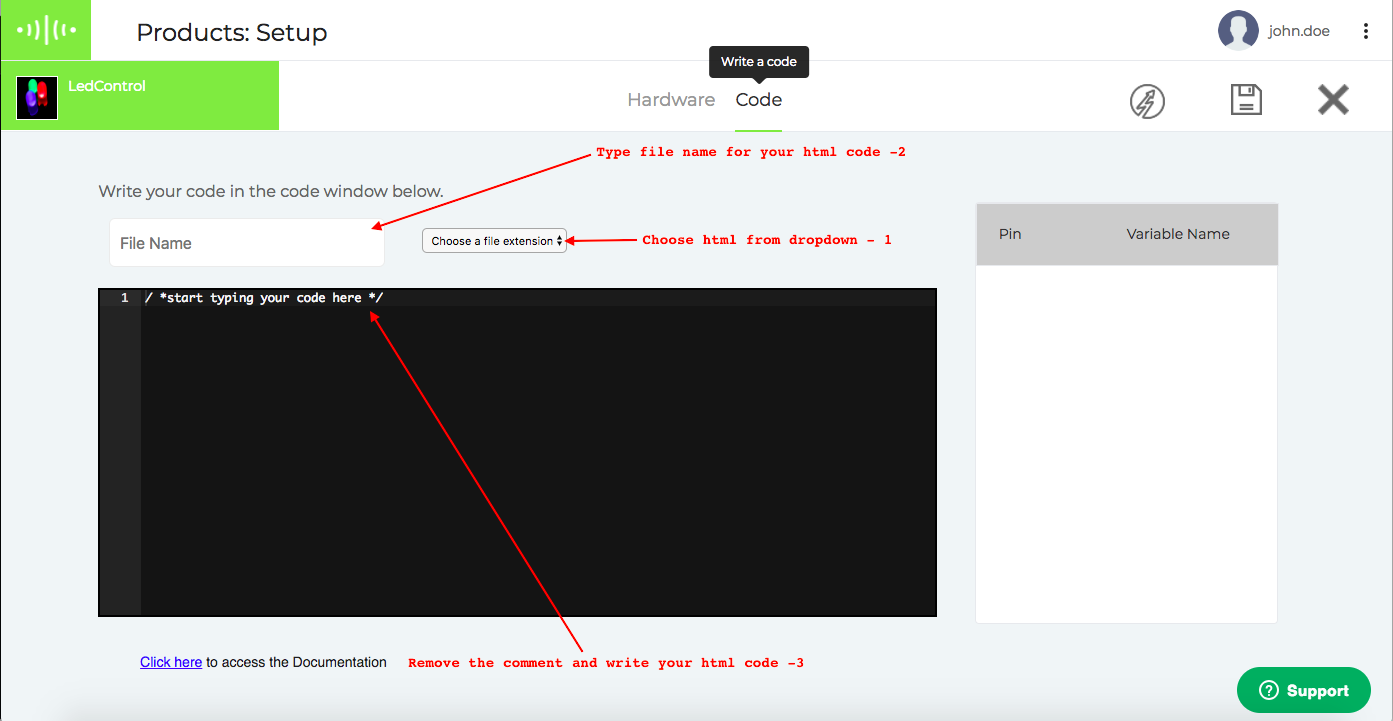
- First, choose the html from the dropdown, then enter the file name for your HTML code and in last write your html code for controlling the devices.
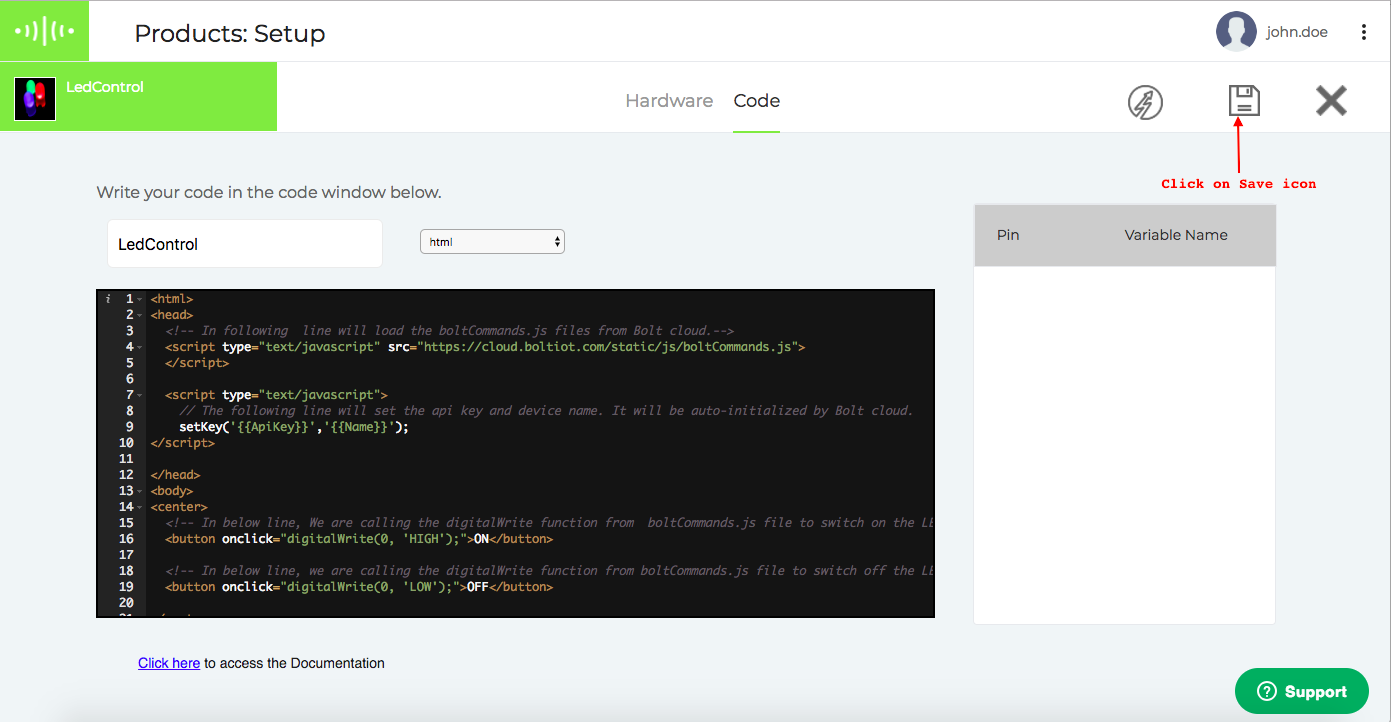
- After writing the code, Click on the Save your configuration button.
- A confirmation pop will be open, Click on the SAVE button.
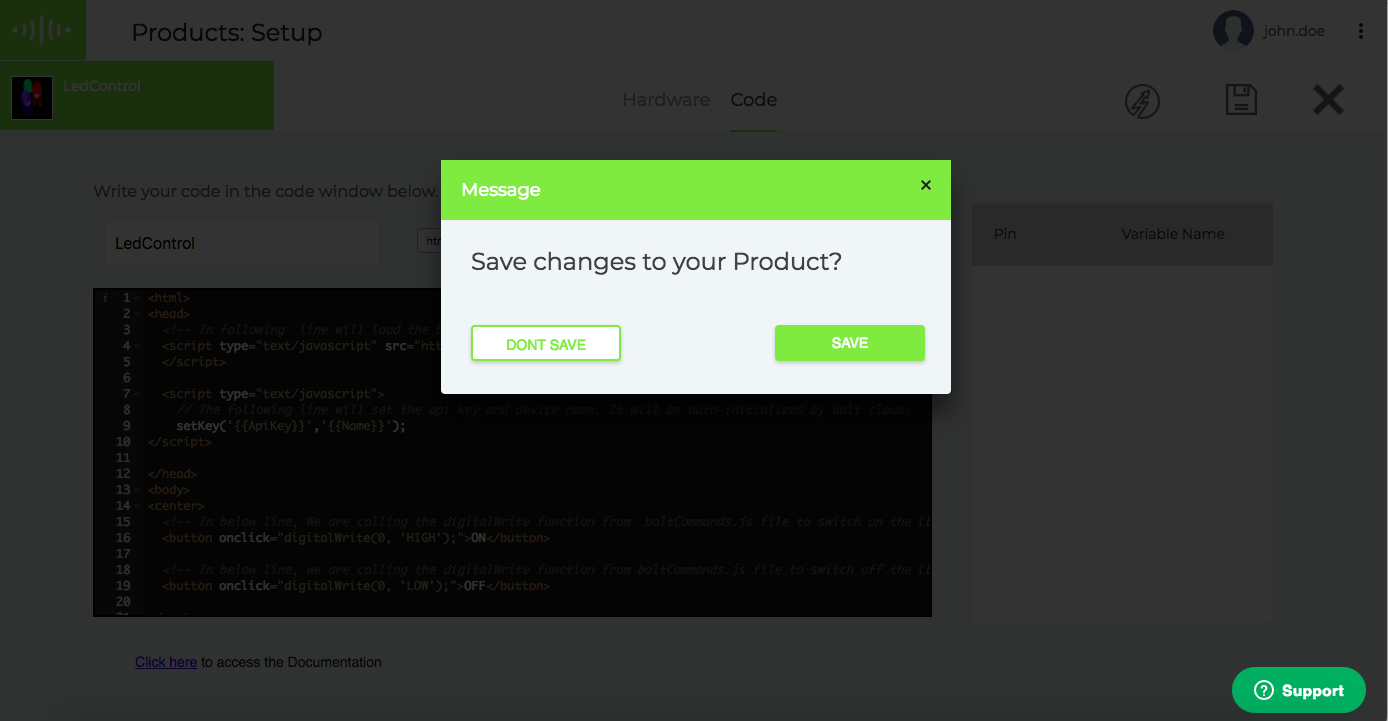
- Your product is configured, now you can link the product with your device.
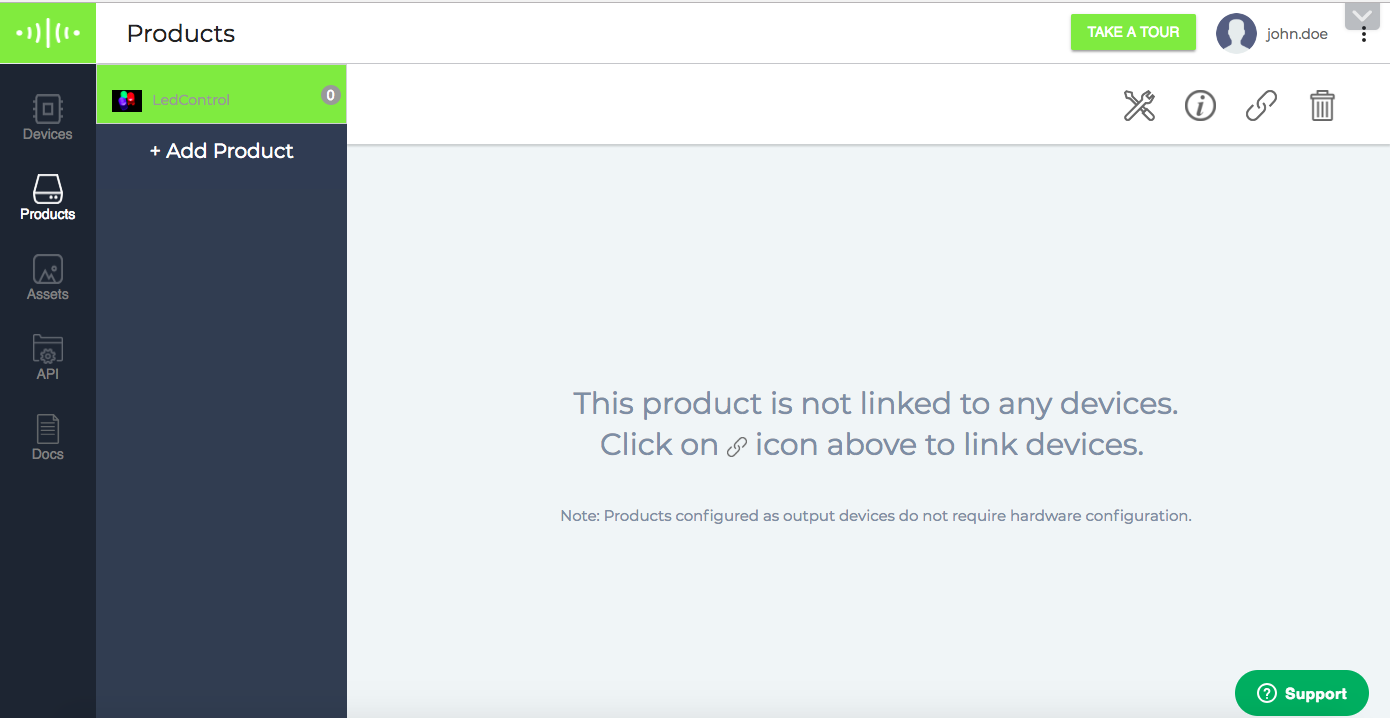
Editing product
After configuring the product, you can configure the product again to edit the product UI(HTML).
- Go to the product tab and select the product that you want to configure again.
- Product configuration page will be opened. Click on the Code tab.
- You can change the HTML code, or the file name
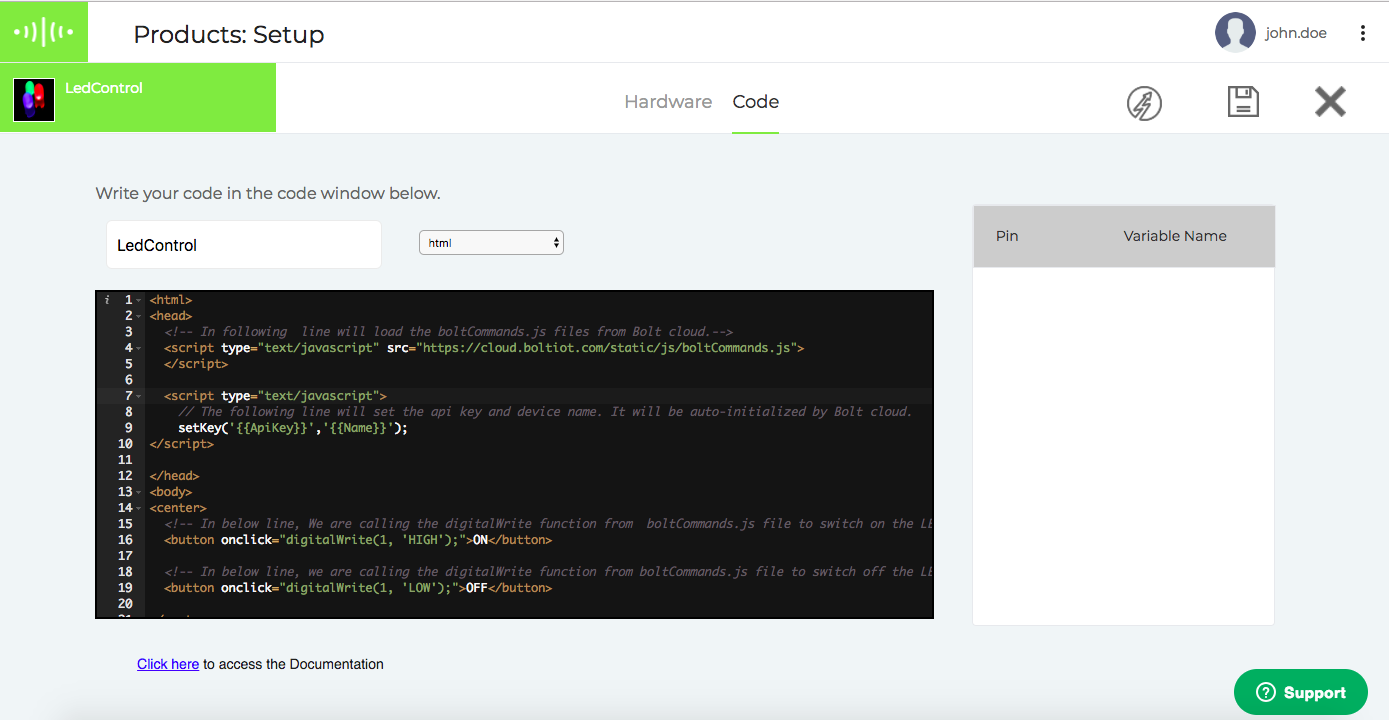
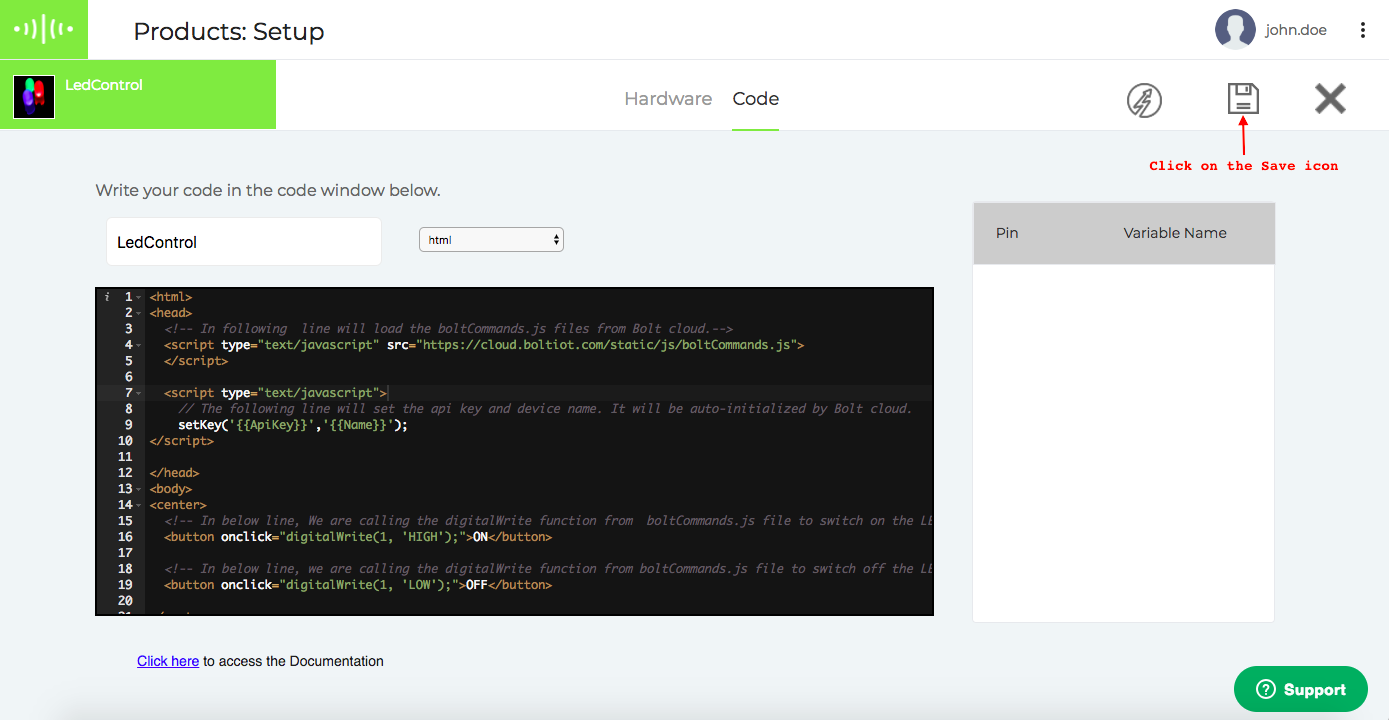
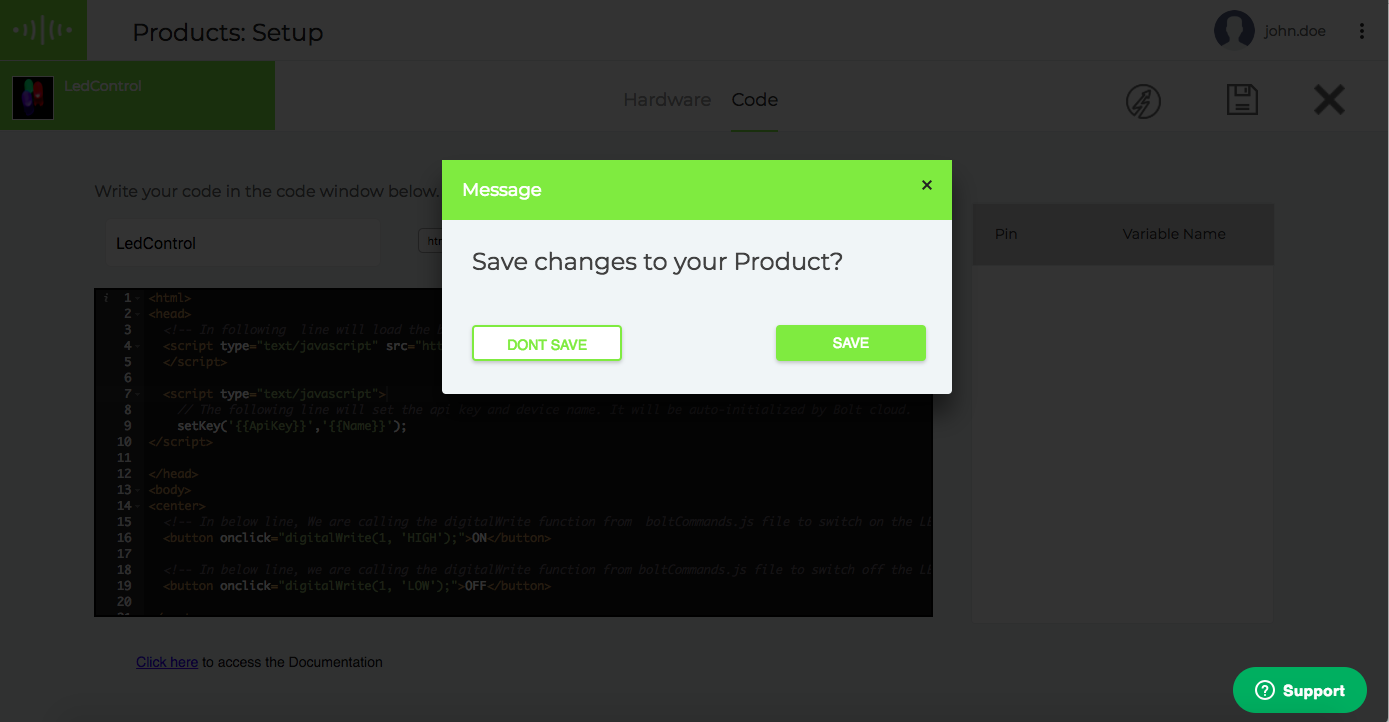
Your code is updated and it will be reflected in all the devices linked with this product.
Products for input devices.
Creating product
- Go to Products tab.
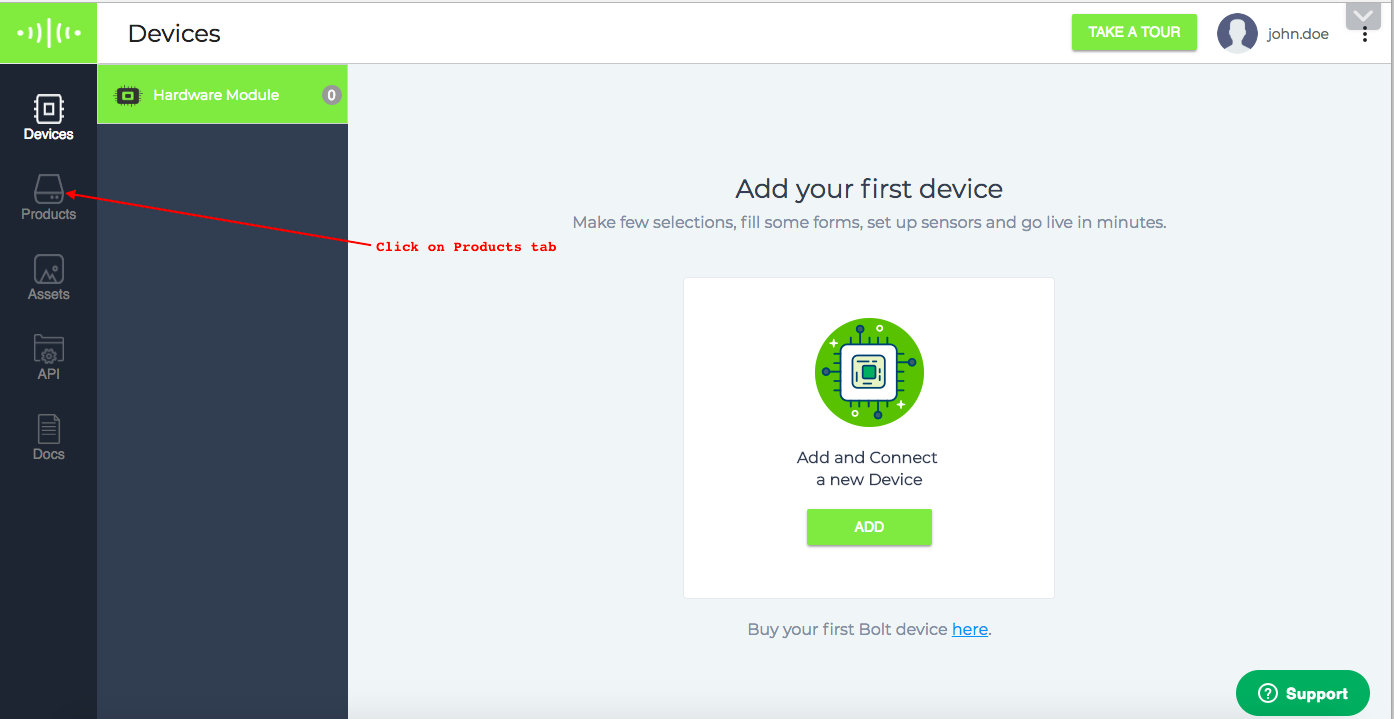
- Click on the Build button
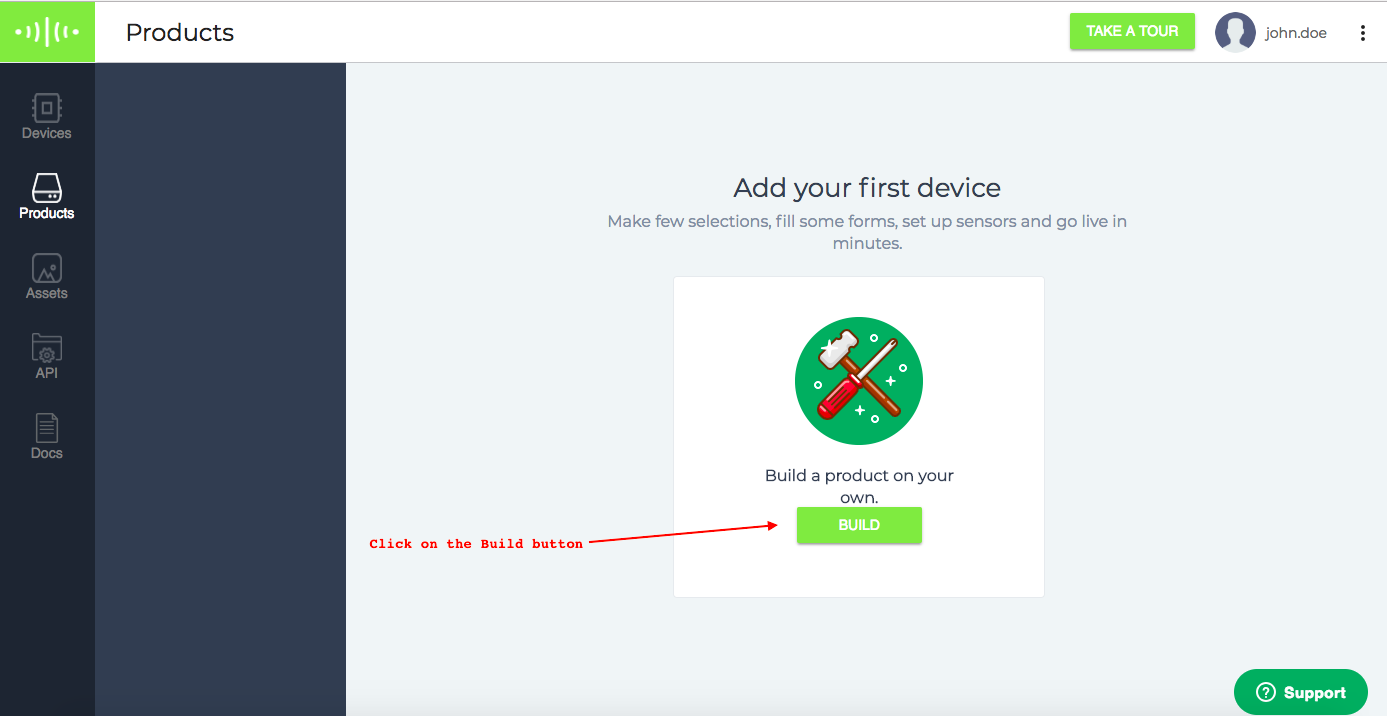
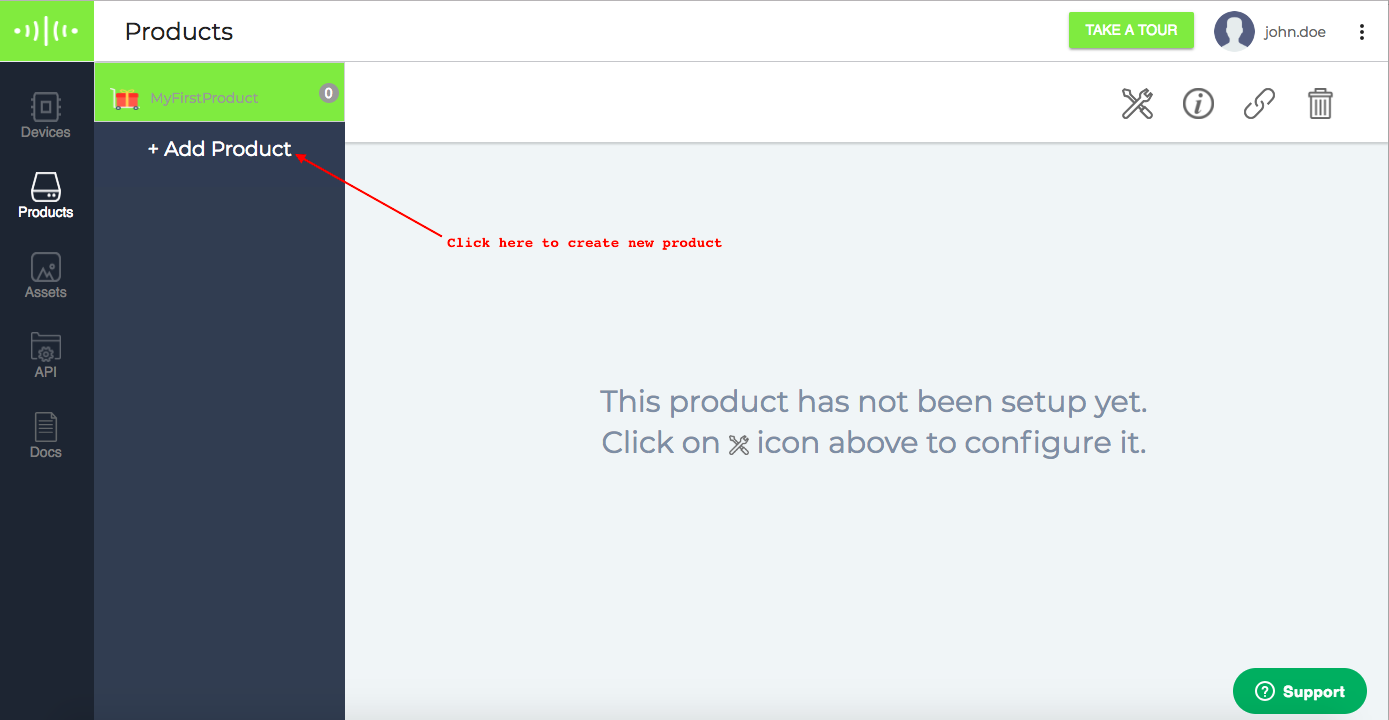
Note: If you have already created the product then click on + Add Product as shown in the image below.
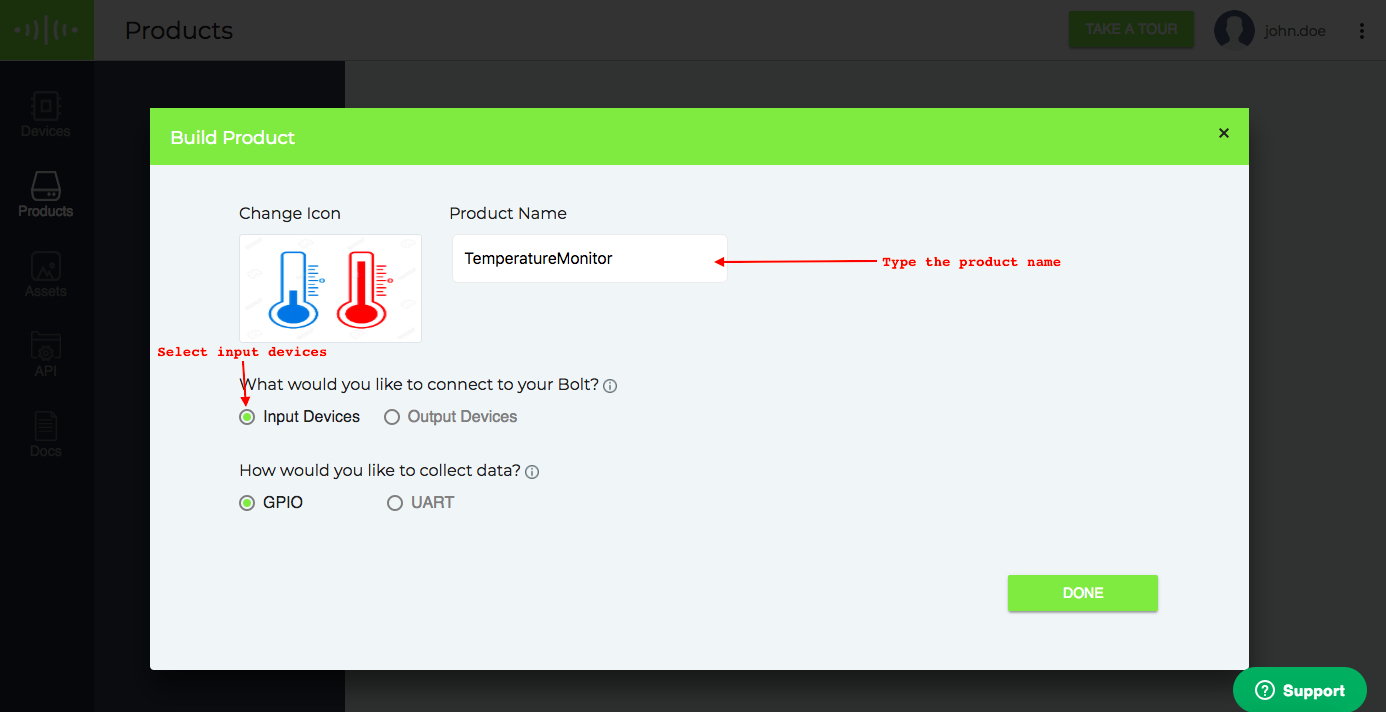
- Enter the product name and choose the input device in the radio button. You can collect the data in two ways.
- GPIO
- UART
I am choosing the GPIO here, but the steps for UART will be the same.
Note: Product names can only have alphabets, numbers, and underscore ( _ ) as a special character. Spaces are not allowed.
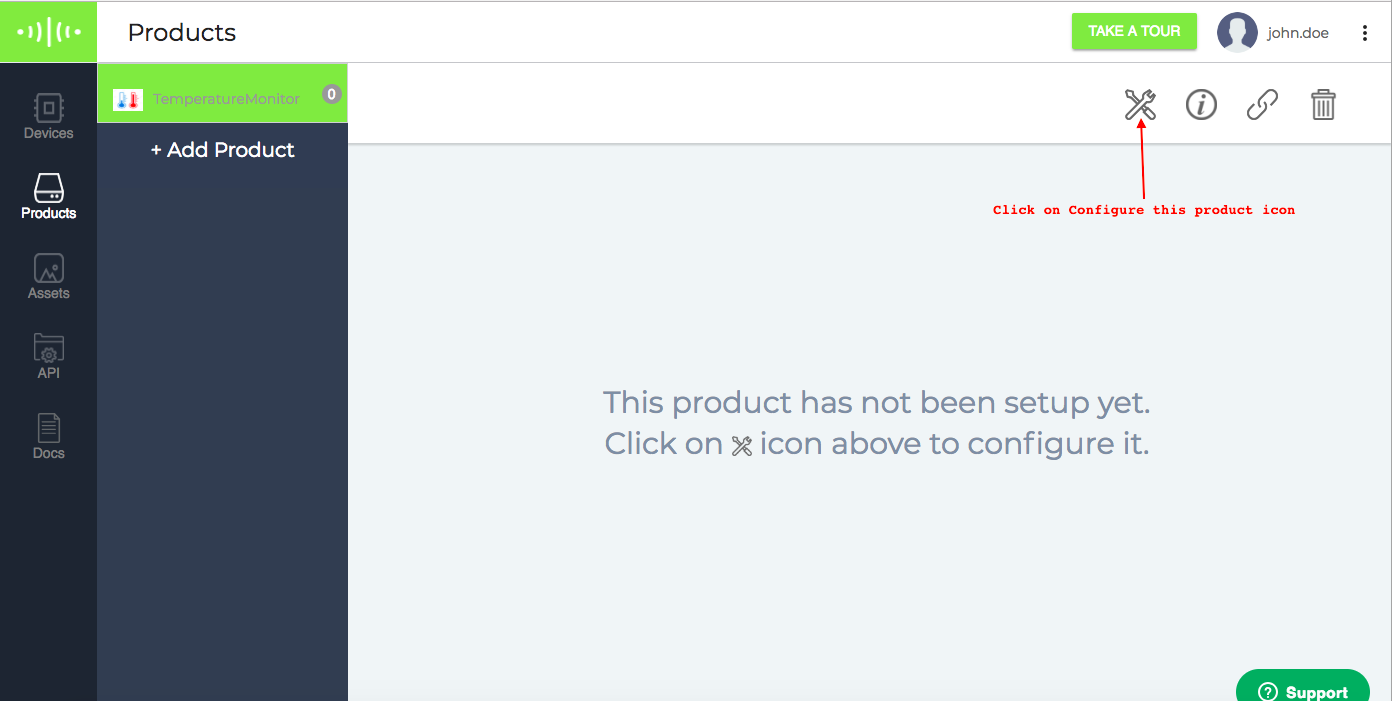
- Your product is created, now we will configure it. Click on the Configure this product icon.
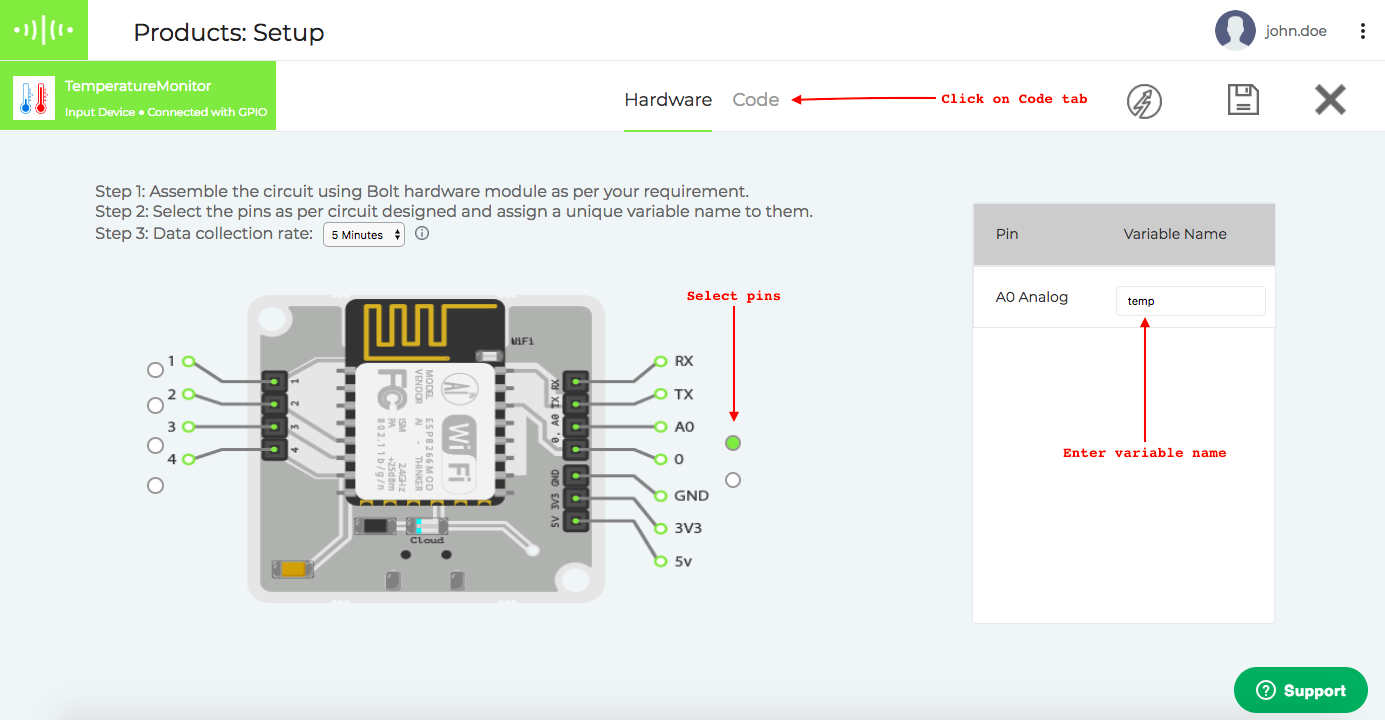
- Product configuration page will be opened. Click select the pins, enter the variable name and the click on Code tab.
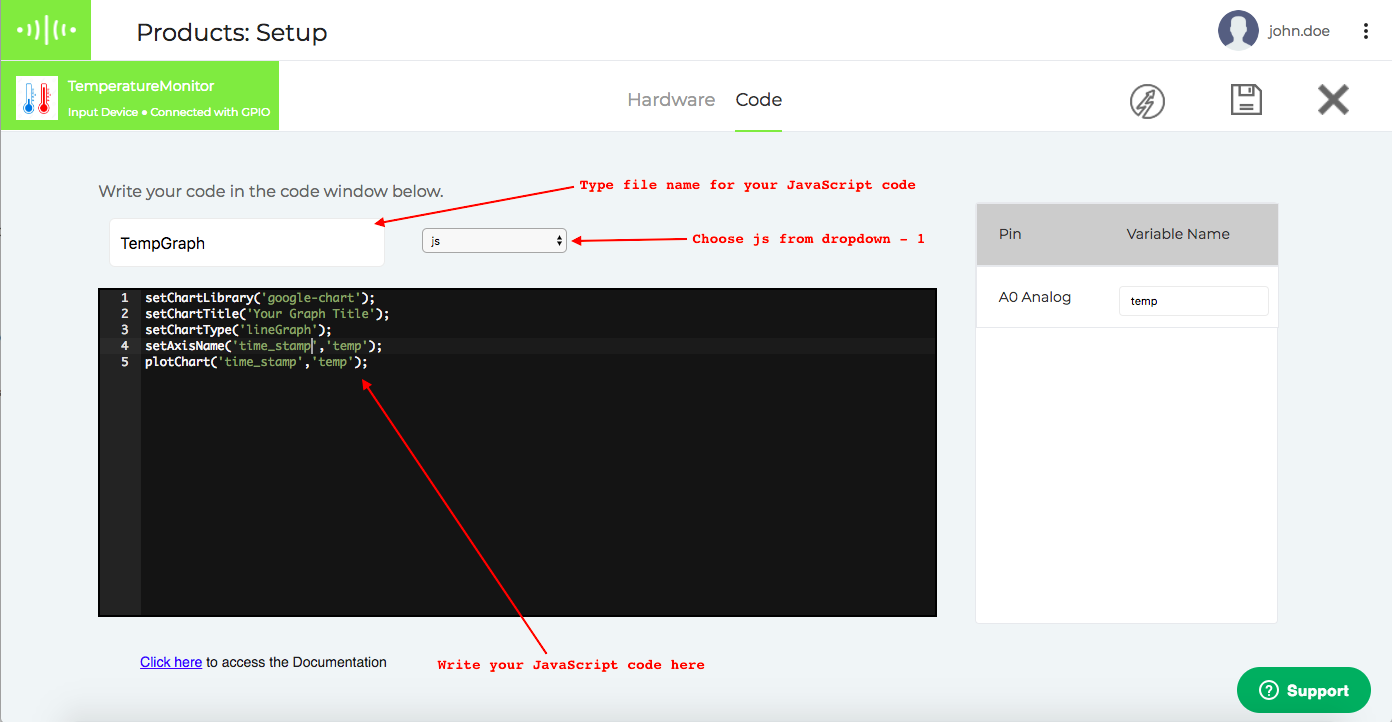
- First, choose the js from the dropdown, then enter the file name for your Javascript code and in last write your js code for plotting the graph.
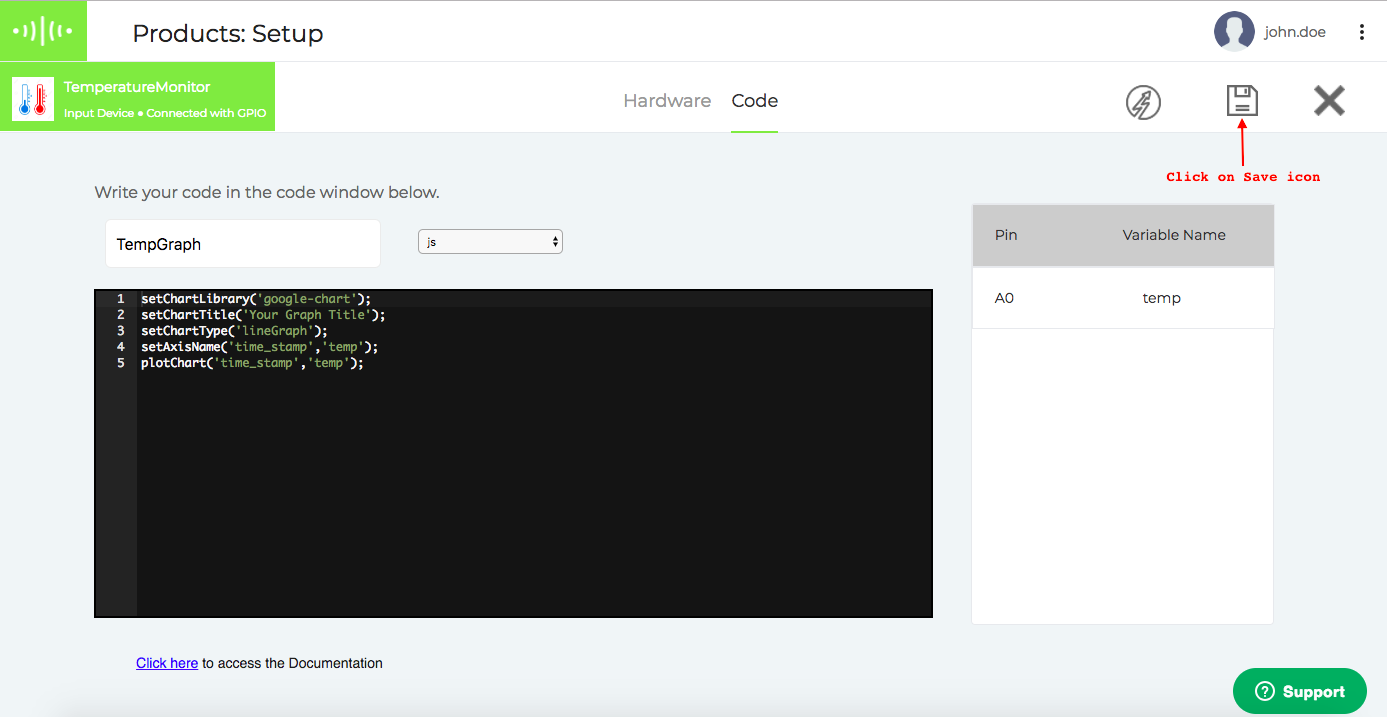
- After writing the code, Click on the Save your configuration button.
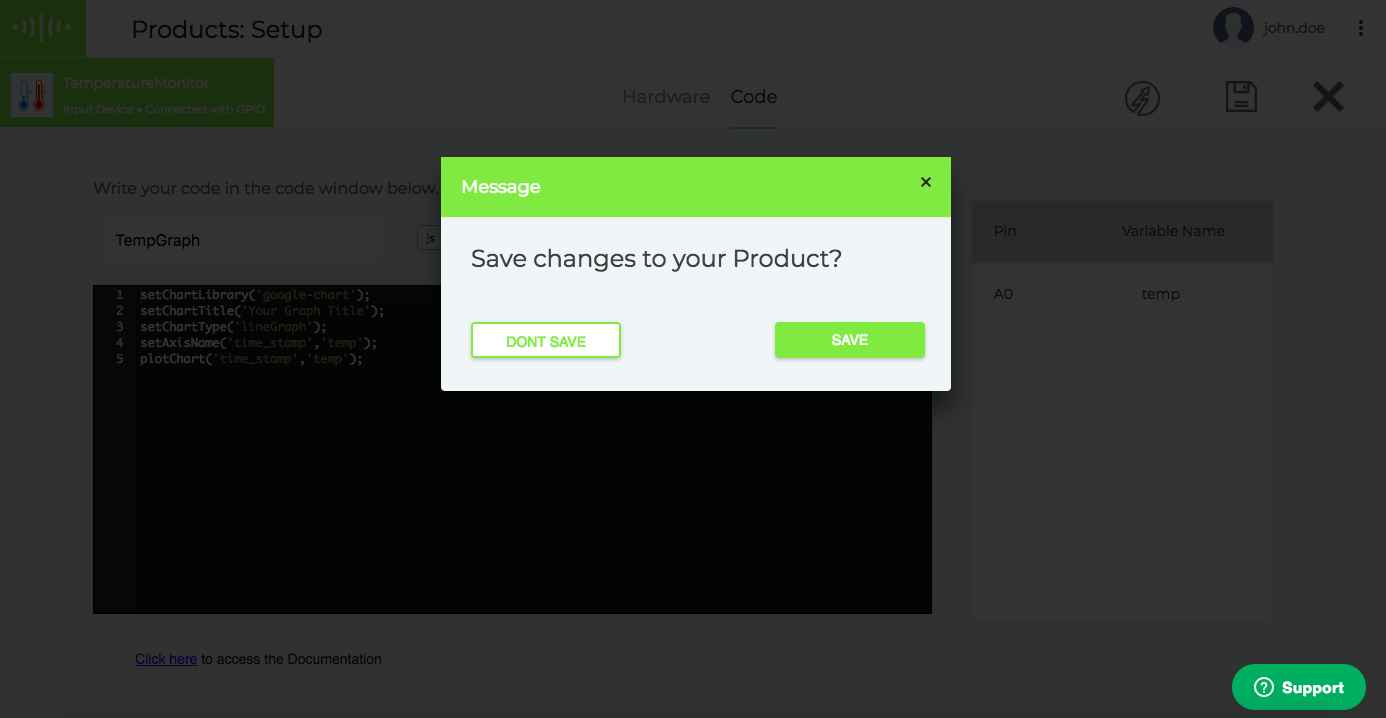
- A confirmation pop will be open, Click on the SAVE button.
- Your product is configured, now you can link the product with your device.
Updated over 6 years ago
