Adding Raspberry Pi to Bolt Cloud
Beta feature
This page documents a Beta feature. Beta features are new features on the Bolt Cloud. This means that you might face some issues while using this feature.
If you face any issues with this feature, please post your issue to form.boltiot.com and add the tag "Raspberry Pi" to the post.
Prerequisites
Make sure that you have set up your Raspberry Pi to connect to the Internet, and have SSH access to it.
If not then visit this page for the instructions on Setting up Raspberry Pi
Setting up the Raspberry Pi as a Bolt
The process to add Raspberry Pi as Bolt is super simple.
Step 1: Copy the command below in a notepad.
wget https://cloud.boltiot.com/PiBoltInstaller/<api_key> -O install.sh -o /dev/null 2>/dev/null;sudo bash install.sh
Step 2: Replace the API key with the API key of your cloud account. Visit https://cloud.boltiot.com/api_credentials to get your API key.
Step 3: Log in to your Raspberry Pi terminal.
Step 4: Run the command with your API key in your Raspberry Pi terminal.
That's it. Your Raspberry Pi will now show in your Bolt Cloud account. 🎉
P.S.: If your device does not show then refresh your cloud device page.
Confused about the steps above? Here are detailed instructions
Detailed instructions
Step 1: Copy the command below in a notepad. In this command, we need to add our API key.
wget https://cloud.boltiot.com/PiBoltInstaller/<api_key> -O install.sh -o /dev/null 2>/dev/null;sudo bash install.sh
Step 2 Login to https://cloud.boltiot.com

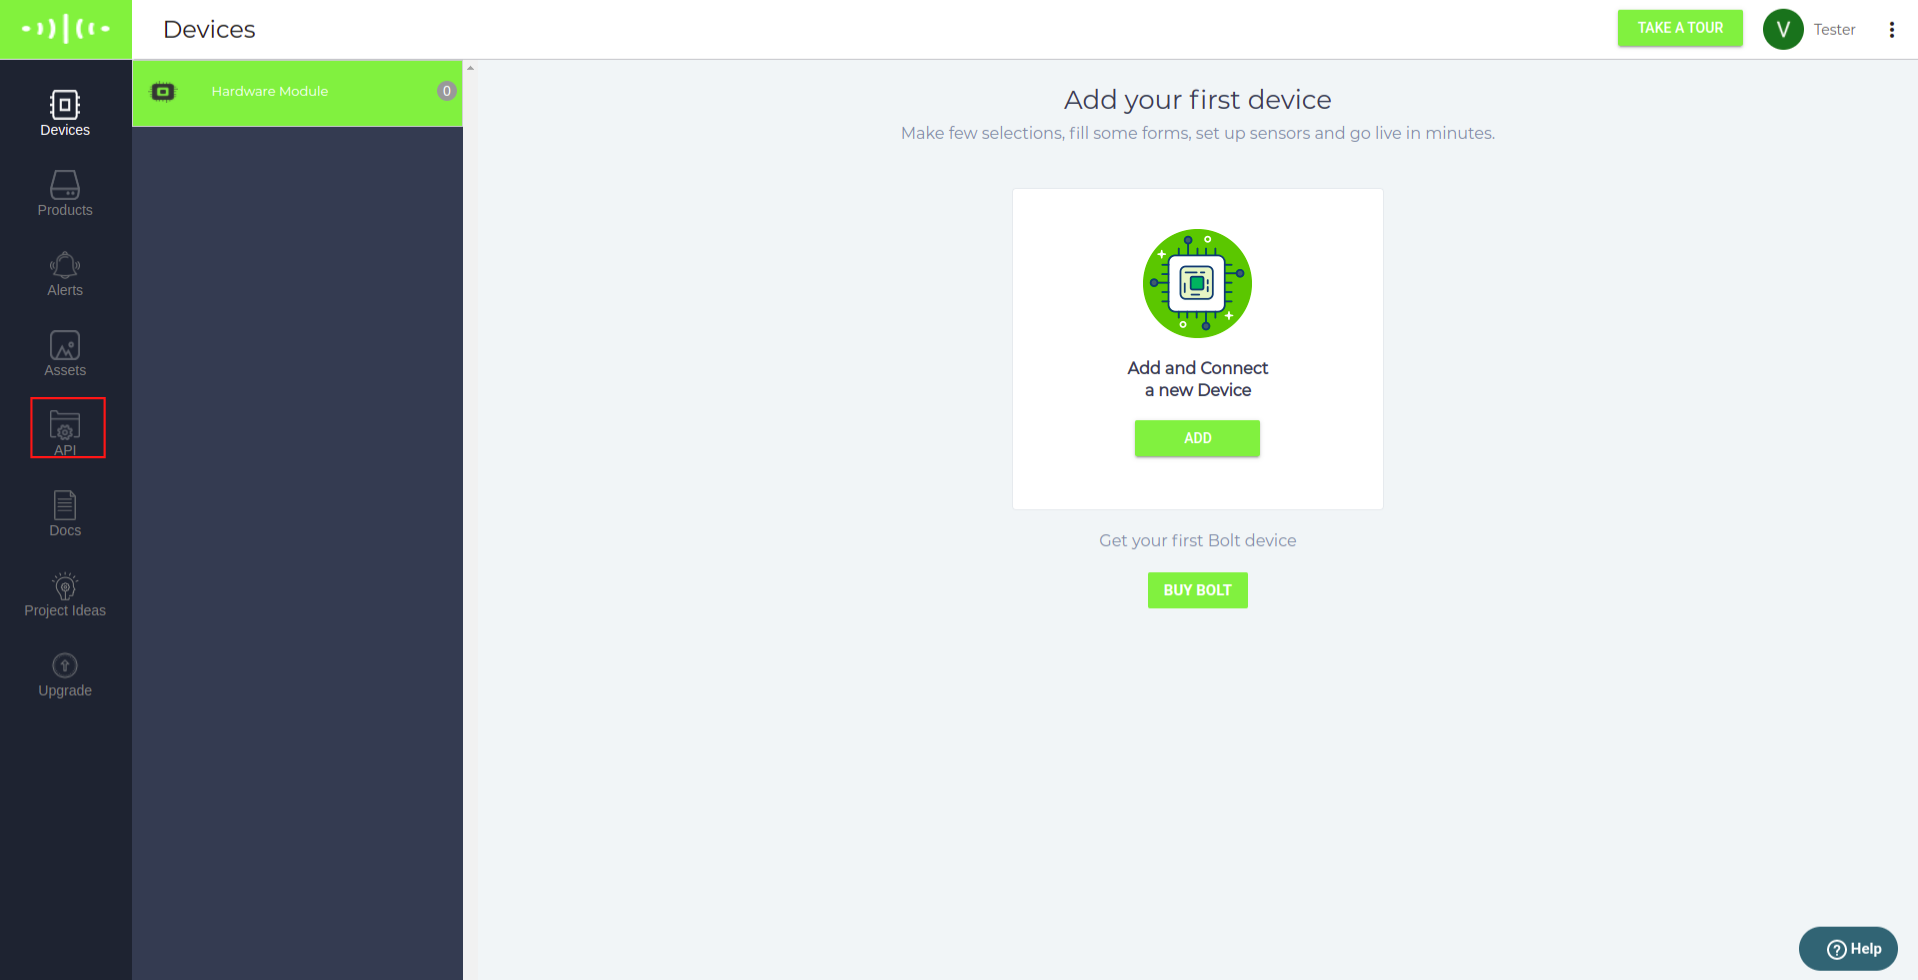
Step 3: Go to the API tab on the Bolt Cloud dashboard.

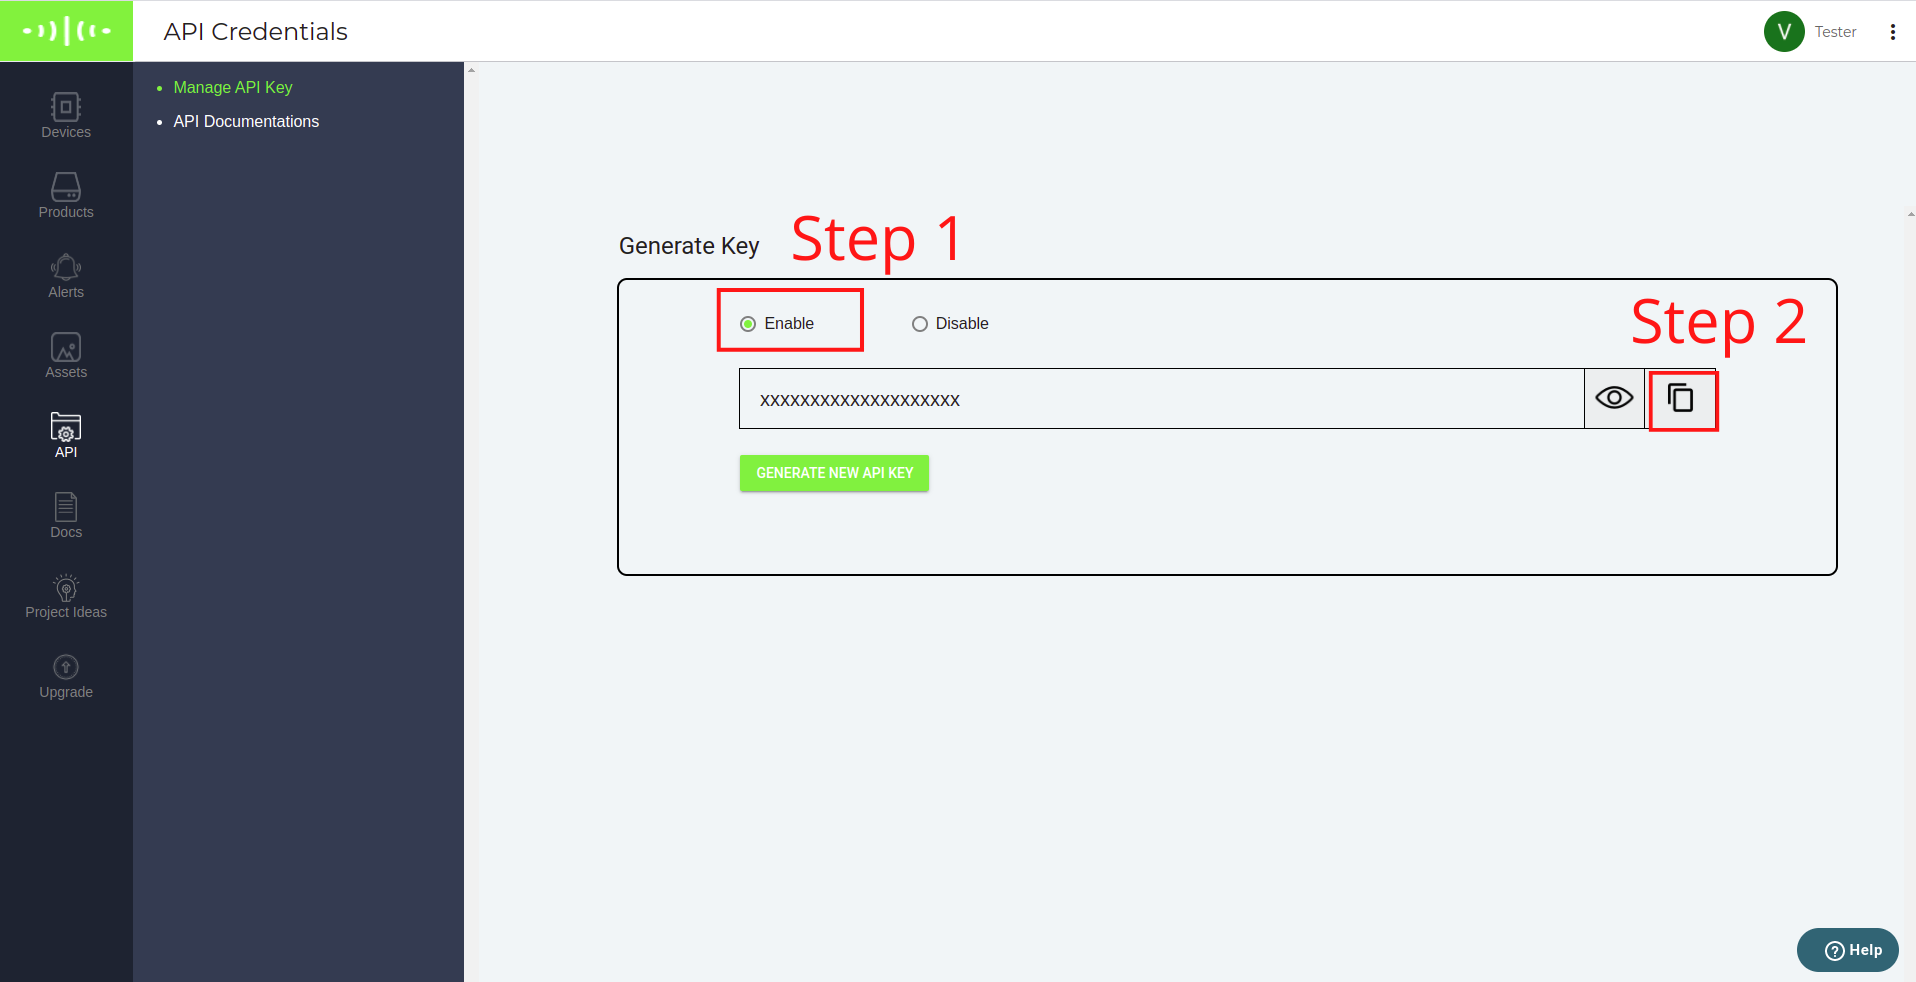
Step 4: From the API tab, enable your API key as shown in the image below as Step 1.

Step 5: Copy your API key by clicking on the copy button shown above marked as Step 2
Step 6: Replace the API key in the command in Step 1 with the API key of your cloud account. Visit https://cloud.boltiot.com/api_credentials to get your API key.
Step 7: Now, paste the final command with your API key into the Raspberry Pi SSH session (use ctrl+shift+v, in to paste), and press enter.
wget https://cloud.boltiot.com/PiBoltInstaller/<api_key> -O install.sh -o /dev/null 2>/dev/null;sudo bash install.sh
This command will do all the setup required, and also link your Raspberry Pi to your Bolt Cloud account. The output of the command will be as per the image below.

NOTE: In some Raspberry Pi images, this command may return without any output. In such a case, just press the up button, and then press enter. The command will work properly.
Updated over 3 years ago
The Pinout for Raspberry Pi is different from the ones for Bolt WiFi Module. Once you understand the difference in Pinouts you may follow any tutorial made for the Bolt WiFi module to work with the Raspberry Pi as well. Learn the steps for Pinout carefully.
