Text tutorial: Setup and build first project
If you are the kind who prefers text tutorials over video then follow the steps below.
Android App and iOS App
Below instruction is given for Android App, but the same can be followed for the iOS App as well with a few minor differences.
Step 1: Take out your WiFi Module
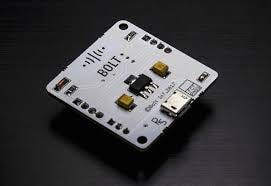
Open the box and take out your Bolt WiFi module that looks like this. 👇
Step 2: Power it on
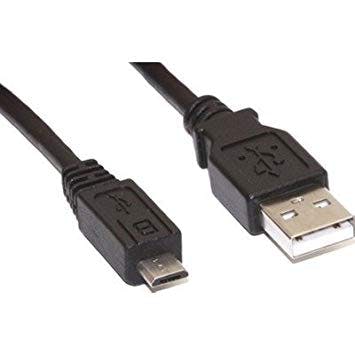
- Connect a 5V 1A micro USB cable. These are often used to charge an Android phone.
-
Plug the other end of the cable into the power supply. You can also use your laptop to power on the Bolt device.
-
There are no ON/OFF buttons on Bolt. Once you power it ON, it is good to go.
-
You can also view this small video to know how you can power up your Bolt device.
Step 3: Check your WiFi network frequency
- Check if the WiFi network to which you will be connecting Bolt works at 2.4 GHz.
- Bolt does NOT support 5 GHz WiFi Networks at the moment.
2.4 GHz WiFi required
- Bolt does NOT support 5 GHz WiFi Networks at the moment.
- Check if the WiFi network to which you will be connecting Bolt works at 2.4 GHz.
- In case you are not sure, you could check the manual of your WiFi router.
Yes. We know these are the same points as above. But we thought of repeating them since our users tend to miss them sometimes. 😀
Step 4: Login into the Bolt Cloud
-
If you have created an account before on the mobile app or via the website cloud.boltiot.com, use the same credentials to log in.
-
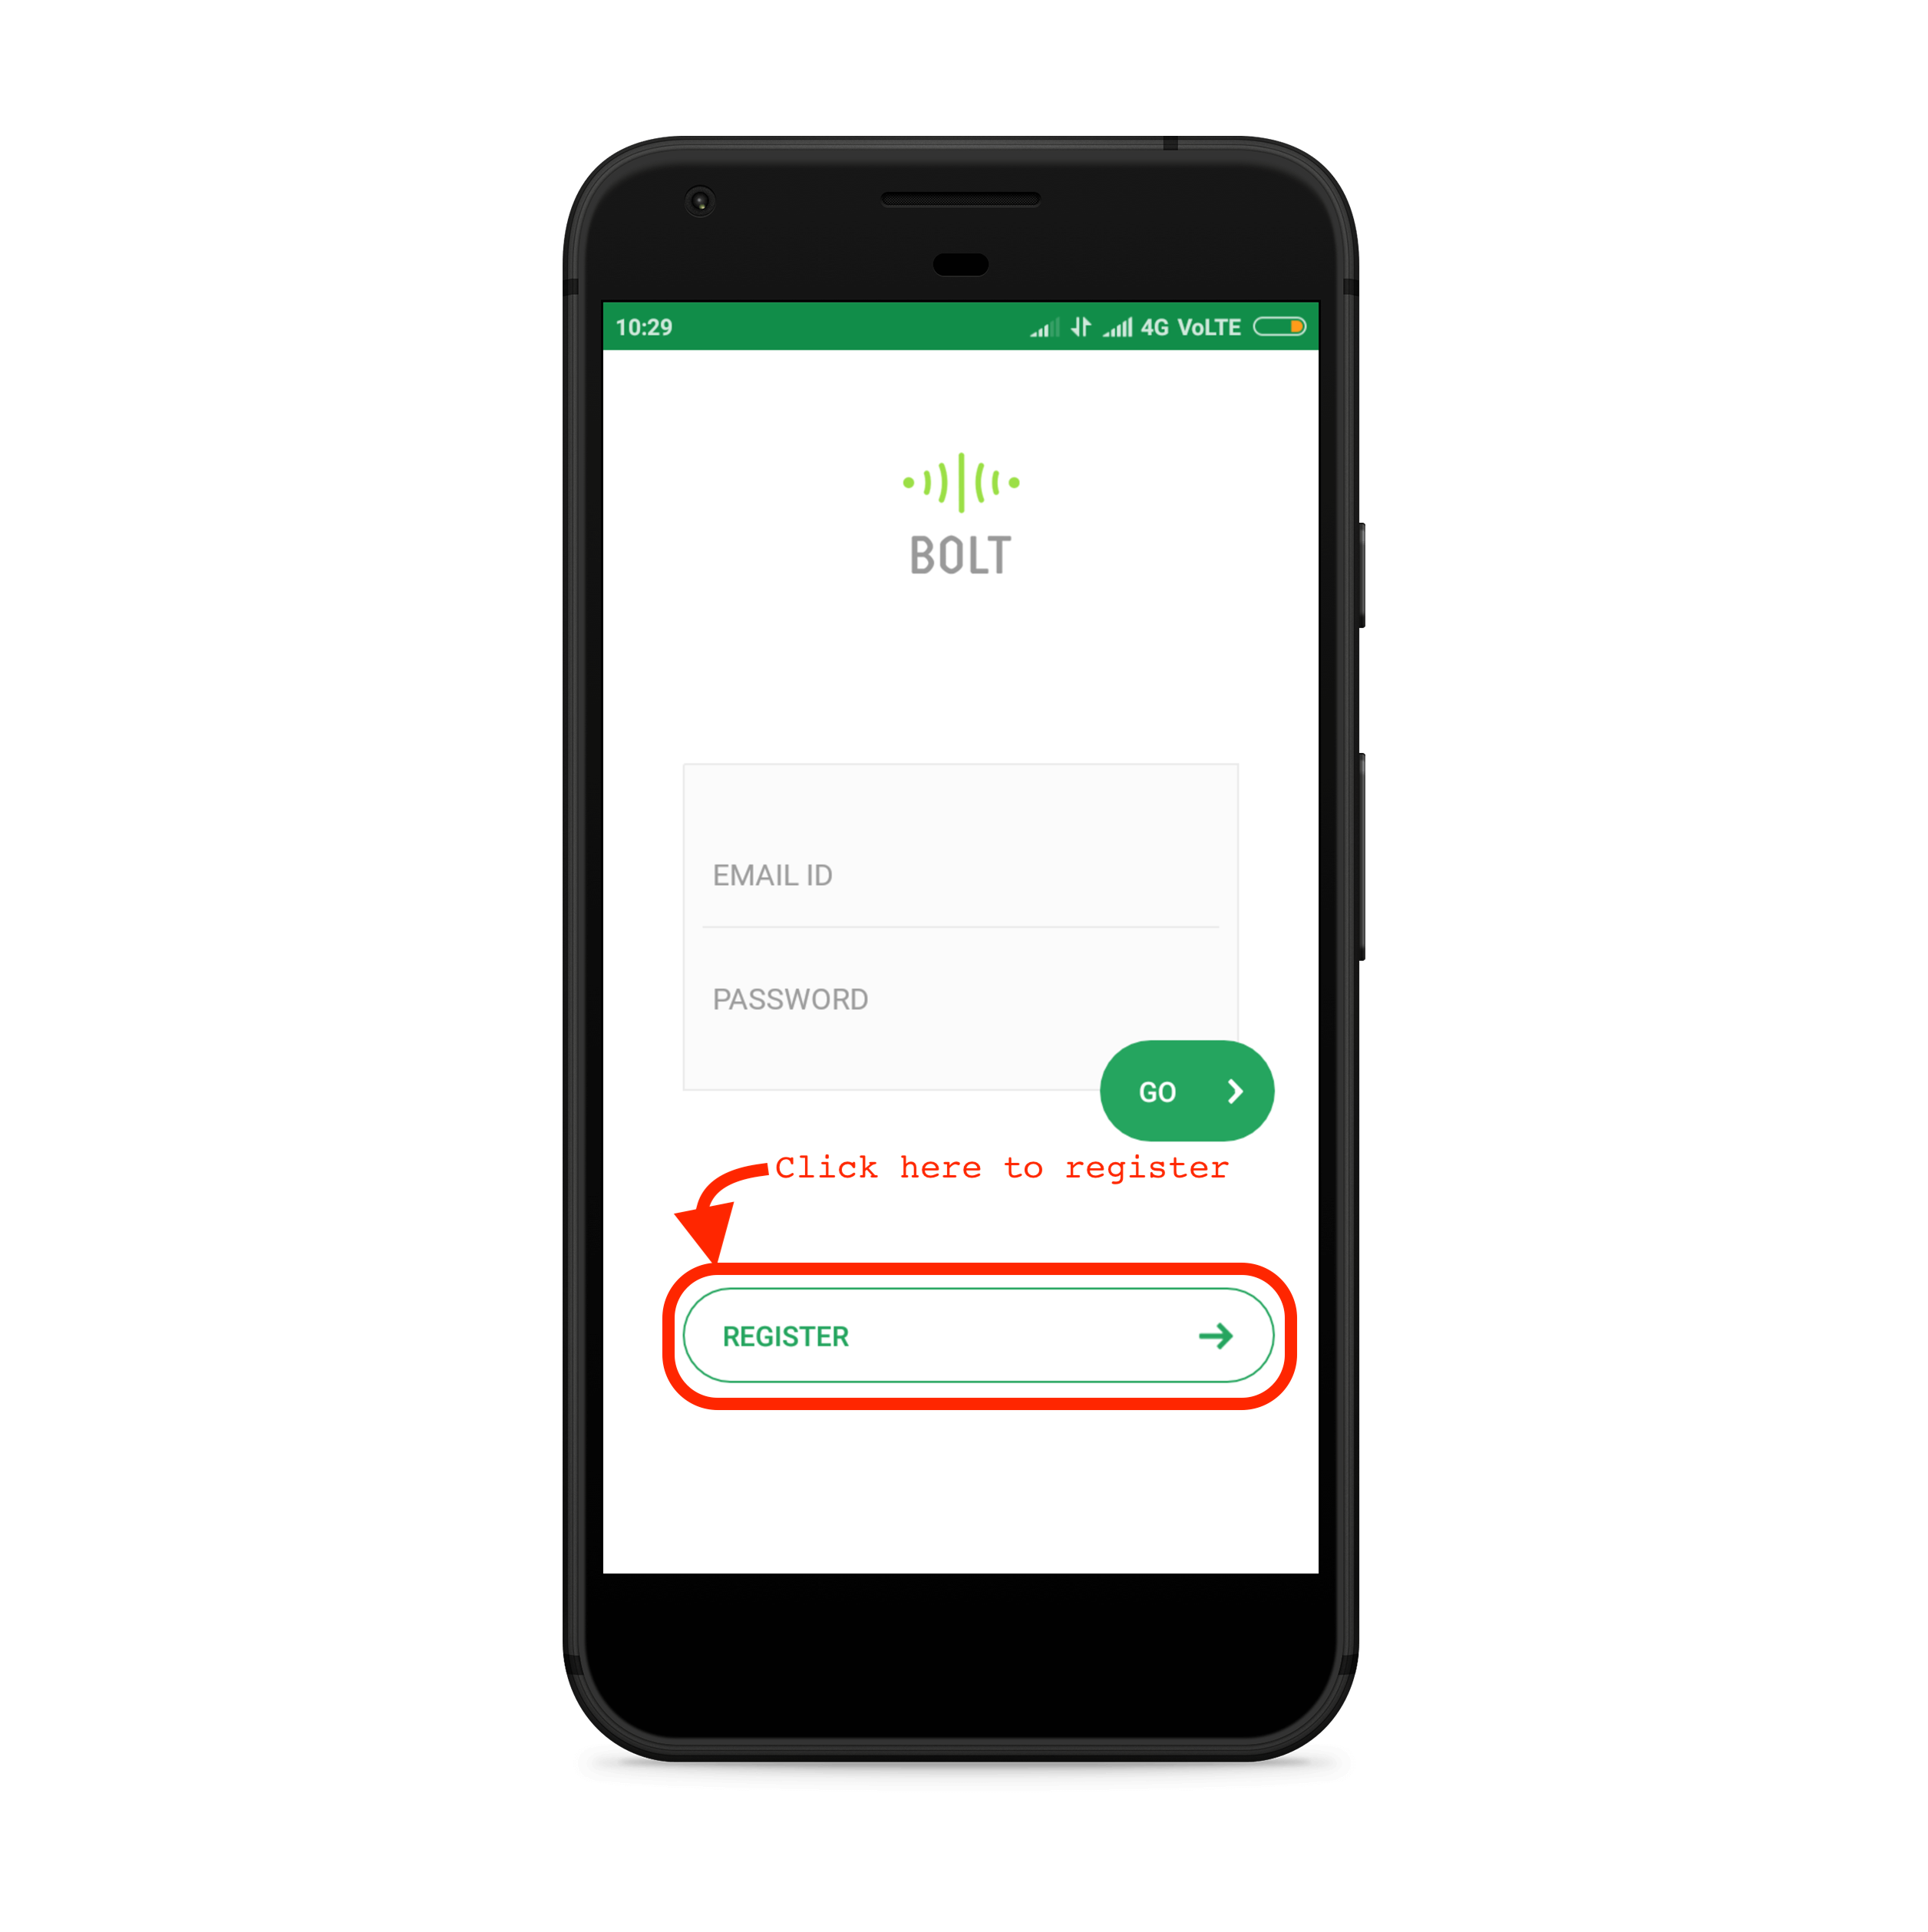
If you have not created an account before, then open the Bolt App and click on 'REGISTER to create a new account.
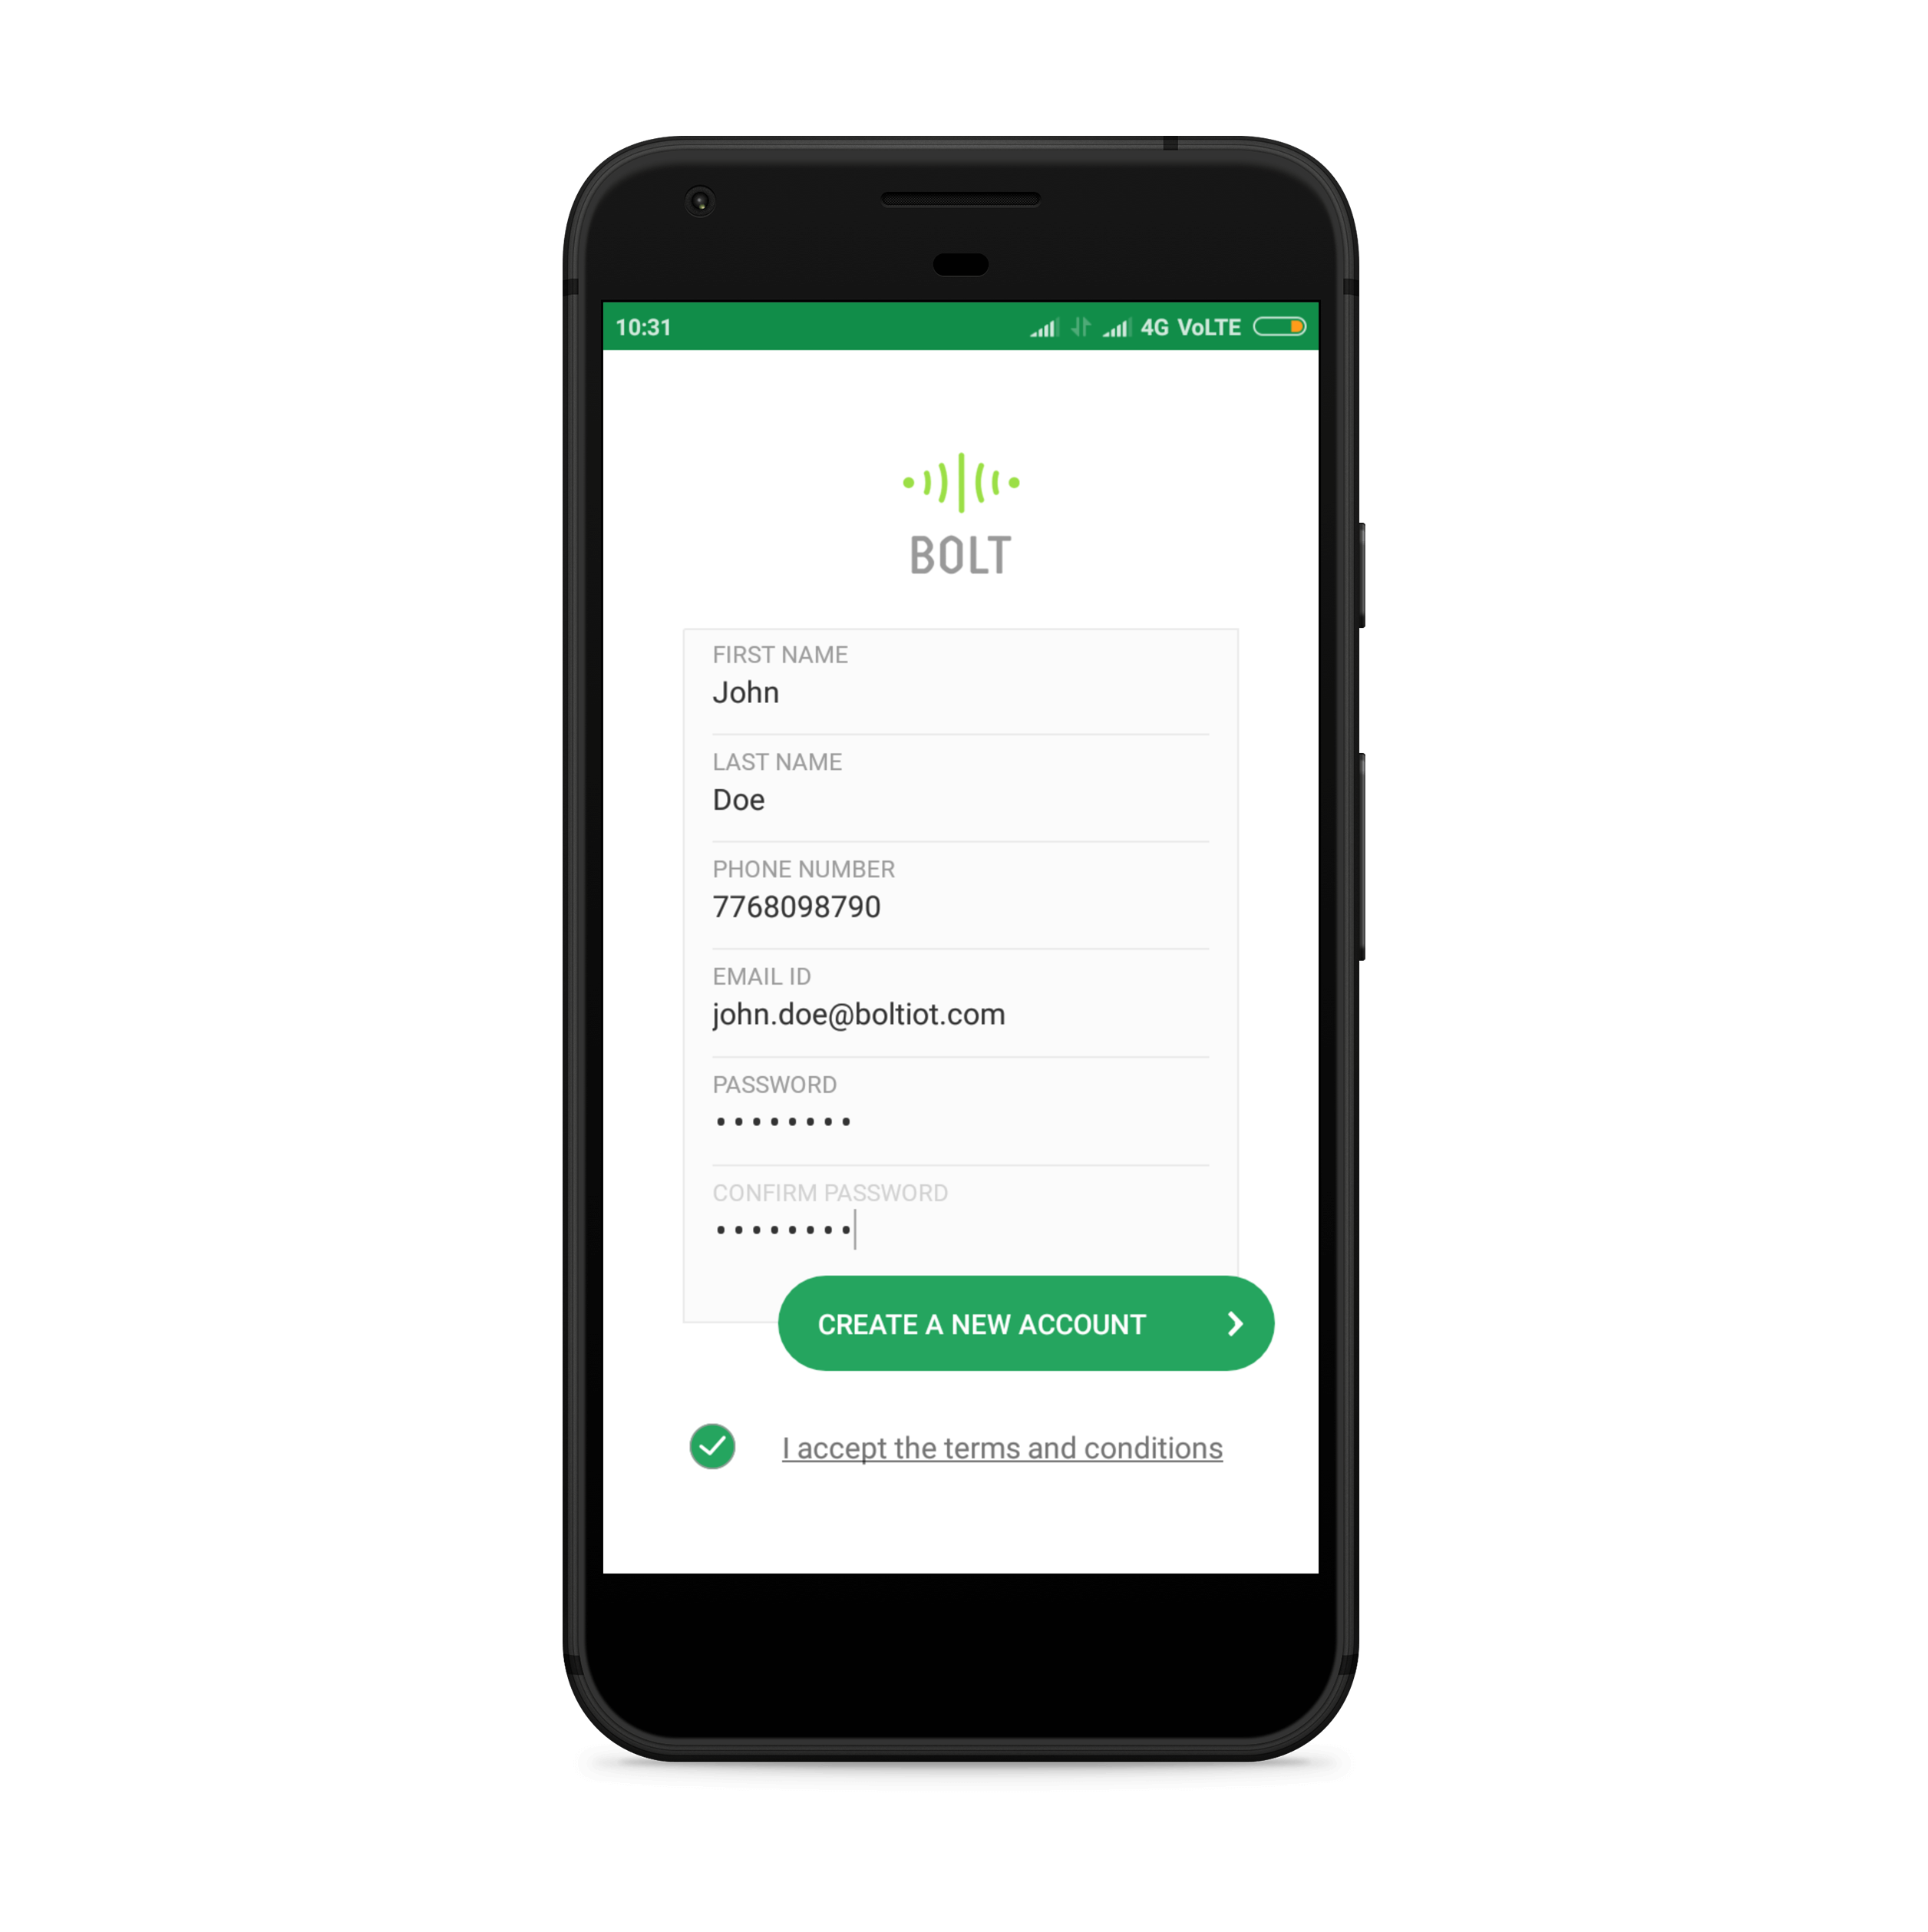
- Fill in all the required details and agree to the terms and conditions. Finally, click on 'CREATE A NEW ACCOUNT to create your account.
-
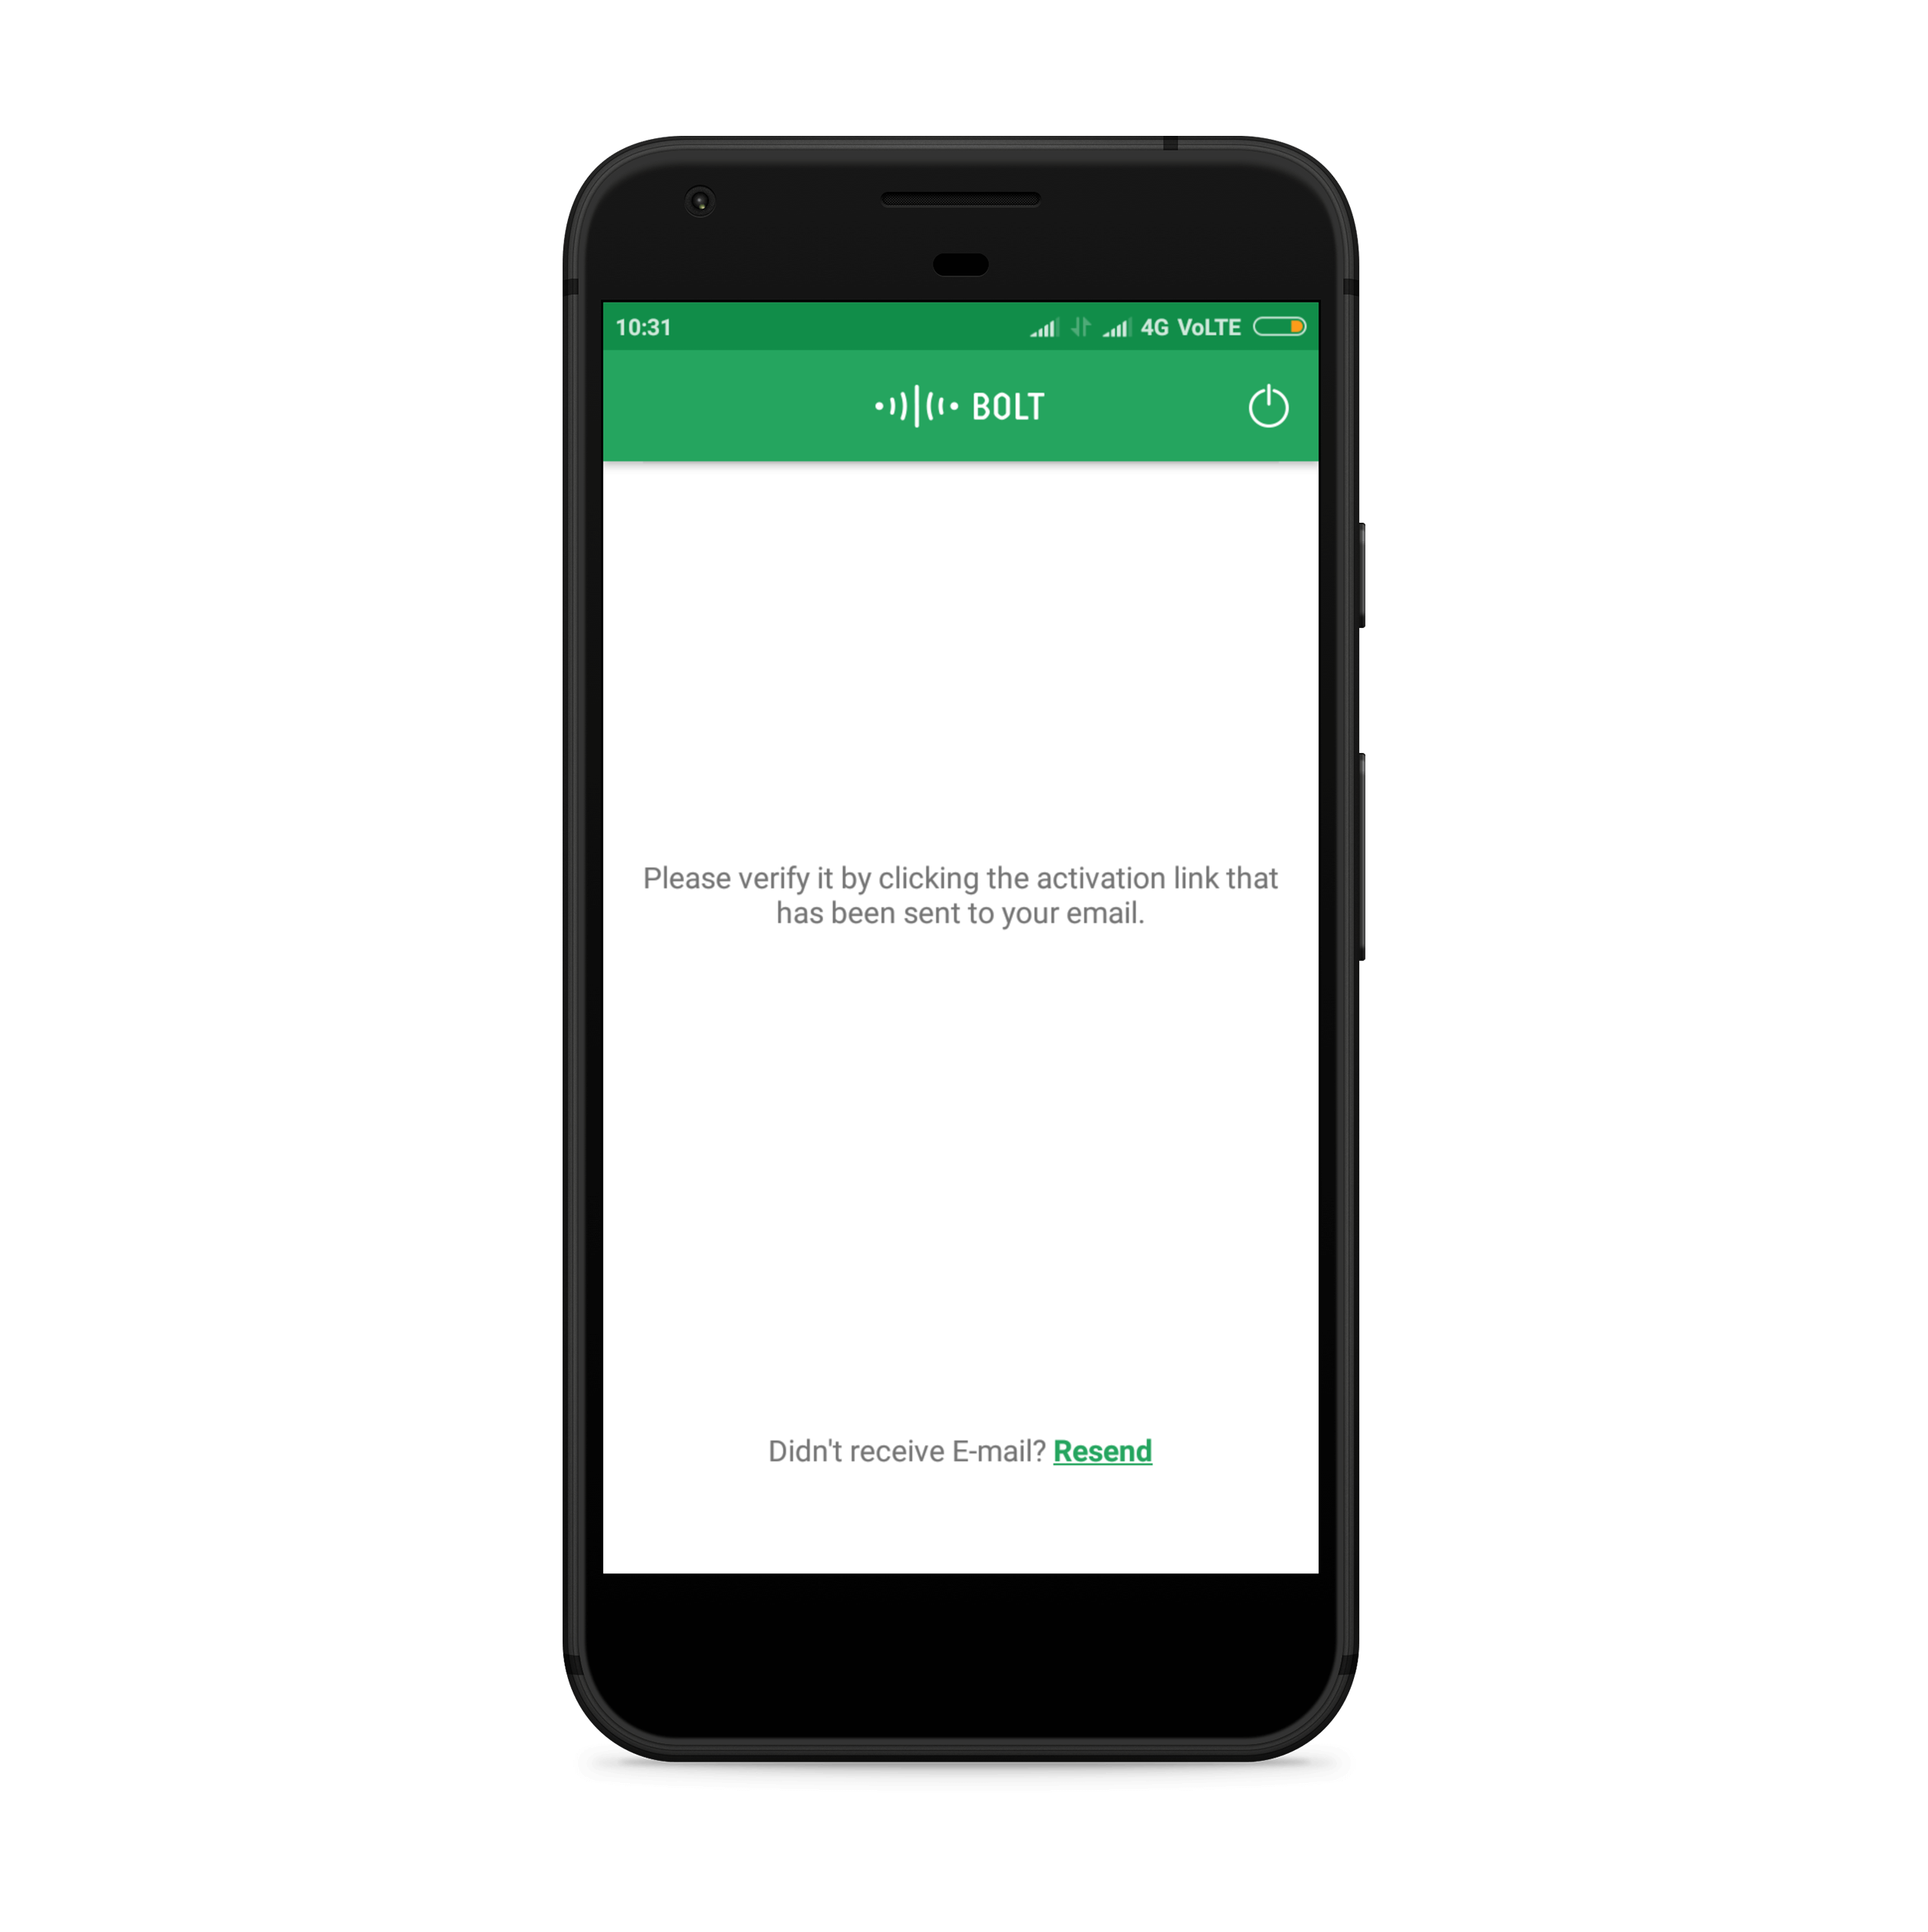
You will now receive an email on the email ID you had given to verify your account. Follow the instructions in the email to activate your Bolt Cloud account.
-
Now, pull down on the screen using your fingers to refresh the mobile App screen, which looks something like this below,
-
Congratulations, you have created your account. 🎉
-
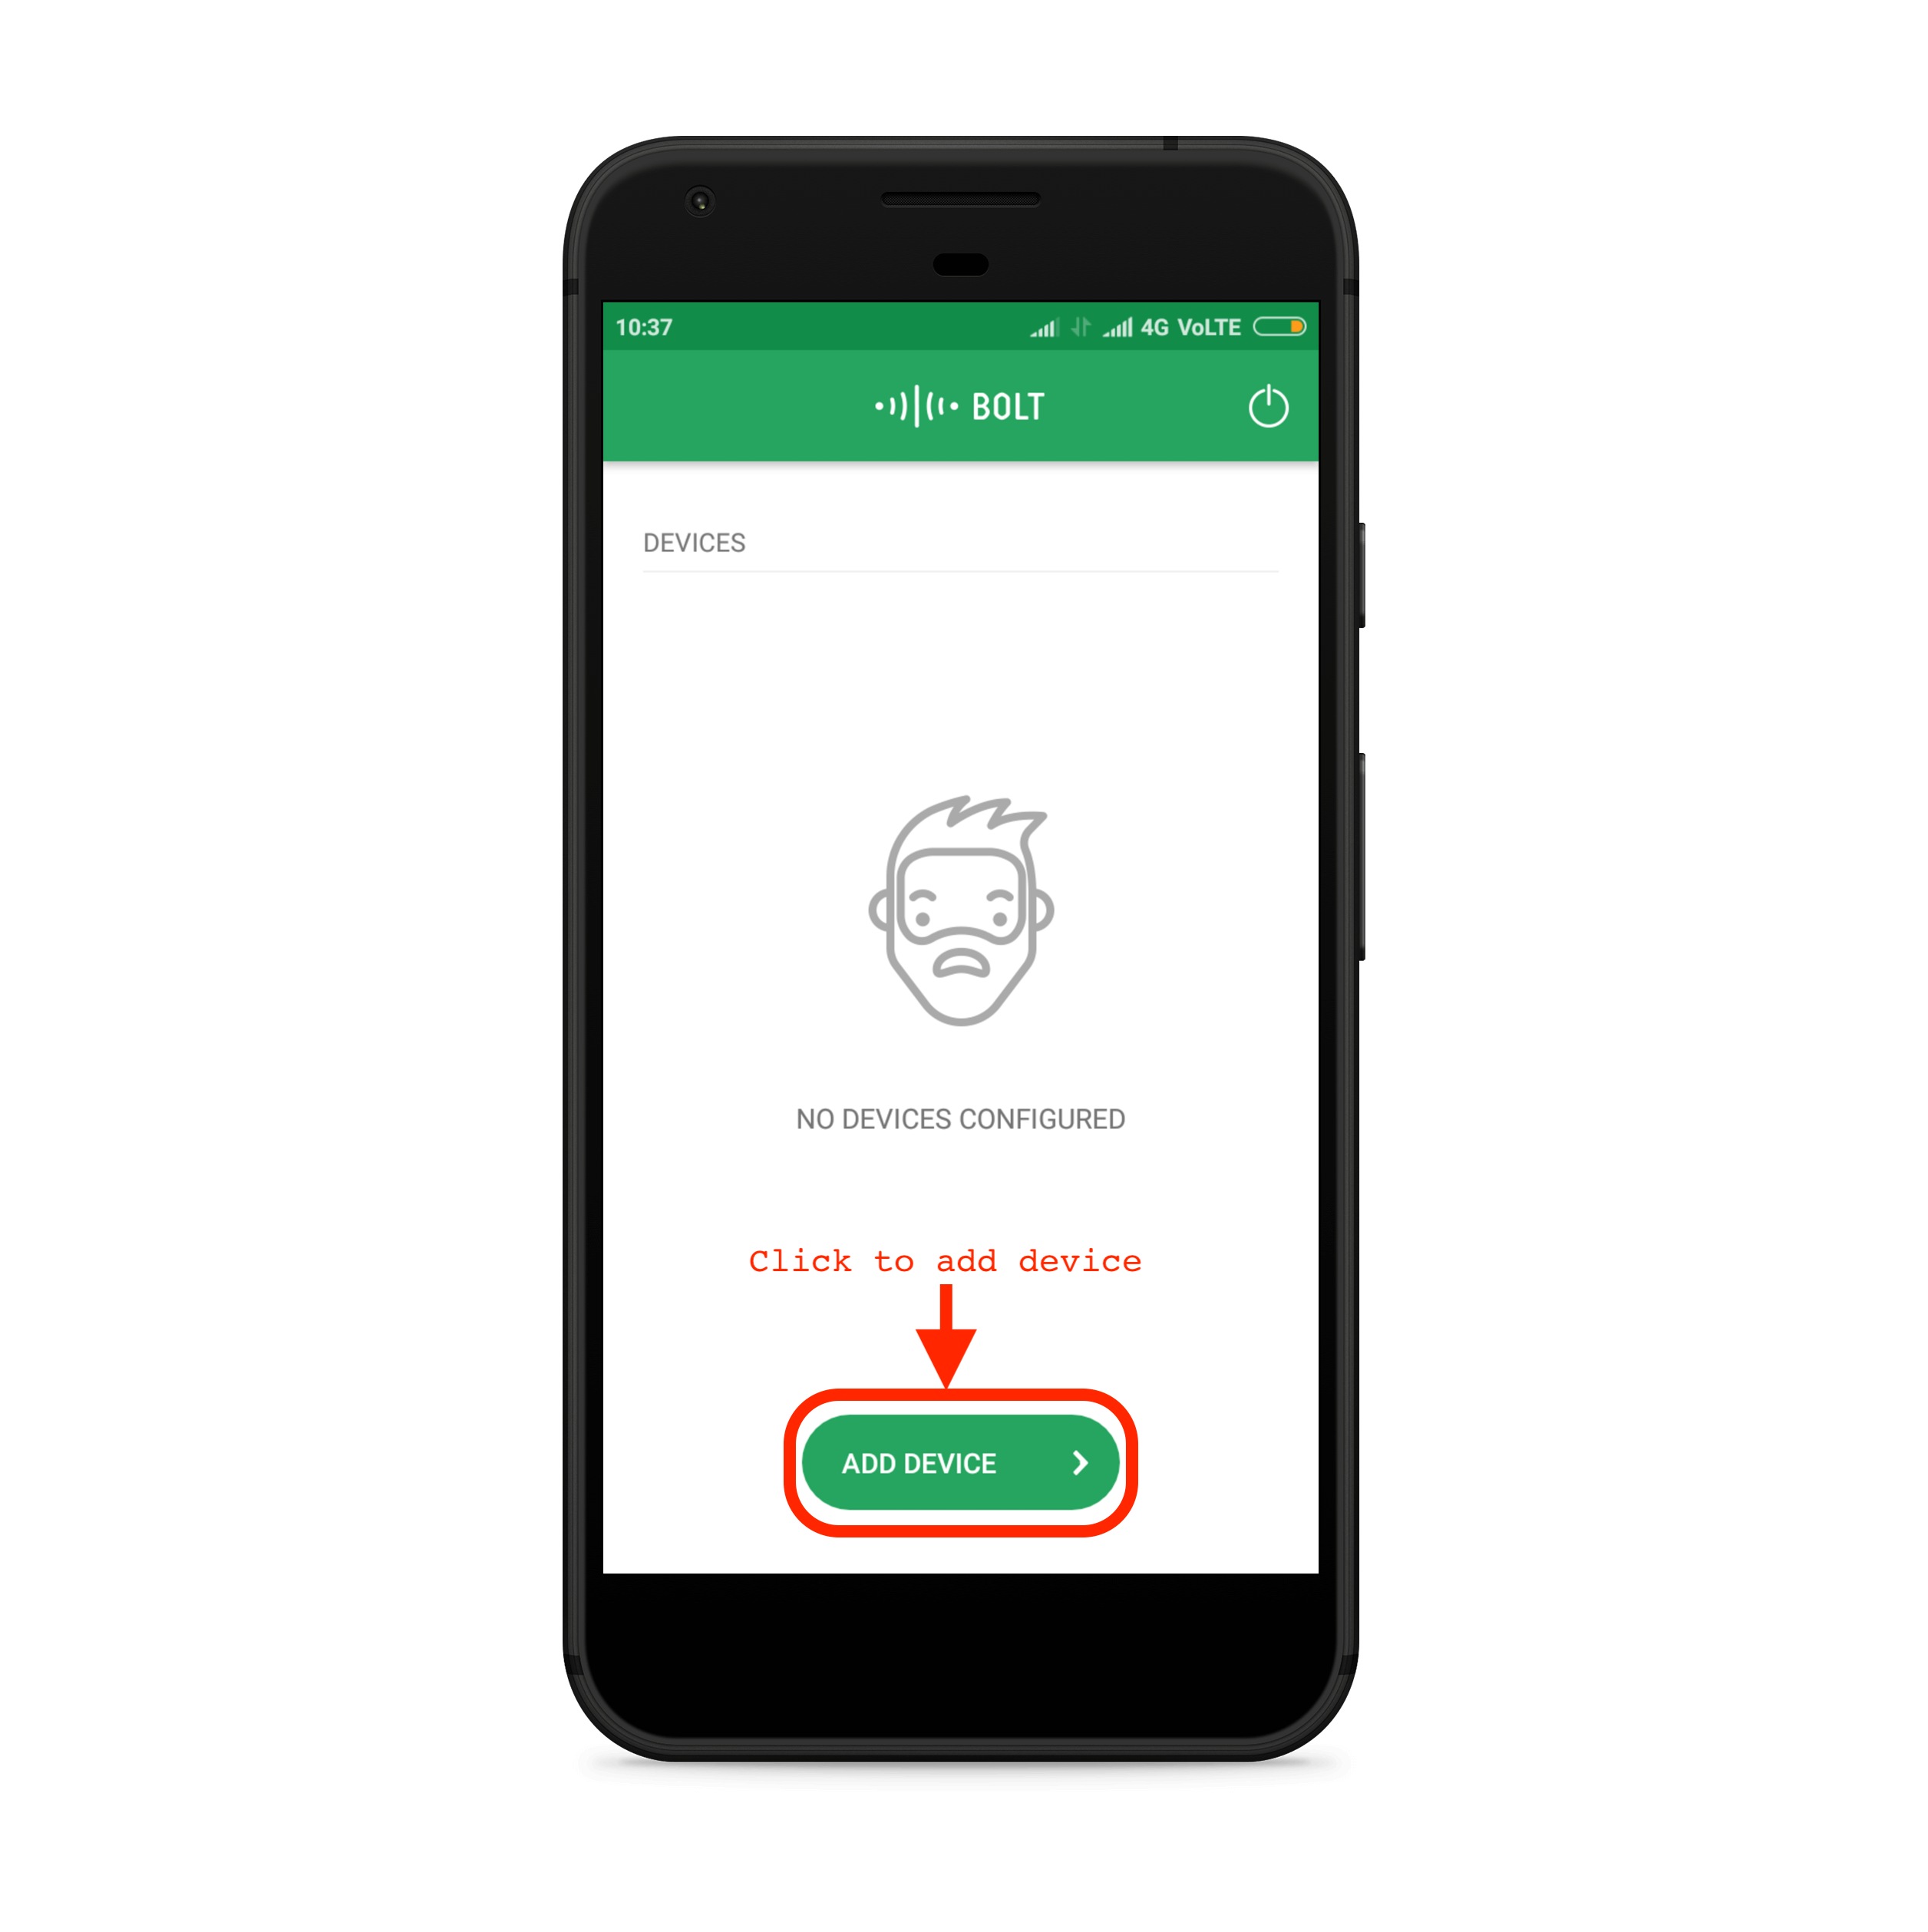
You will then be greeted with a screen that says you don't have any Bolts Modules linked to your account. Don't worry! We will add our device in the next tutorial steps.
Step 5: Connecting Bolt WiFi Module to the Internet
-
The Bolt Mobile App will help you connect your WiFi module to the Internet as well as add it to your Bolt cloud account.
-
To add a device to your cloud account, click on the 'ADD DEVICE' button.
-
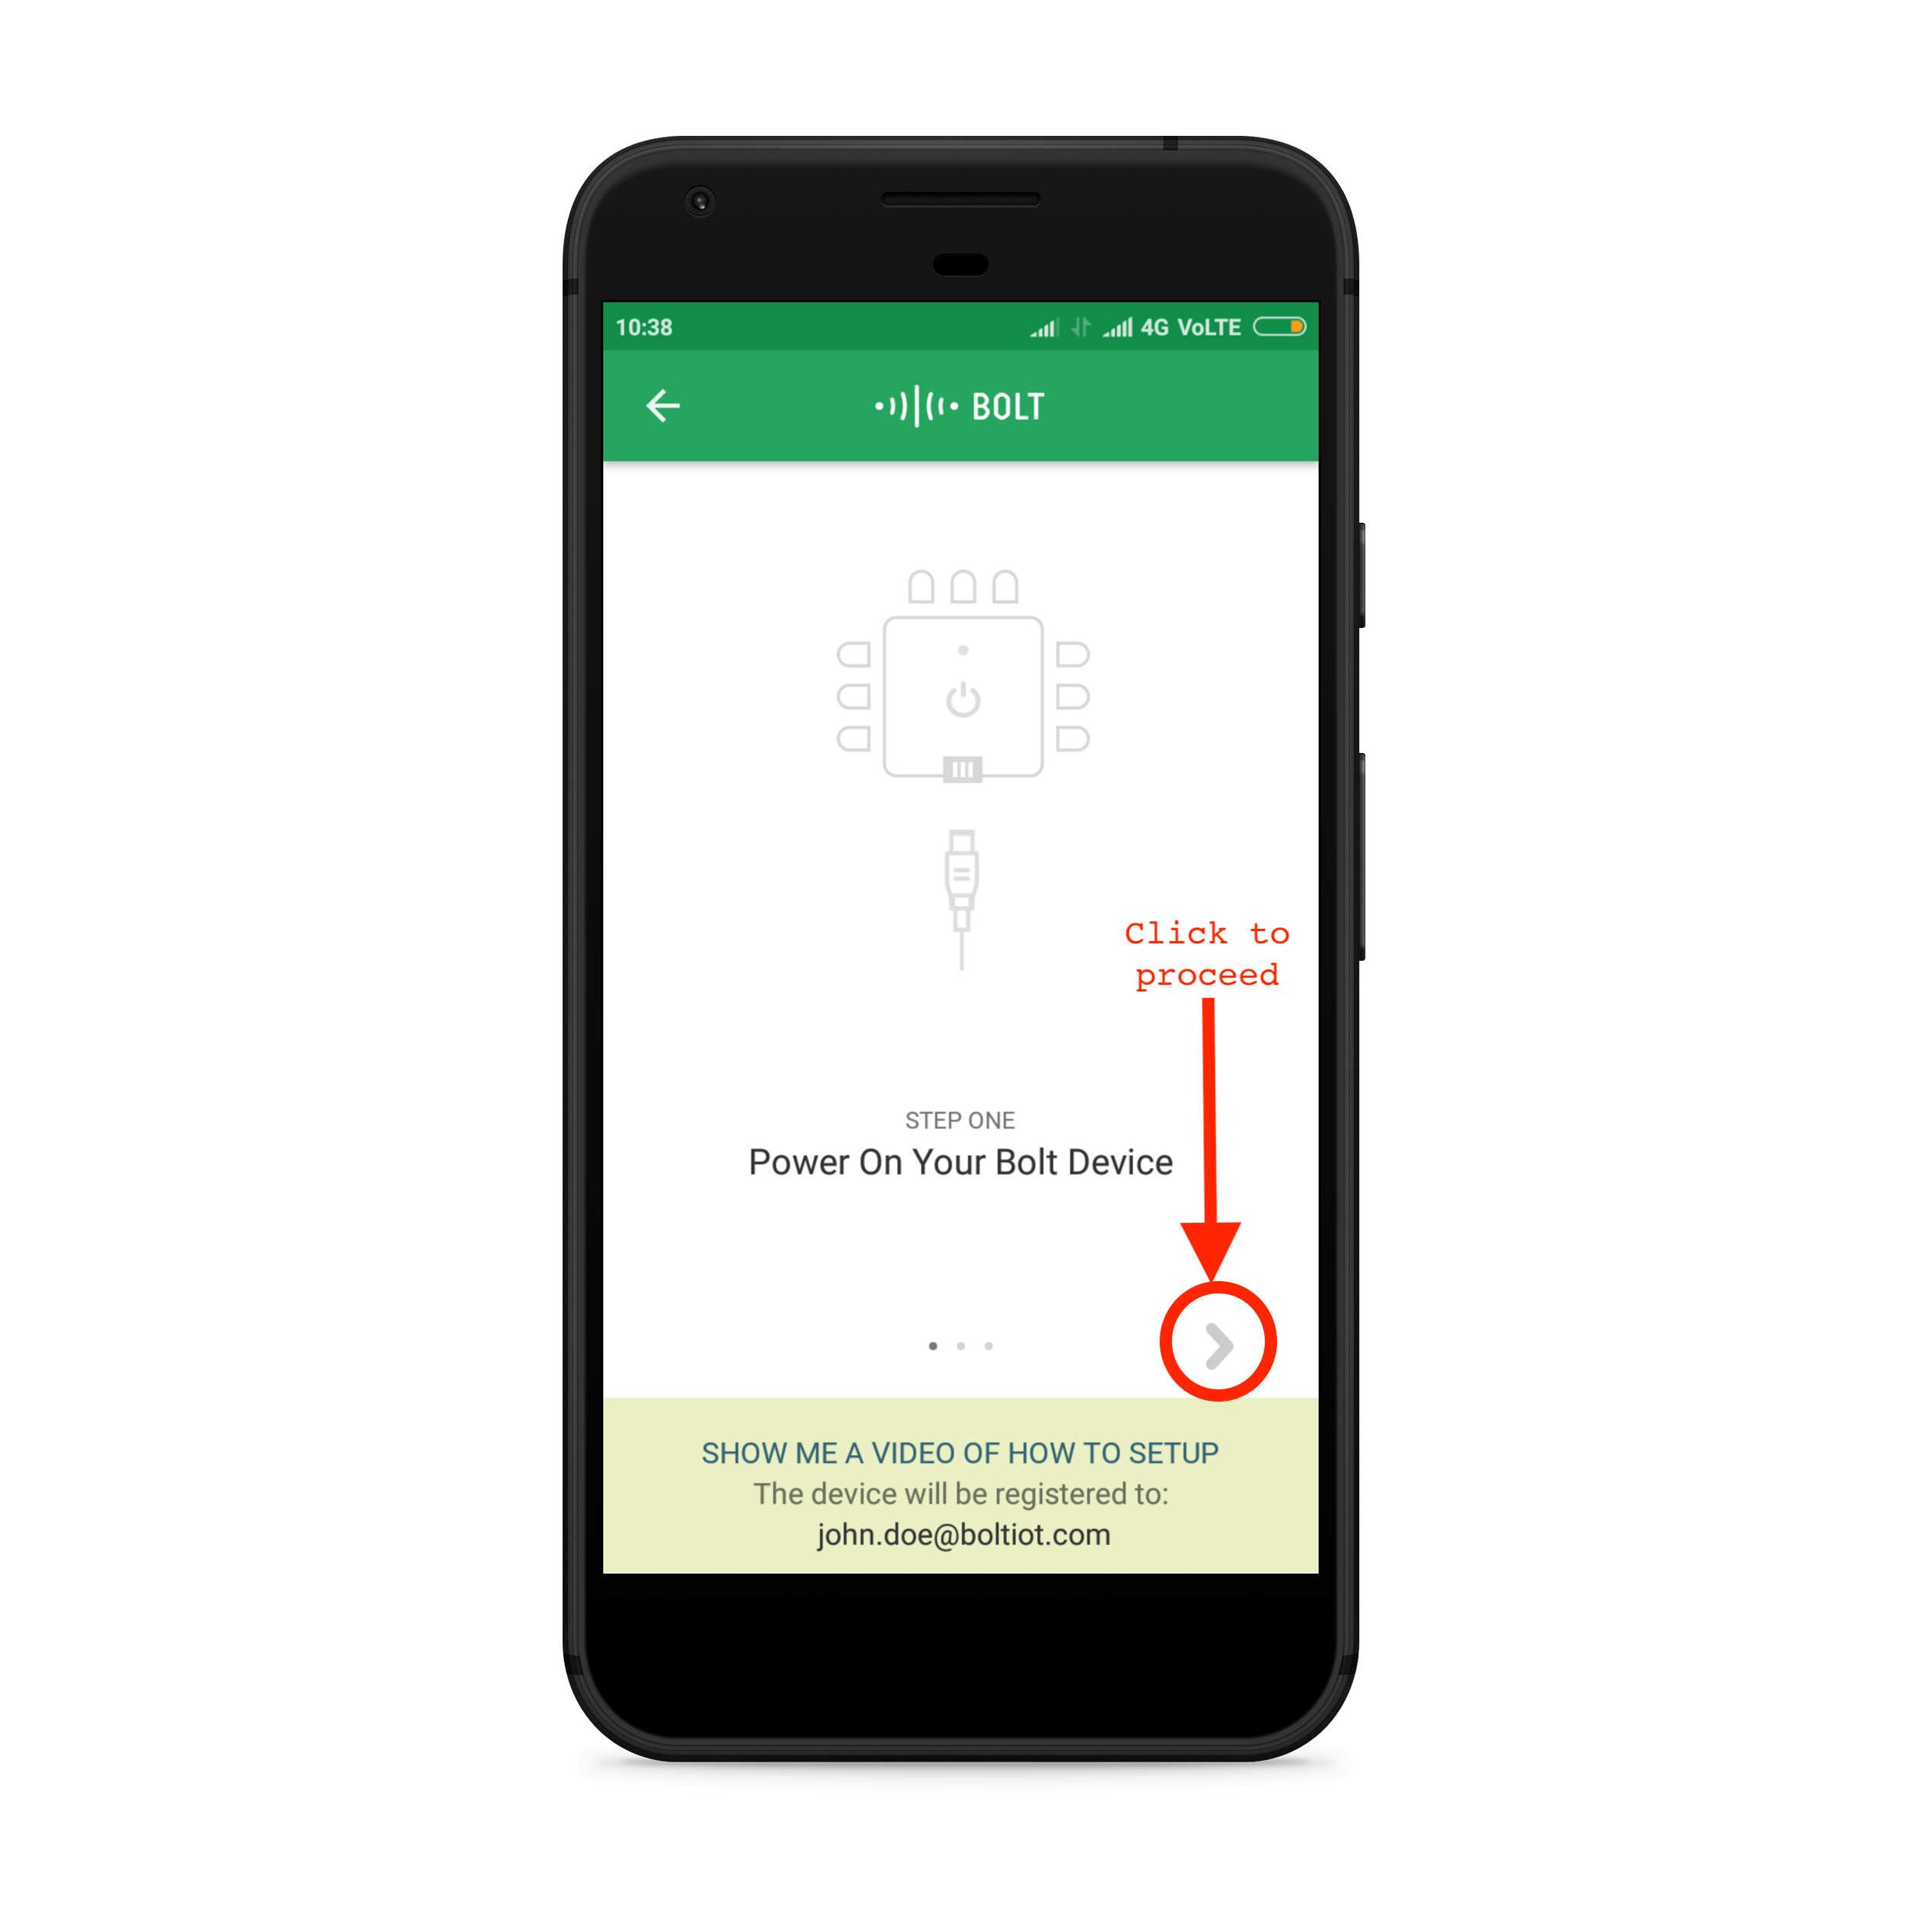
If you have not yet done, power ON the Bolt device by inserting the Micro USB cable into the USB port provided on the Bolt and connecting the other end of the cable to the Android charger or your laptop.
-
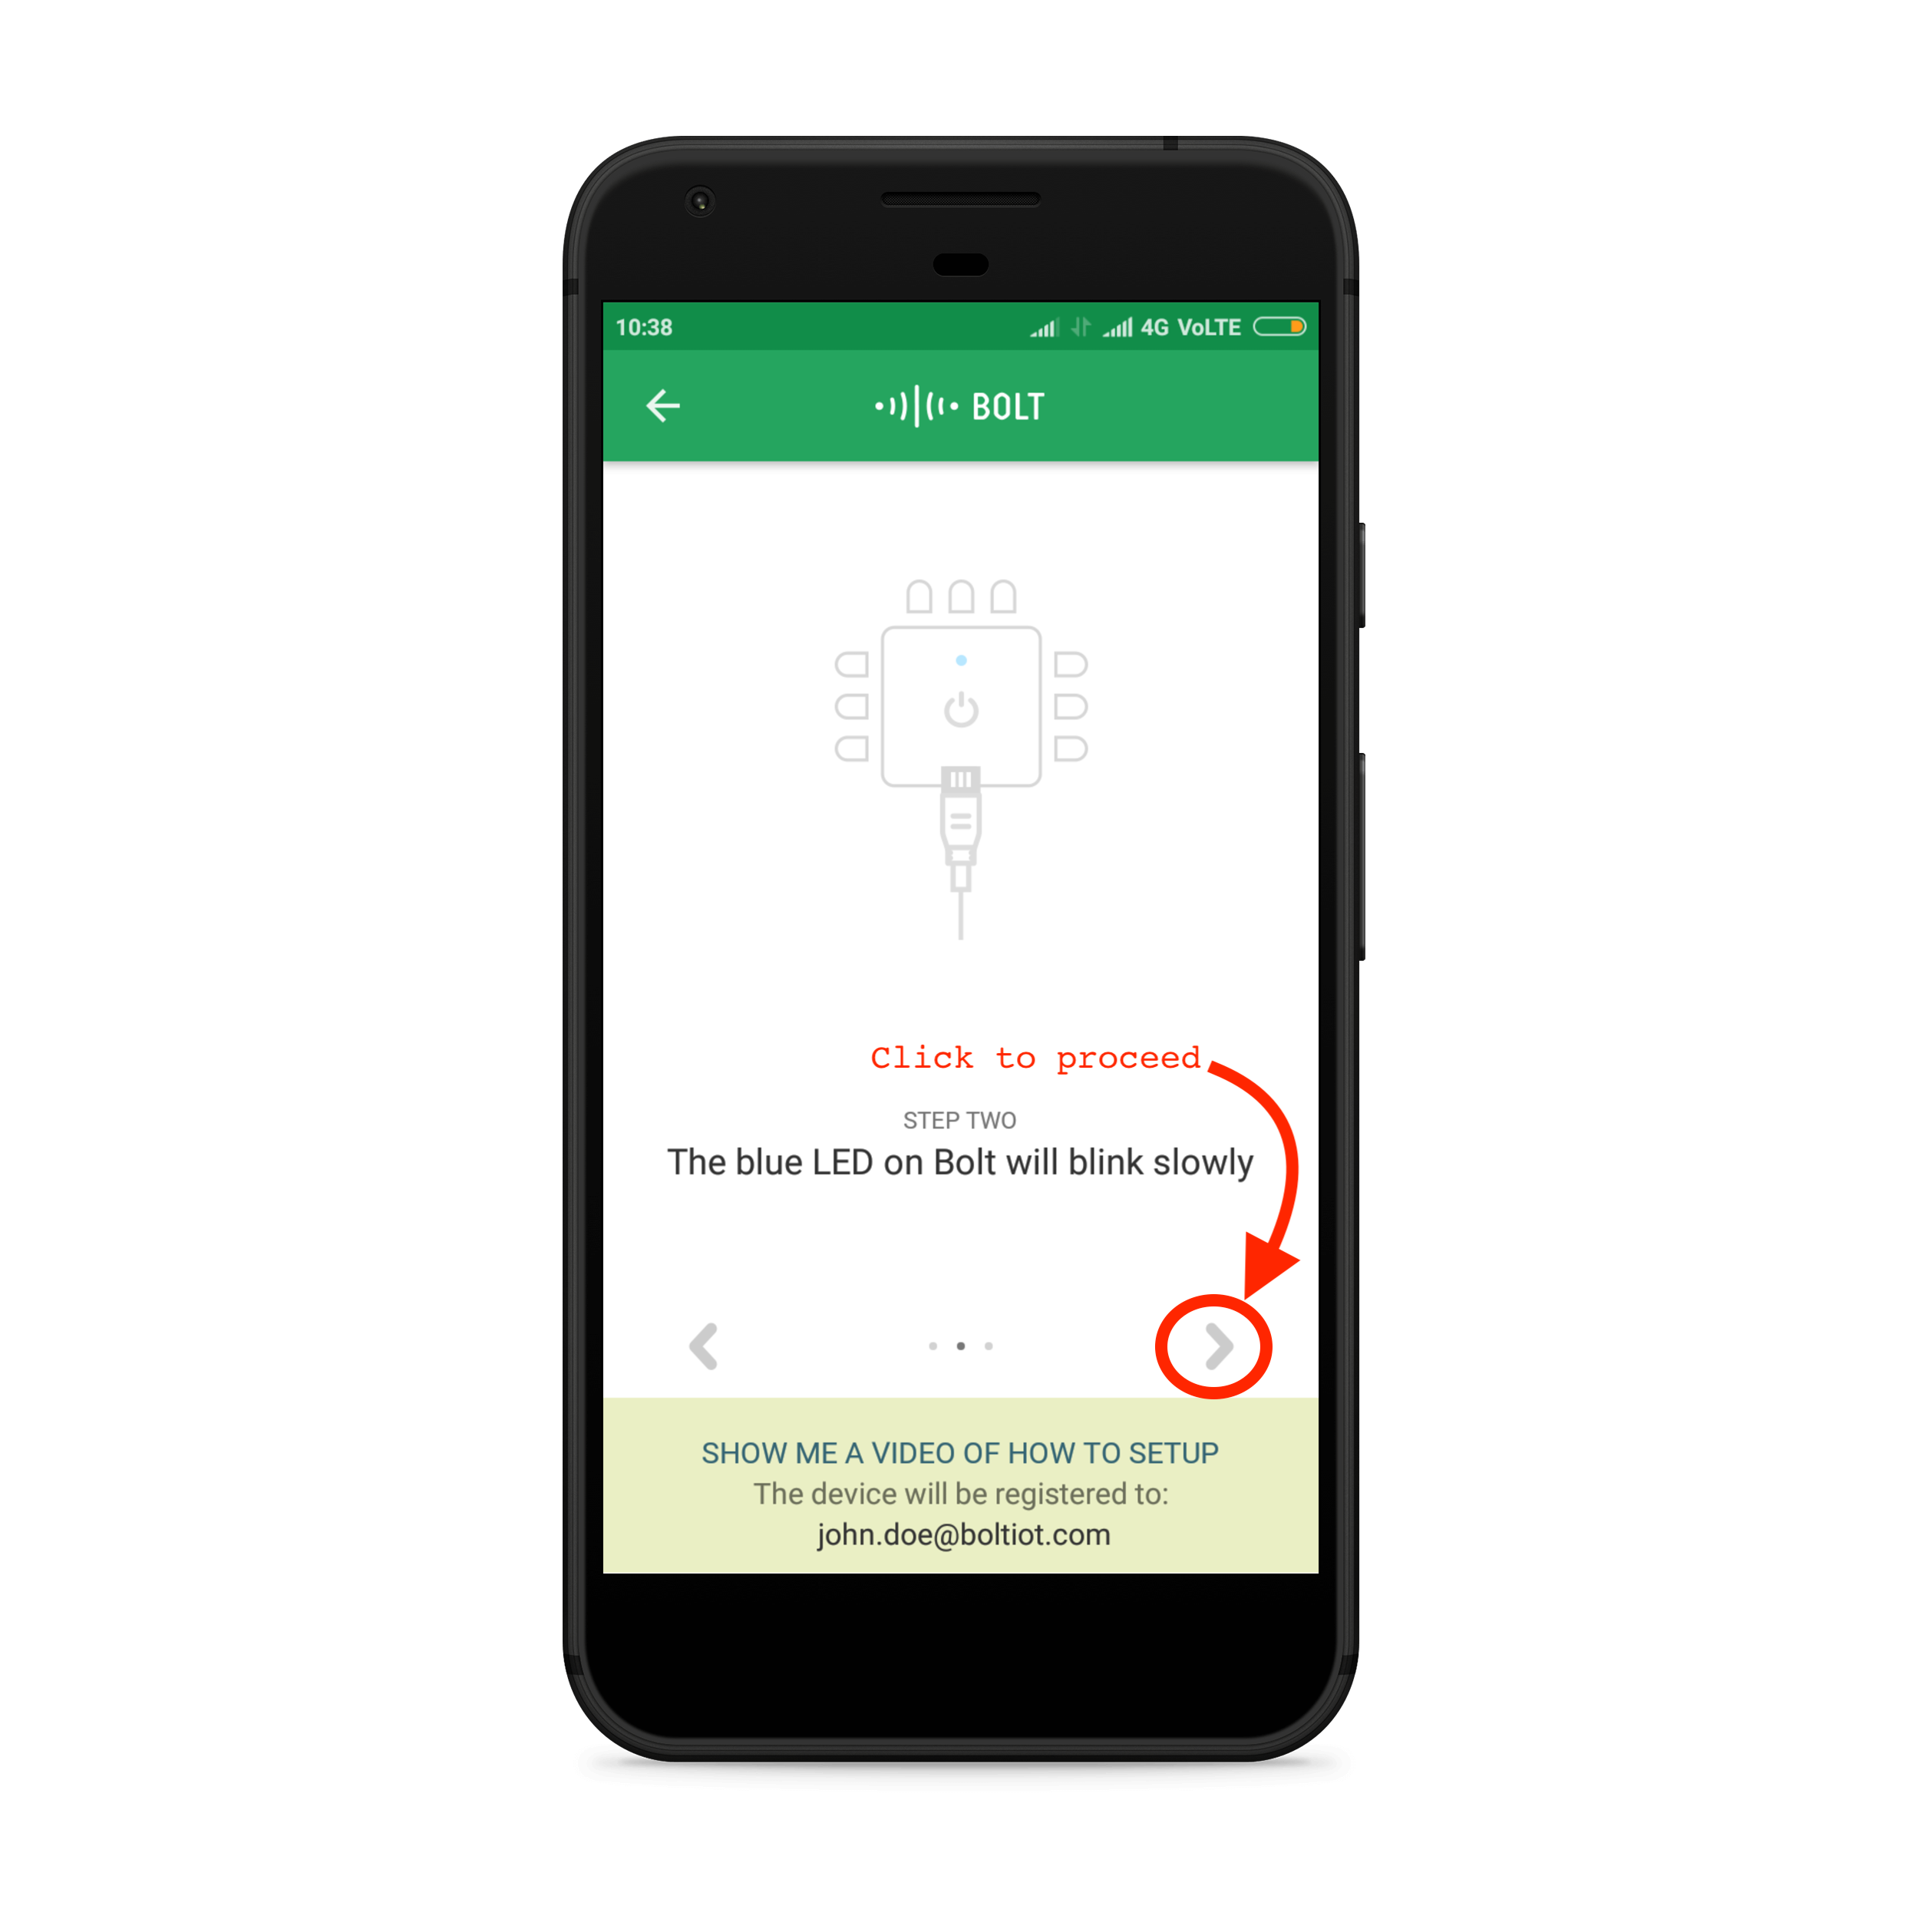
Once you have powered ON the Bolt device, the blue LED on the Bolt will begin to blink slowly, and the green LED will be OFF.
What do the LEDs on Bolt indicate?
The LEDs are a helpful way for us to know the state of our Bolt WiFi Module.
- Blue LED blinking slow indicates that the Bolt is not connected to WiFi and transmitting a hotspot.
- Blue LED blinking fast indicates that Bolt is transmitting a hotspot and a smartphone is connected to that hotspot.
- Blue LED glowing stable indicates that Bolt is connected to WiFi.
- Green LED glowing indicates that the Bolt is connected to the Internet.
👉Connected to WiFi is not the same as connected to the Internet. Your device might be connected to the local WiFi network but it may not have internet connectivity.
- Click on the '>' symbol on the app to progress further.
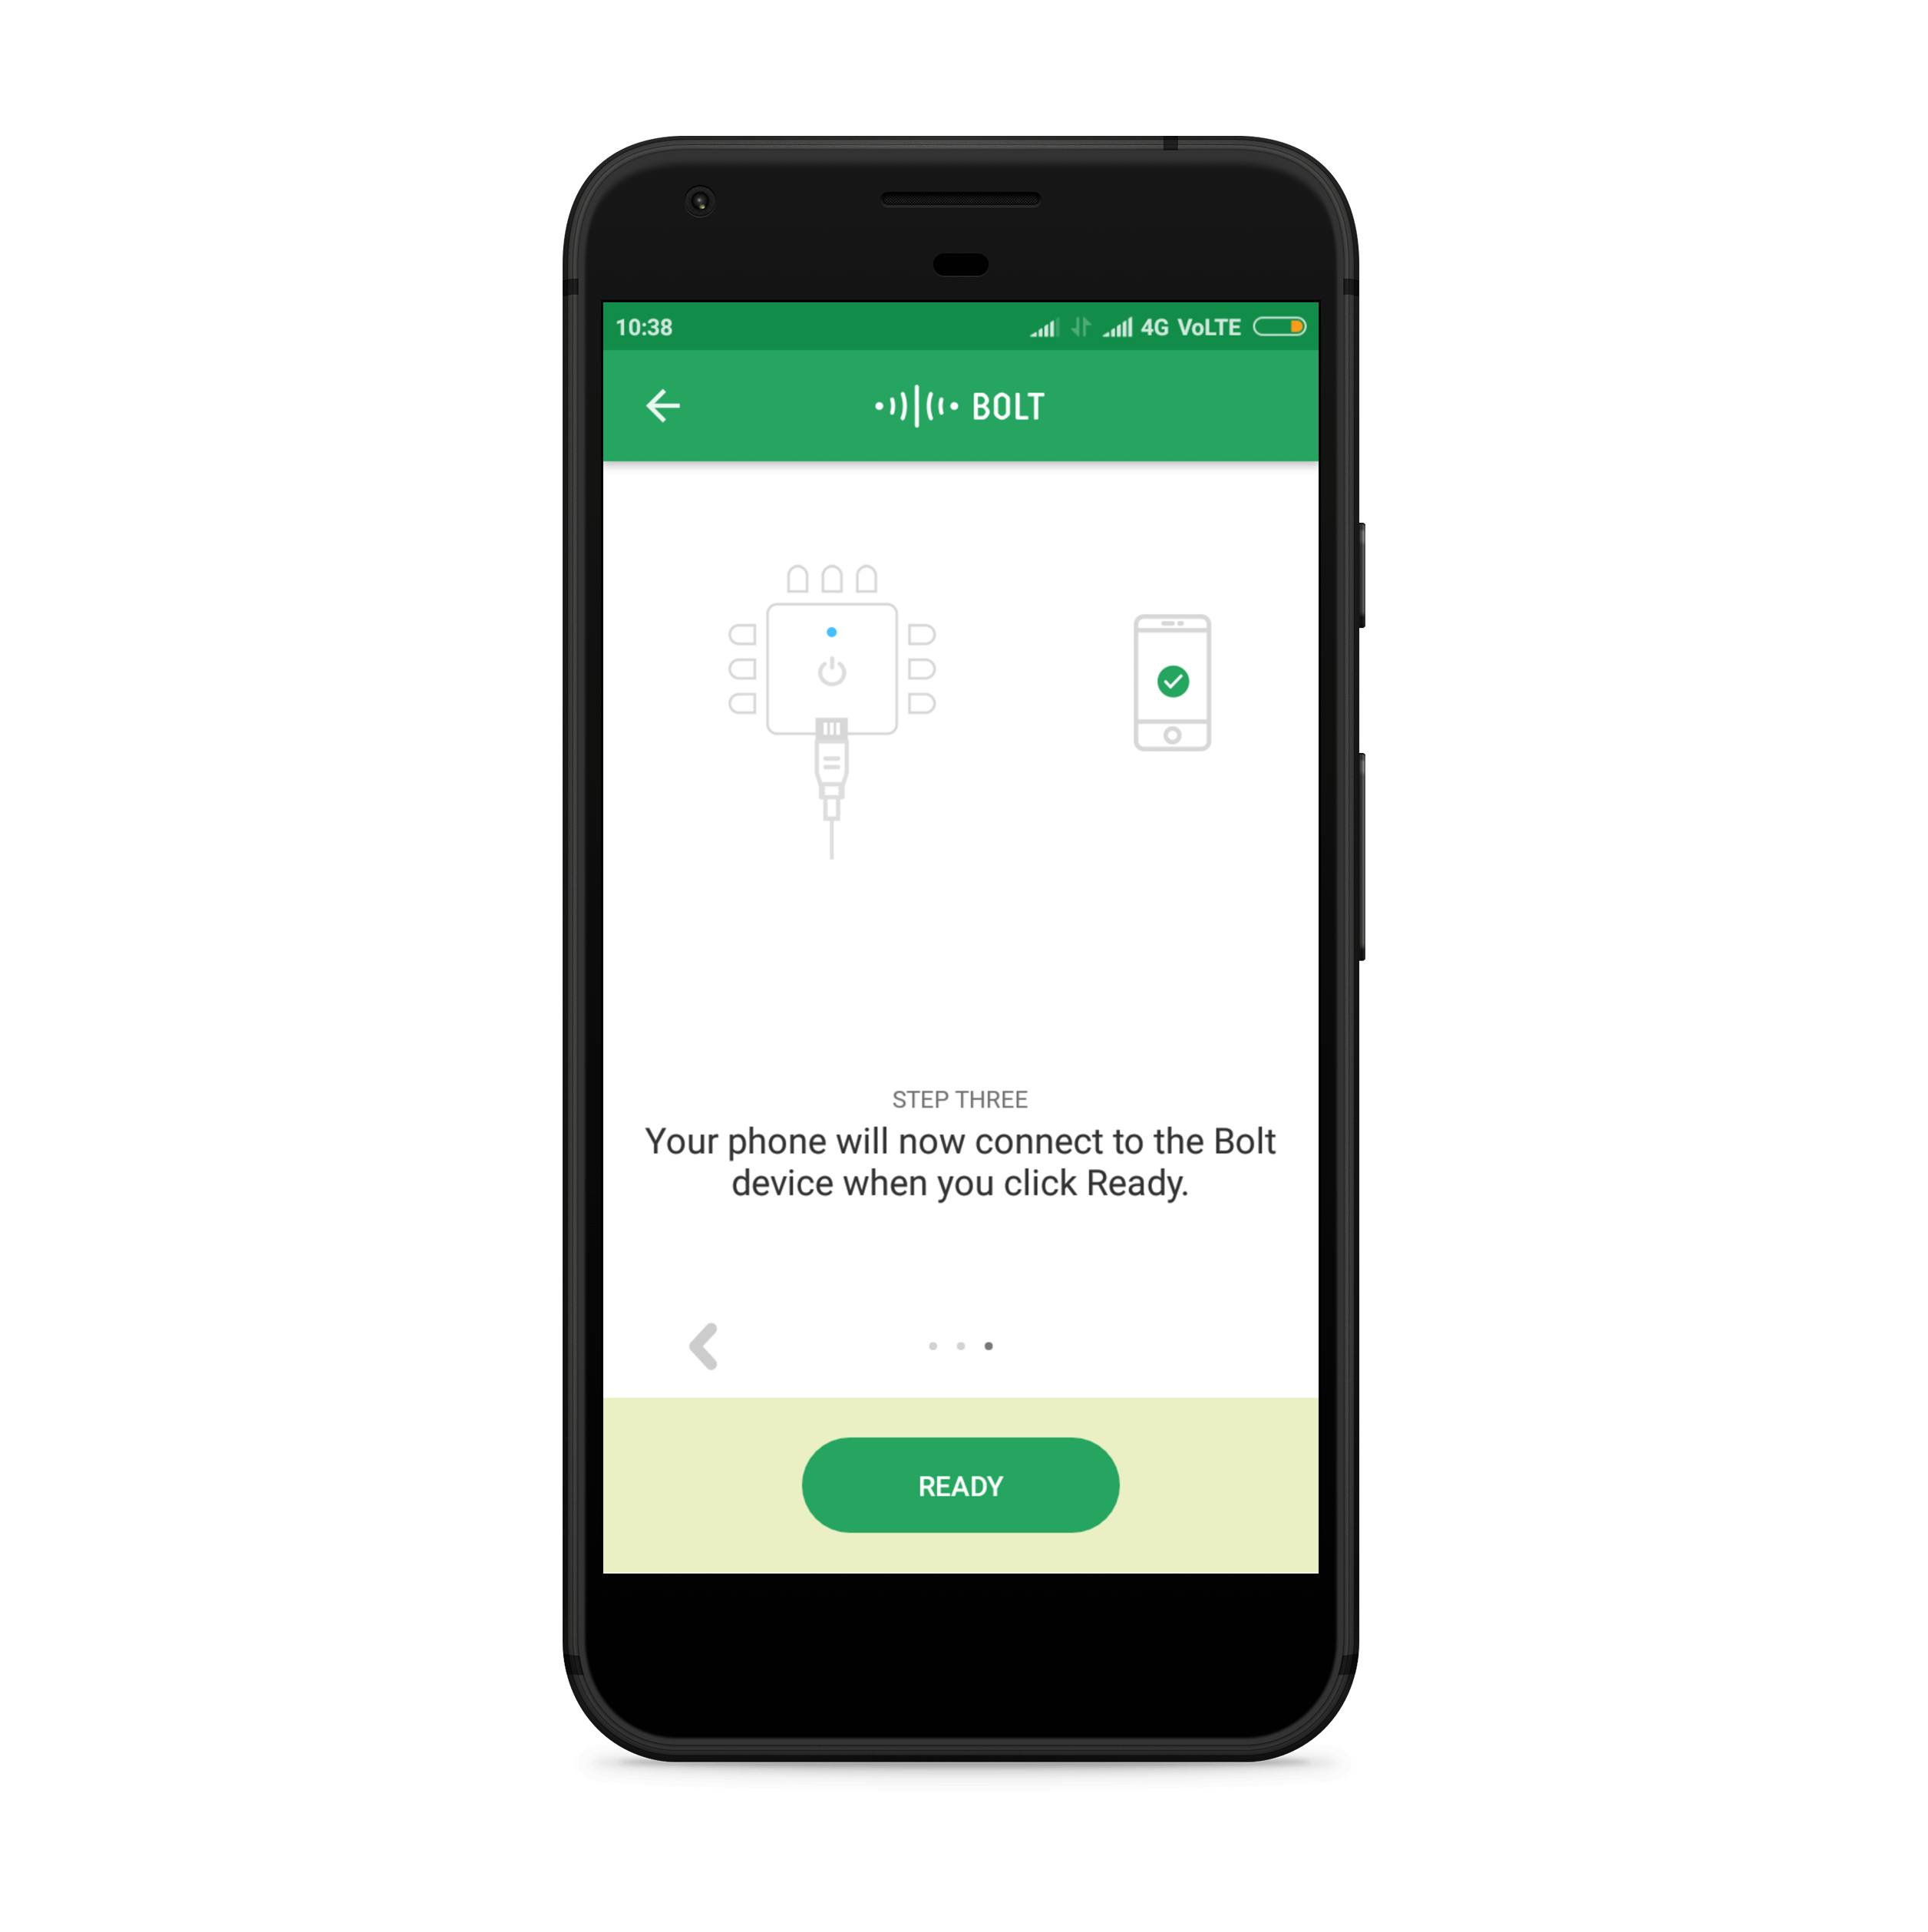
- Click on READY to proceed with the setup.
For Android Only: Switch on the location service
Before proceeding further, kindly switch OFF your mobile data and switch ON the location service in your mobile if not already and click on the "READY" button. This is required only in the Android App due to APIs by Google. We do not collect or store any of your location data.
For iOS and Android 9 and above: Manually connect to the Bolt hotspot
- While setting up with the Android mobile app, the mobile phone will automatically connect to the hotspot when you click next.
- However, on iOS, you will have to connect to the Hotspot by going to your Setting -> WIFi.
- The Hotspot will have a name which is like BOLTXXXXXX.
- The password for the WiFi hotspot transmitted by the Bolt WiFi Module is bolt1234.
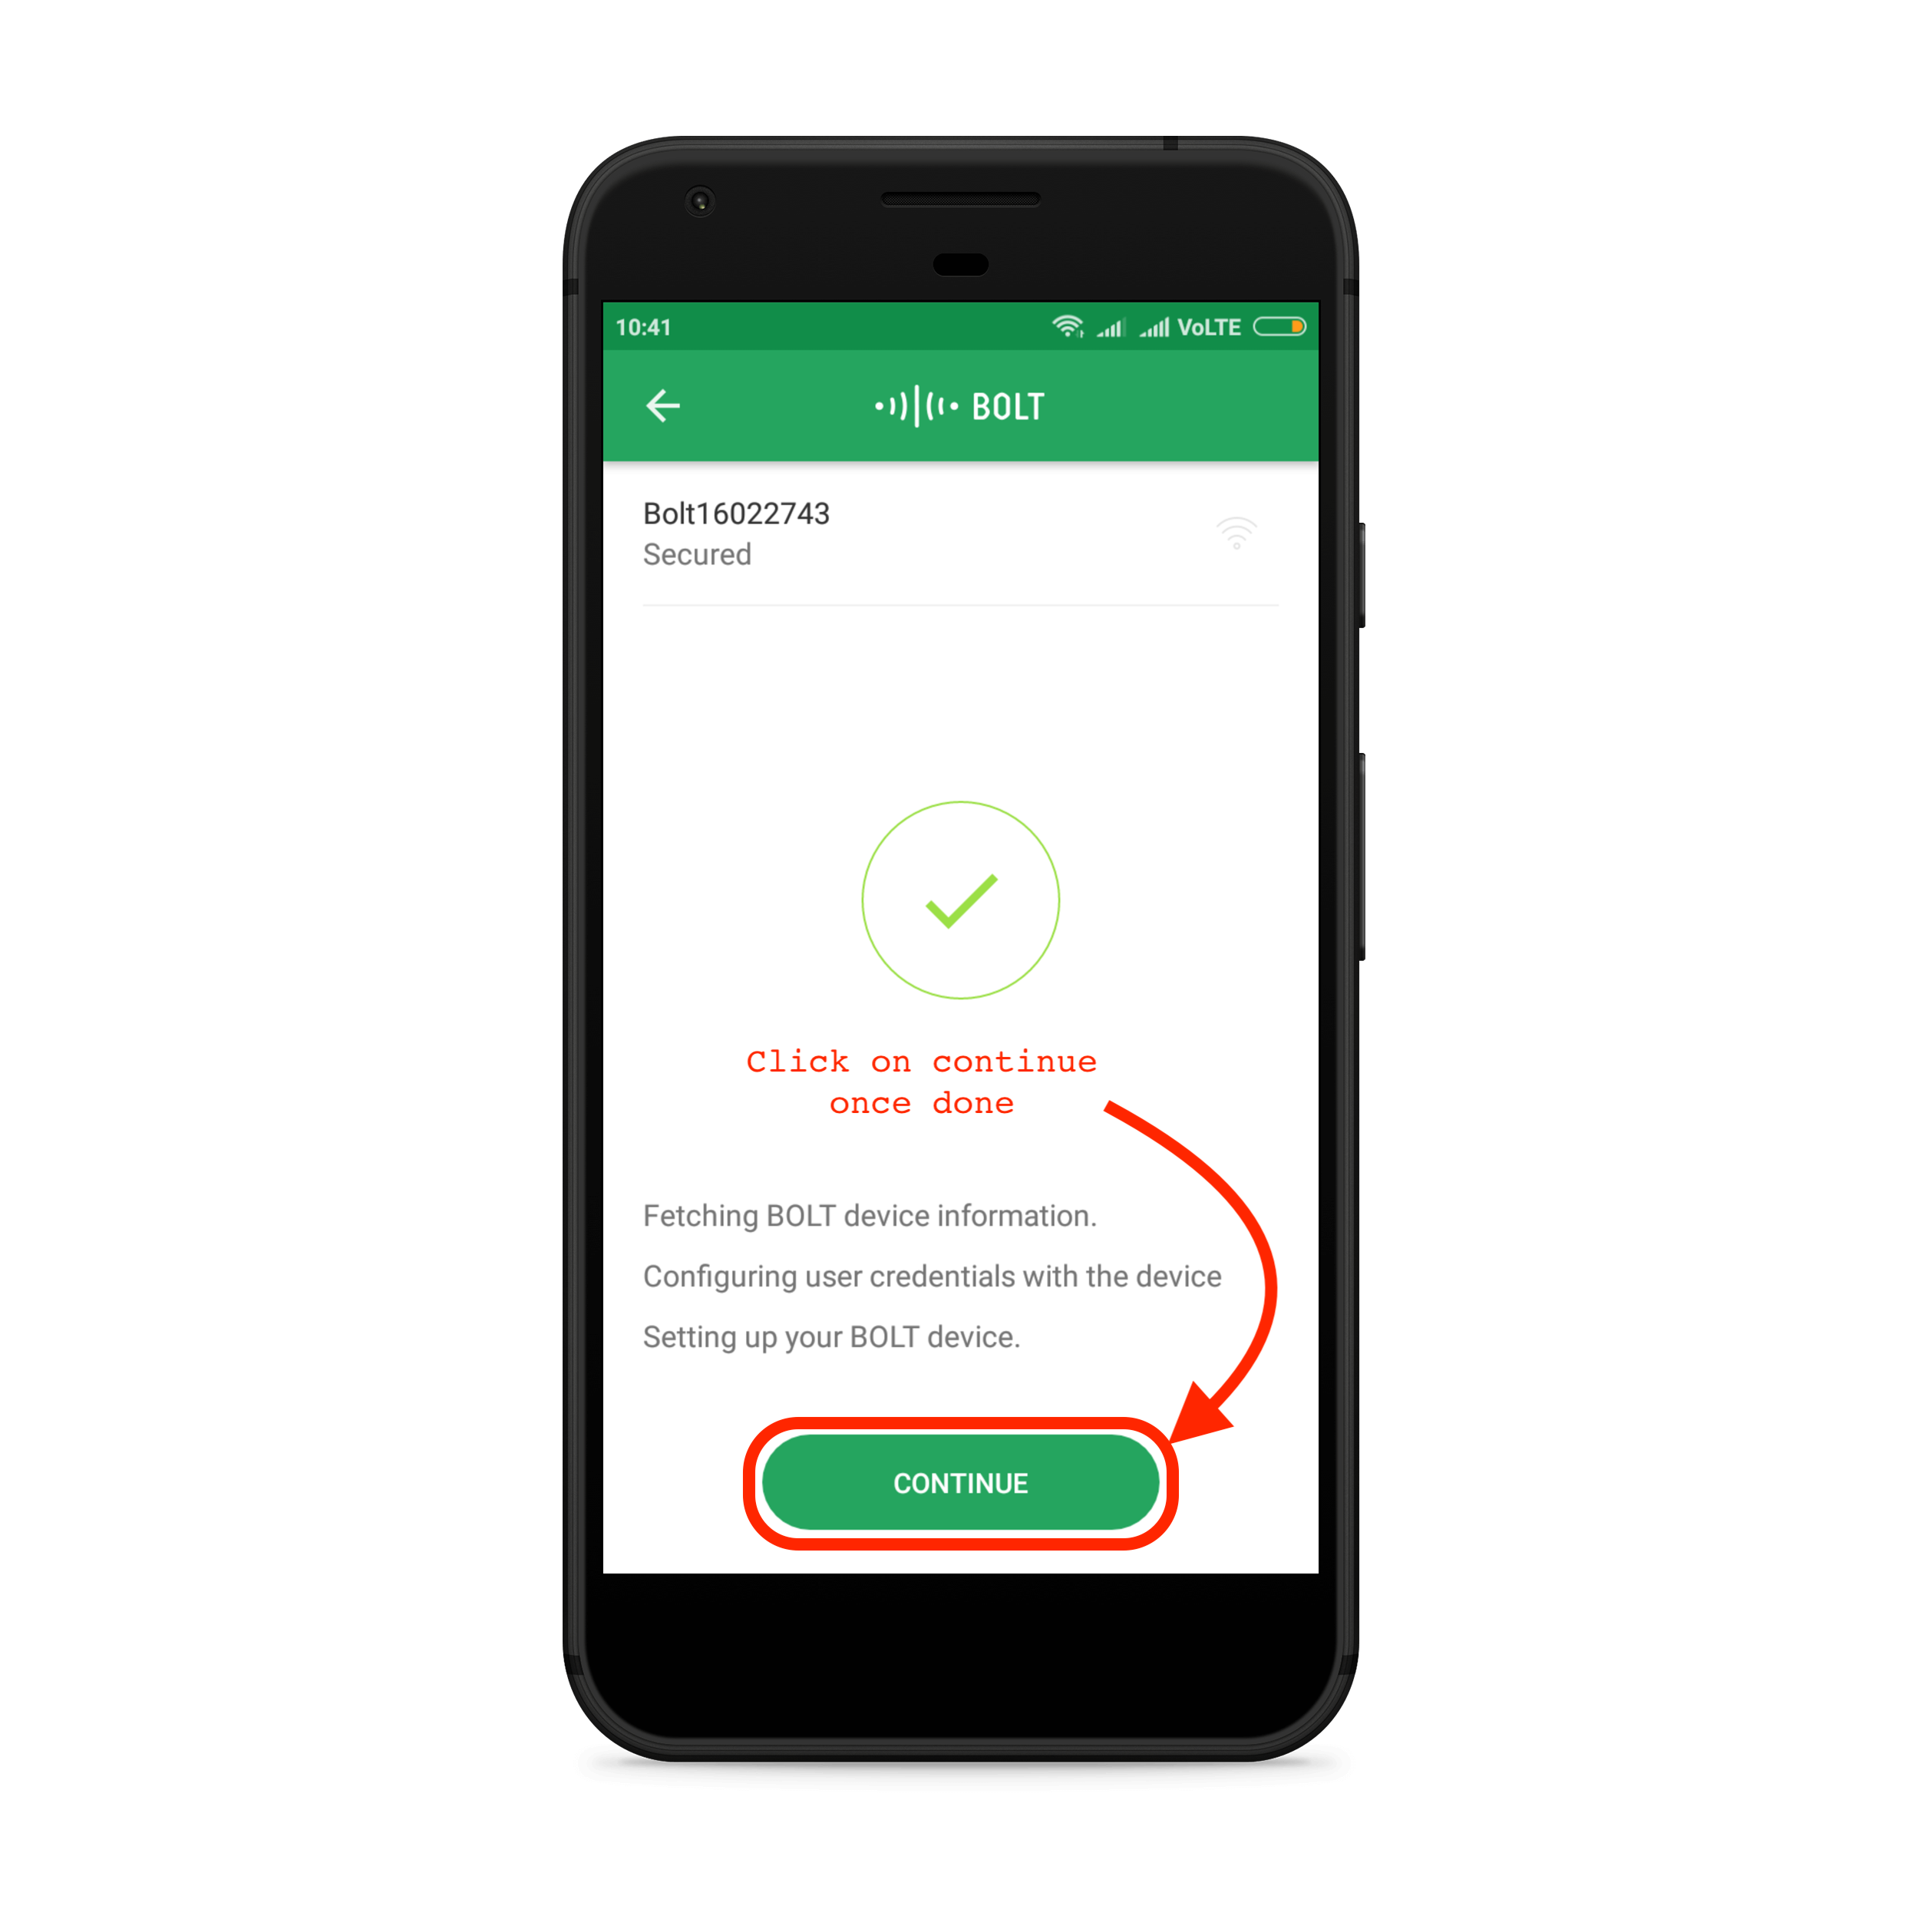
- If the App has detected the Bolt, it will show a screen similar to the one below. The blue LED on the Bolt will now blink fast. This means that it is under the setup process. To proceed, click on 'CONTINUE'.
Your WiFi will not have an Internet and that is fine
The WiFi which the Bolt module transmits does not have the internet on it.
So at this point, your phone may show a message saying:
Current WiFi does not have Internet. Switch Network.
At this point, be aware that we intentionally want to connect to Bolt's Hotspot, which does not transmit the internet, but it is required to communicate the Name and Password of the WiFi network we wish to connect to.
So, in this case, choose the option as Keep.
- Now, we will need to tell the Bolt which WiFi network it has to connect to.
NOTE: As informed earlier, the Bolt WiFi module cannot detect 5 GHz based WiFi networks and will not connect to them. Make sure you connect it to a 2.4 GHz network.
- Select the WiFi network to which Bolt has to be connected. You can click on the WiFi name to choose the WiFi network to connect to.
Note: For the iOS App, you will have to manually enter the SSID (the WiFi Name) of the device you want to connect to.
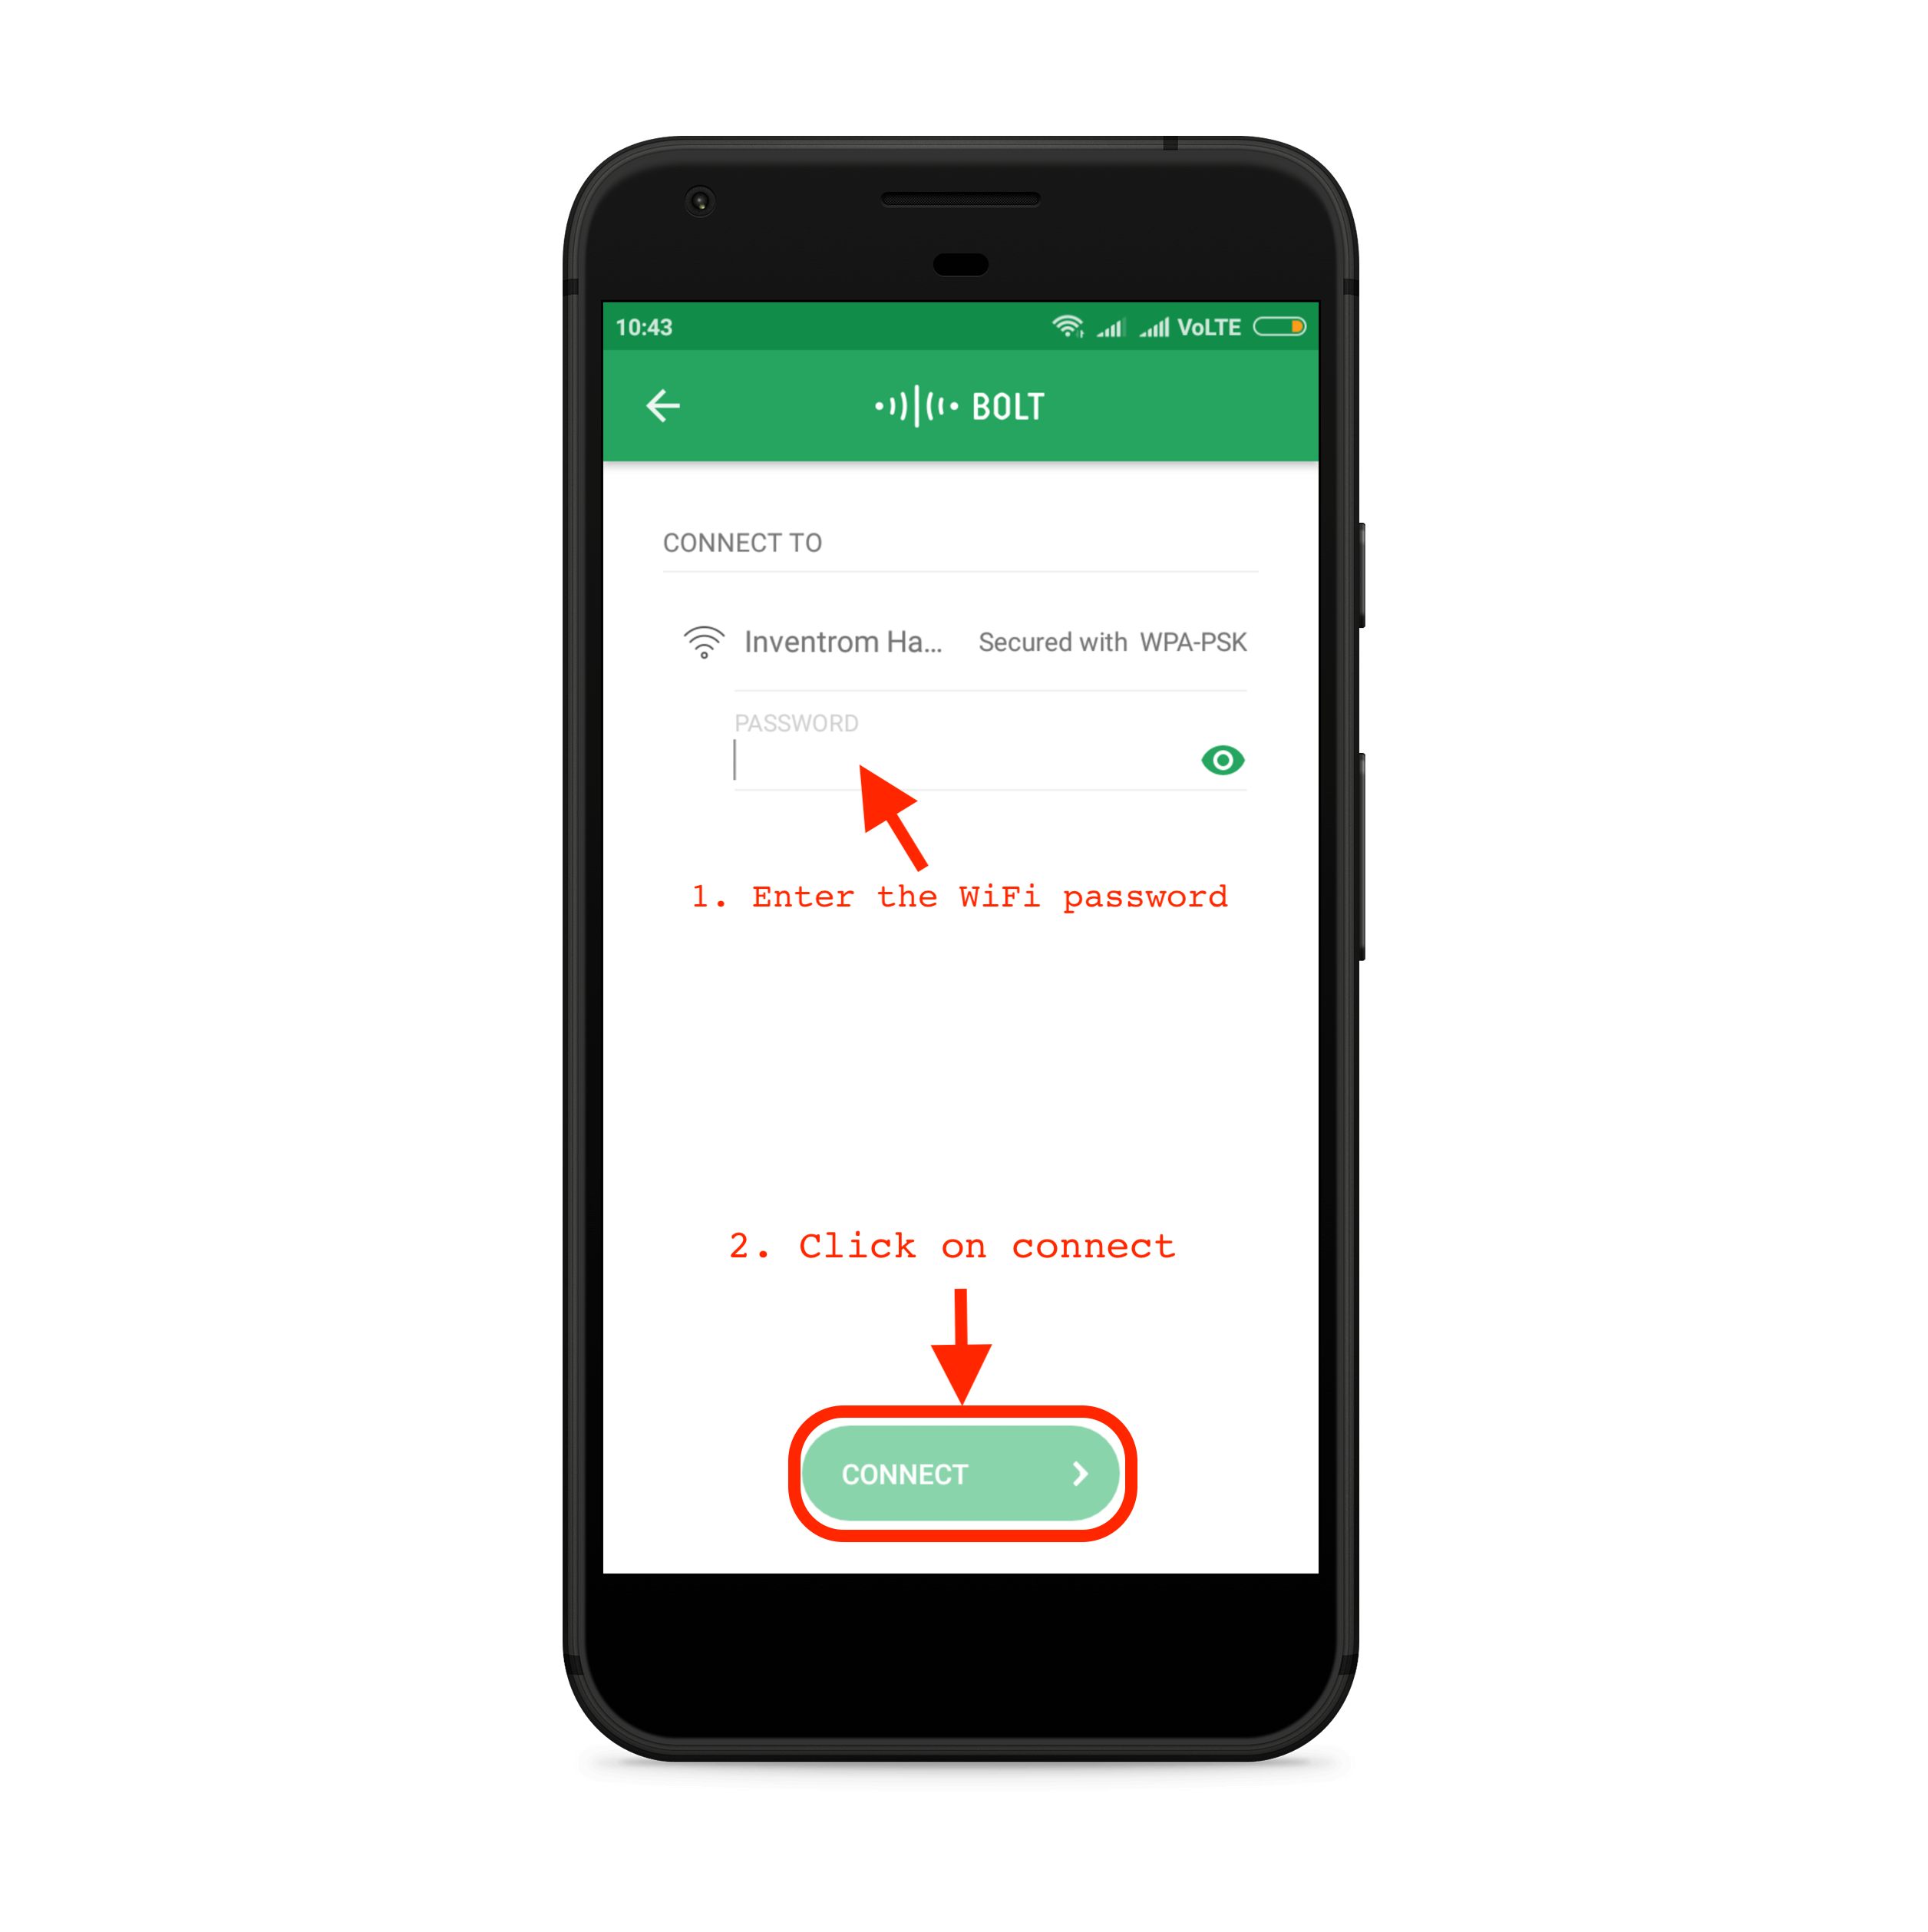
- Enter the password of the WiFi network you had chosen on the previous screen.
-
The App will now send the WiFi credentials to the Bolt WiFi Module. This is possible since your smartphone is connected to the Bolt WiFi module via the Bolt Hotspot.
-
Woohoo! We have not transferred the WiFi router details to the Bolt Hardware Module.
-
Our job with the Bolt HotSpot is now complete.
-
In fact, the Bolt will now stop transferring the HotSpot and instead restart to connect to the WiFi.
-
Since Bolt is now connected to the Internet, we shall connect our phone as well to the Internet.
-
Once the phone is connected to the Internet, the App will send information about this WiFi module to the Bolt Cloud, and the device will start showing in your cloud account.
-
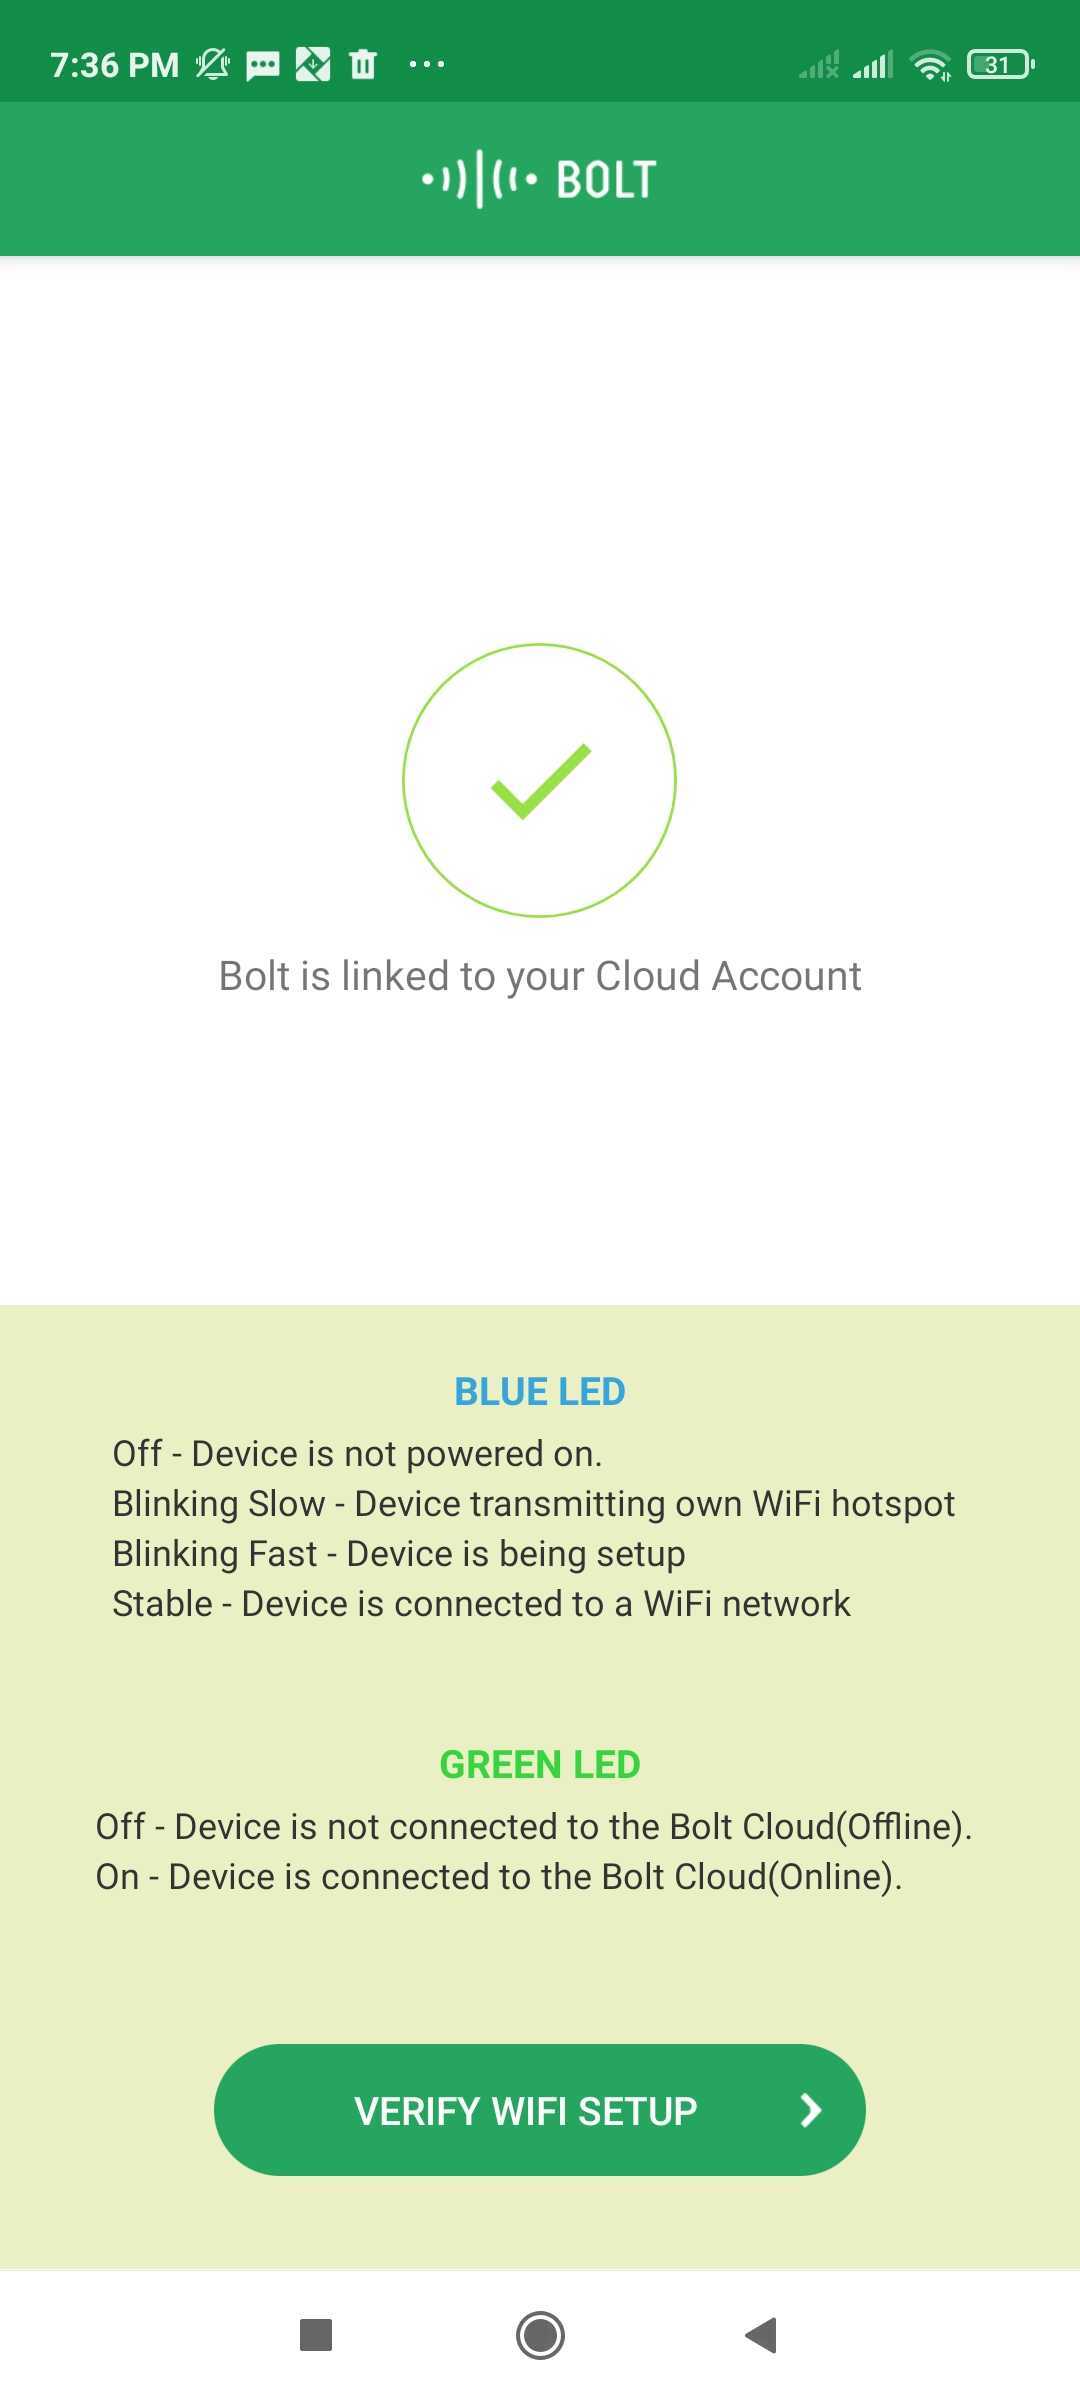
The next step is to verify the WiFi setup.
-
Here, we check if Bolt has actually connected to the Internet.
-
While you did send the WiFi network name and password to the Bolt WiFi Module, sometimes a few users enter the wrong password, so the Bolt cannot connect to the WiFi router and the internet.
-
Keeping this in mind, at this step, we verify if the Bolt is getting internet connectivity or not.
-
There are two ways to do it:
- Check if the Blue and the GREE LEDs on Bolt are both stable. If yes, then your device is connected
to the Internet successfully. - OR Click on the 'Varify the Setup' button, and the app will do it for you.
- Check if the Blue and the GREE LEDs on Bolt are both stable. If yes, then your device is connected
-
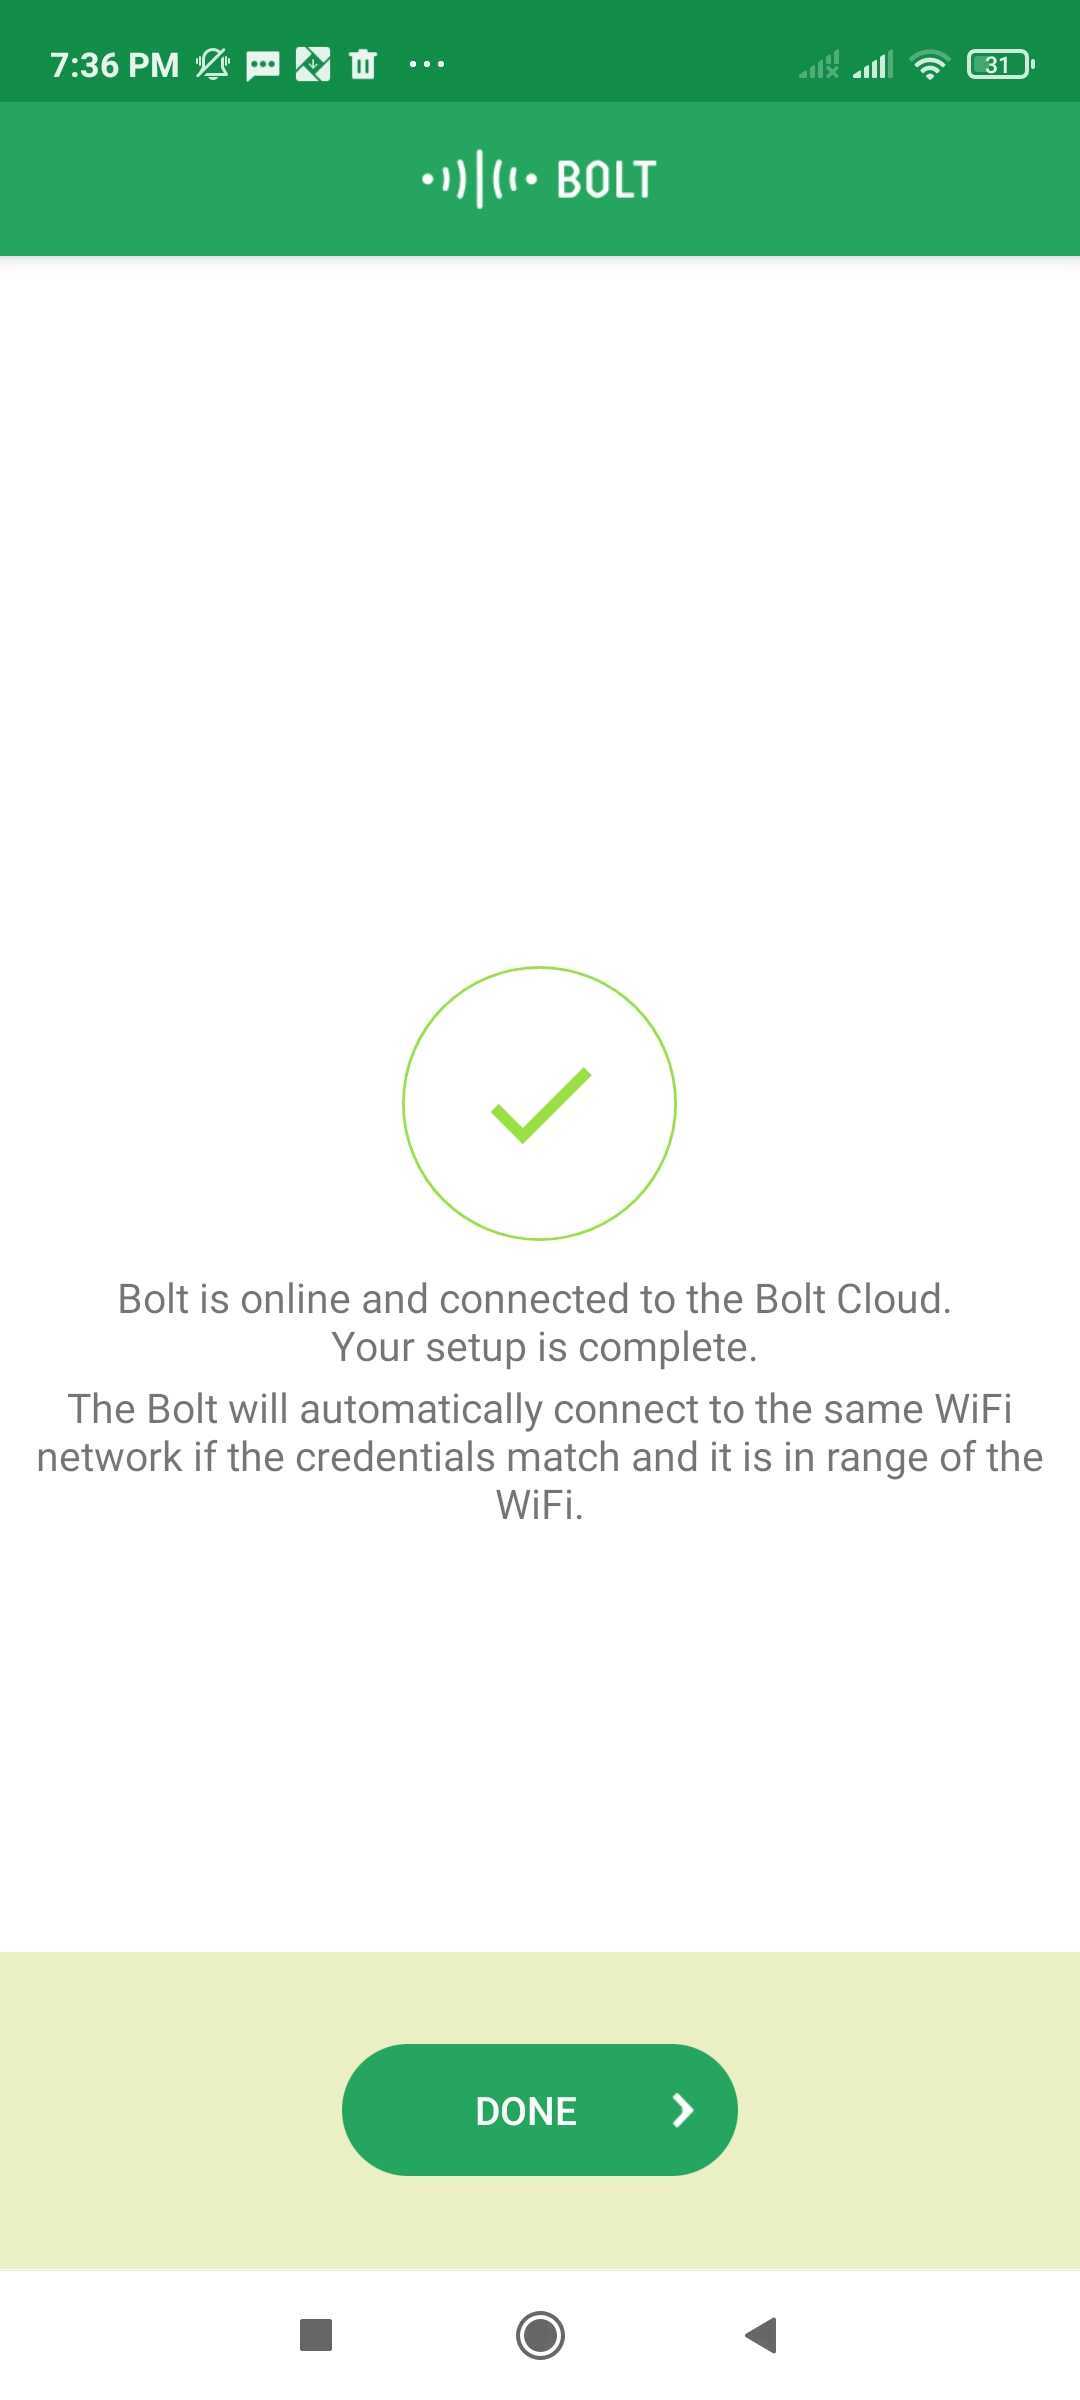
That's it. We have now set up the Bolt WiFi Module and added it to our cloud account. 🎉
-
Now, click on 'DONE.'
-
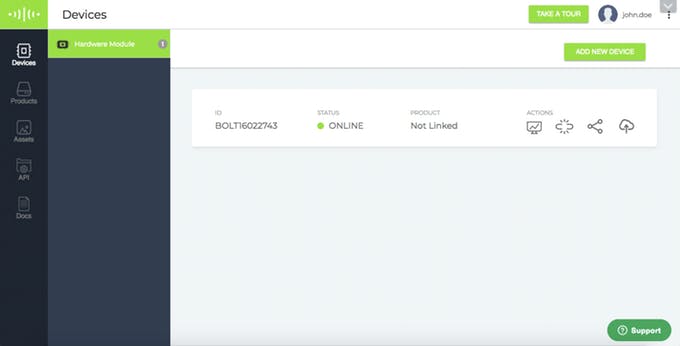
If the Bolt could connect to the WiFi network and is connected to the cloud, a green dot will appear beside the Bolt's device ID, as shown below.
Debugging:
- If the Bolt cannot connect to the WiFi network, the green LED will be OFF, and the Blue LED will be blinking slowly. This generally happens if you have entered the wrong WiFi credentials (SSID or password) while setting up. Please try the setup process once again with the correct WiFi credentials.
- Check if your WiFi Router works at 2.4GHz. Bolt does not support 5GHz at the moment.
Step 4: Accessing the Bolt Cloud to Build IoT Projects
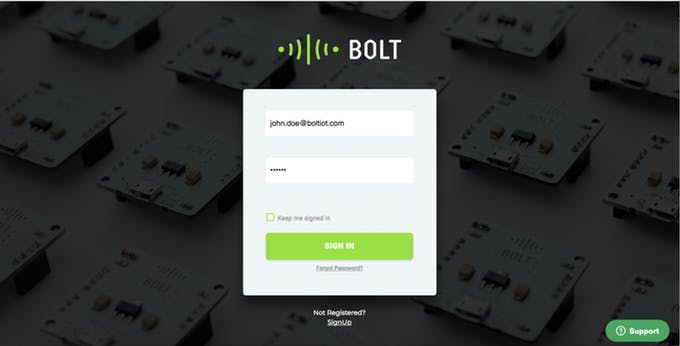
Visit https://cloud.boltiot.com and login into your registered account using the same email ID and password that you have used on the Bolt IoT mobile App.
You will see your Bolt device with status as 'ONLINE' on your account on the dashboard.
Woohoo! You have set up the Bolt and link it to your account. 🎉
What should you do next?
Now that you have set up your Bolt WiFi Module you are all set to build your first project. I recommend you to get started with any of the three projects given below:
How to choose?
- Go for Temperature Monitoring if you have the LM35 sensor with you.
- Go for Light monitoring if you have an LDR (Light Dependent Resistor) with you.
- Go for controlling an output device if you have an LED with you.
P.S.: If you are one of the purists who like to get started by blinking an LED then choose the option of Glowing an LED.
All the links are given below:
Updated over 3 years ago
