LED Control(On/Off)
Creating LED ON button
Let's create a button to turn on the LED.
- Go to the "Design" section.
- Click on "Button"
- Create button inside the rectangle which we had already created to control PIN 0
- Name the button as "LED ON"
- Select "Style" as "Success Button" which will change button colour to Green.
- Click "Start/Edit workflow" to go to the Workflow section.
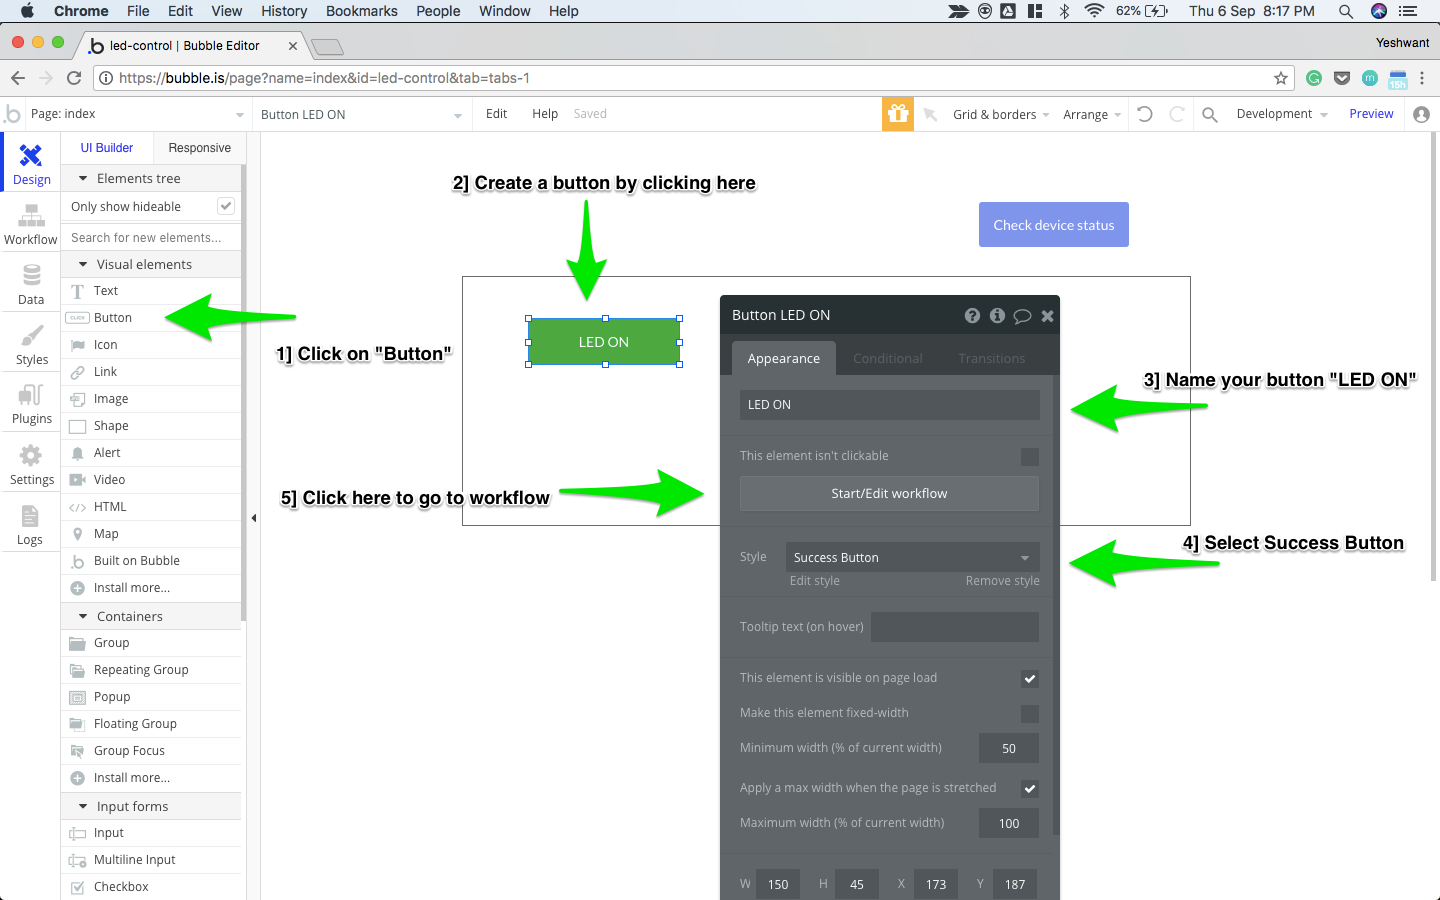
Creating LED ON button
Setting an action for LED ON button
We shall now add an action to this button in the Workflow section.
- Go to "Click here to add an action"
- Go to "Plugins"
- Select "digitalWrite"
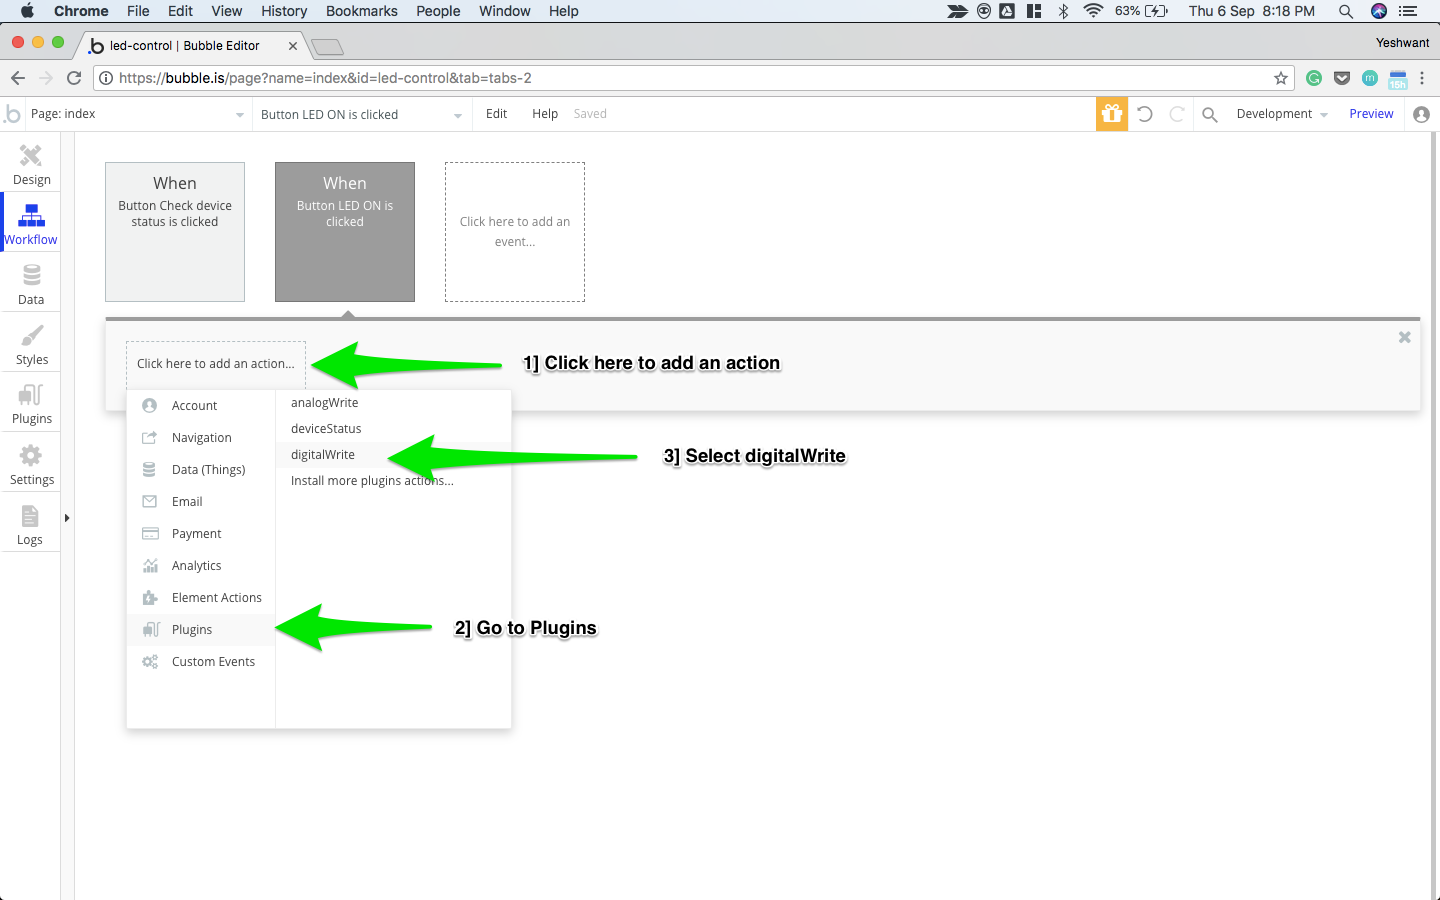
Adding action for LED ON
Set the STATUS as HIGH and PIN as 0. This will configure the action of this button to switch on the LED connected to PIN 0.
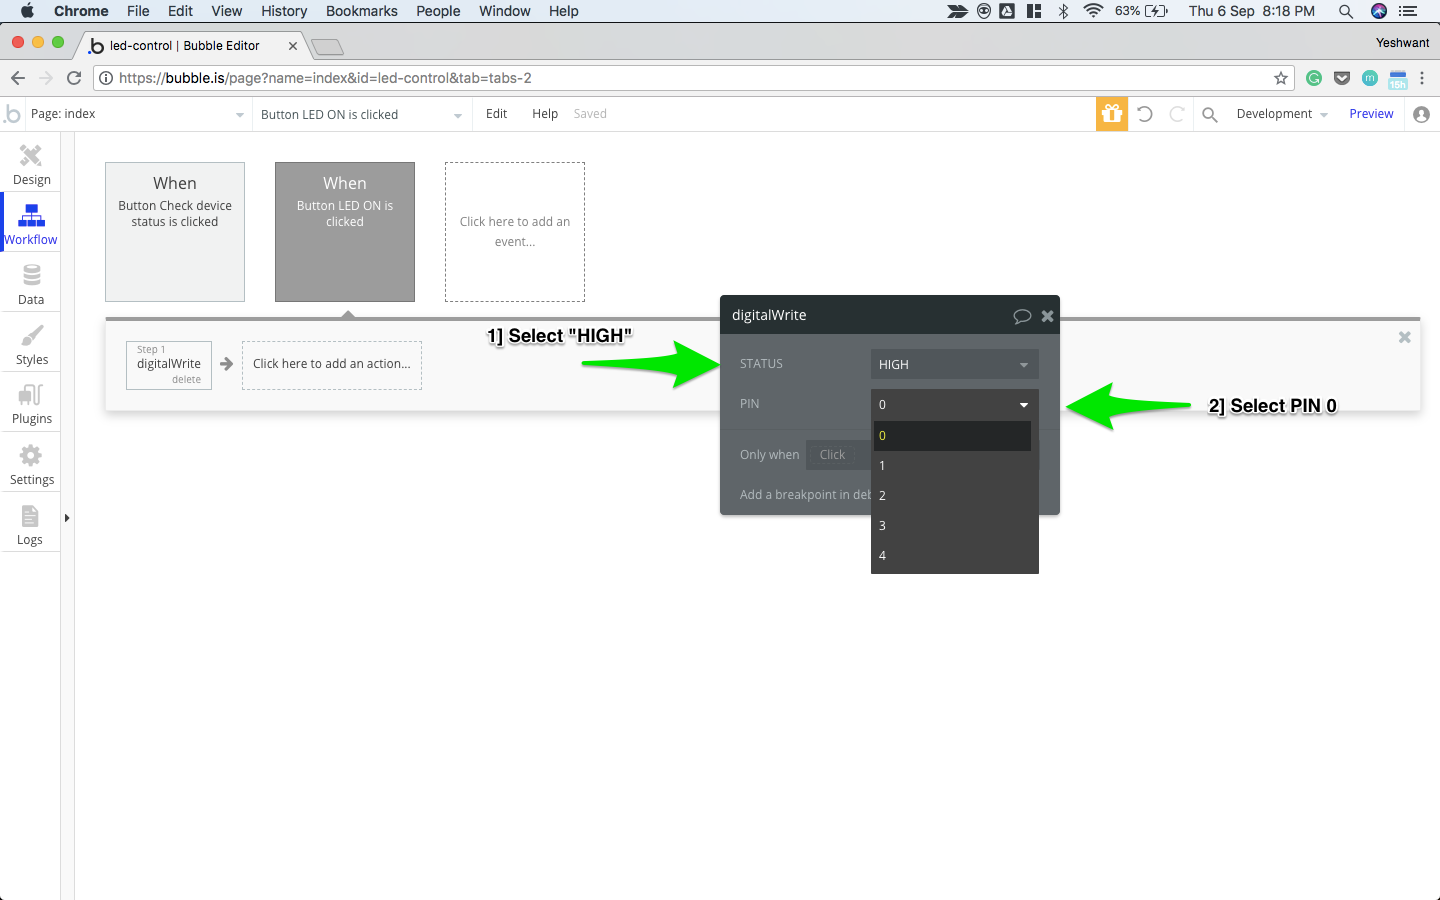
Setting STATUS and PIN
Creating LED OFF button
Let's follow the same steps as above and create a button to turn off the LED.
- Go to the Design section
- Click on "Button"
- Create the button inside the rectangle to the right side of the LED ON button.
- Name the button as "LED OFF"
- Select "Style" as "Danger Button" which will change button colour to Red.
- Click "Start/Edit workflow" to go to the Workflow section.
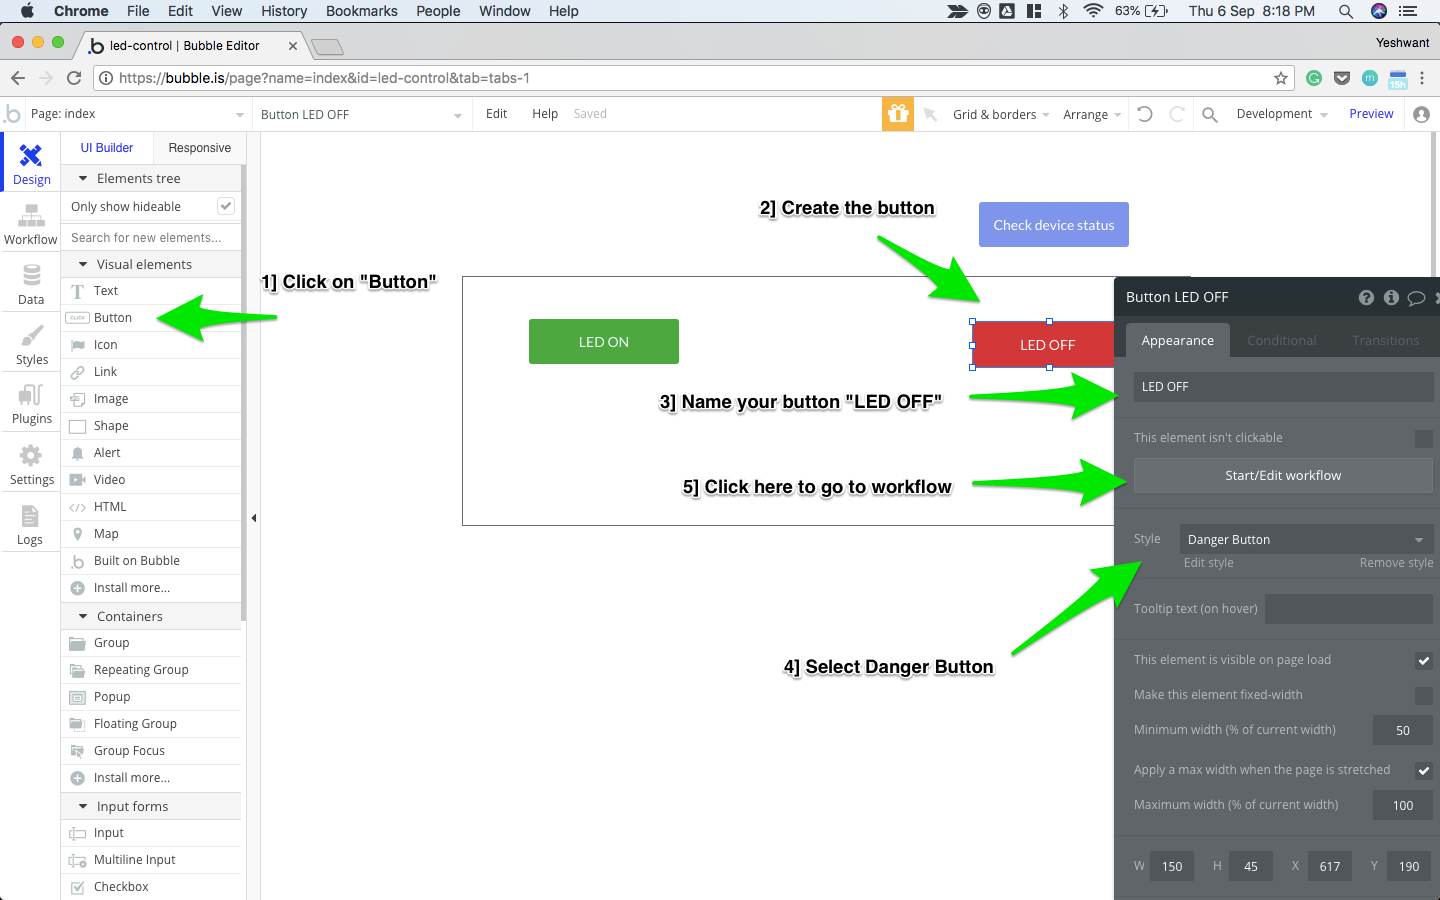
Creating LED OFF button
Setting an action for LED OFF button
Let's add an action to this button in the Workflow section.
- Go to "Click here to add an action"
- Go to "Plugins"
- Select "digitalWrite"
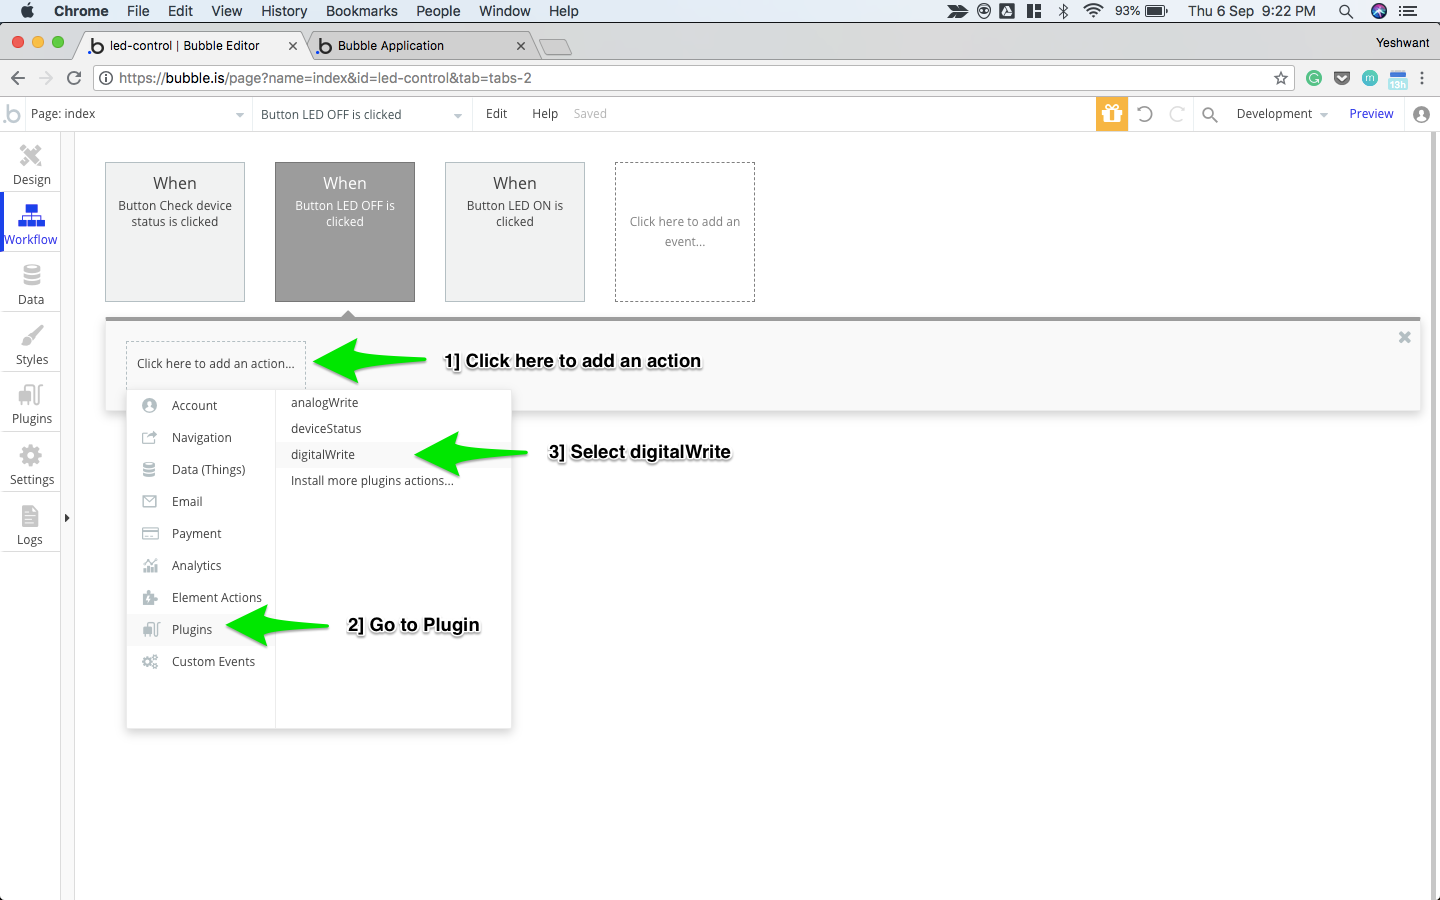
Adding action for LED OFF
Set the STATUS as LOW and PIN as 0. This will configure the action of this button to switch off the LED connected to PIN 0.
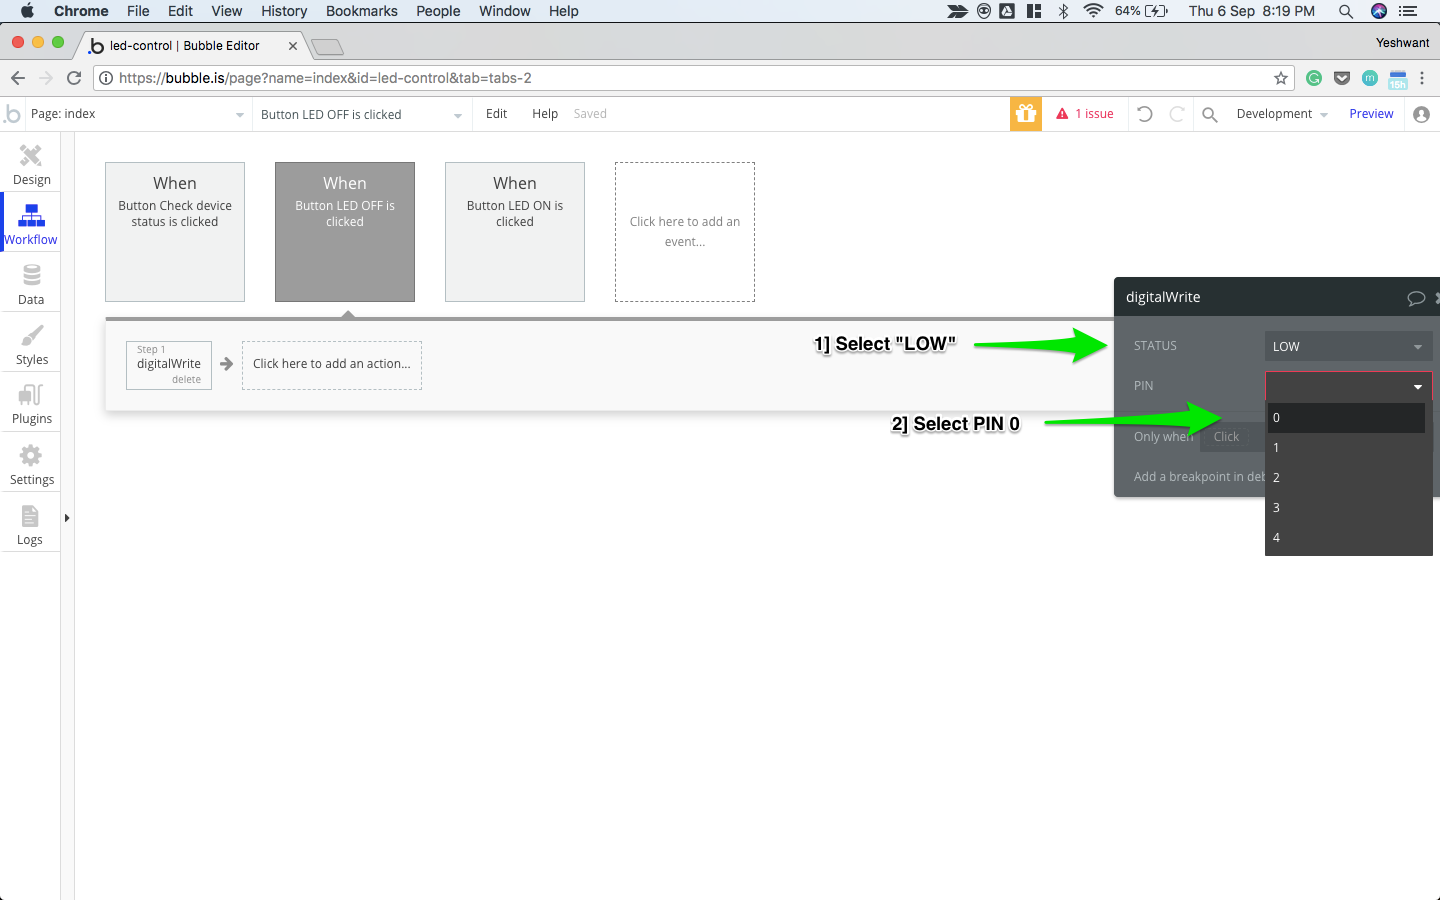
Setting STATUS and PIN
Let's test the buttons by going to the Design section and clicking on "Preview".
You should be able to tun the LED ON/OFF by clicking respective buttons.
If the device is offline, below error message is shown.

Product preview after adding ON and OFF buttons
Here is the step by step video for this section.
In the next section, we shall learn how to control the intensity of the LED or any o/p device connected to the configured PIN.
Updated over 6 years ago
